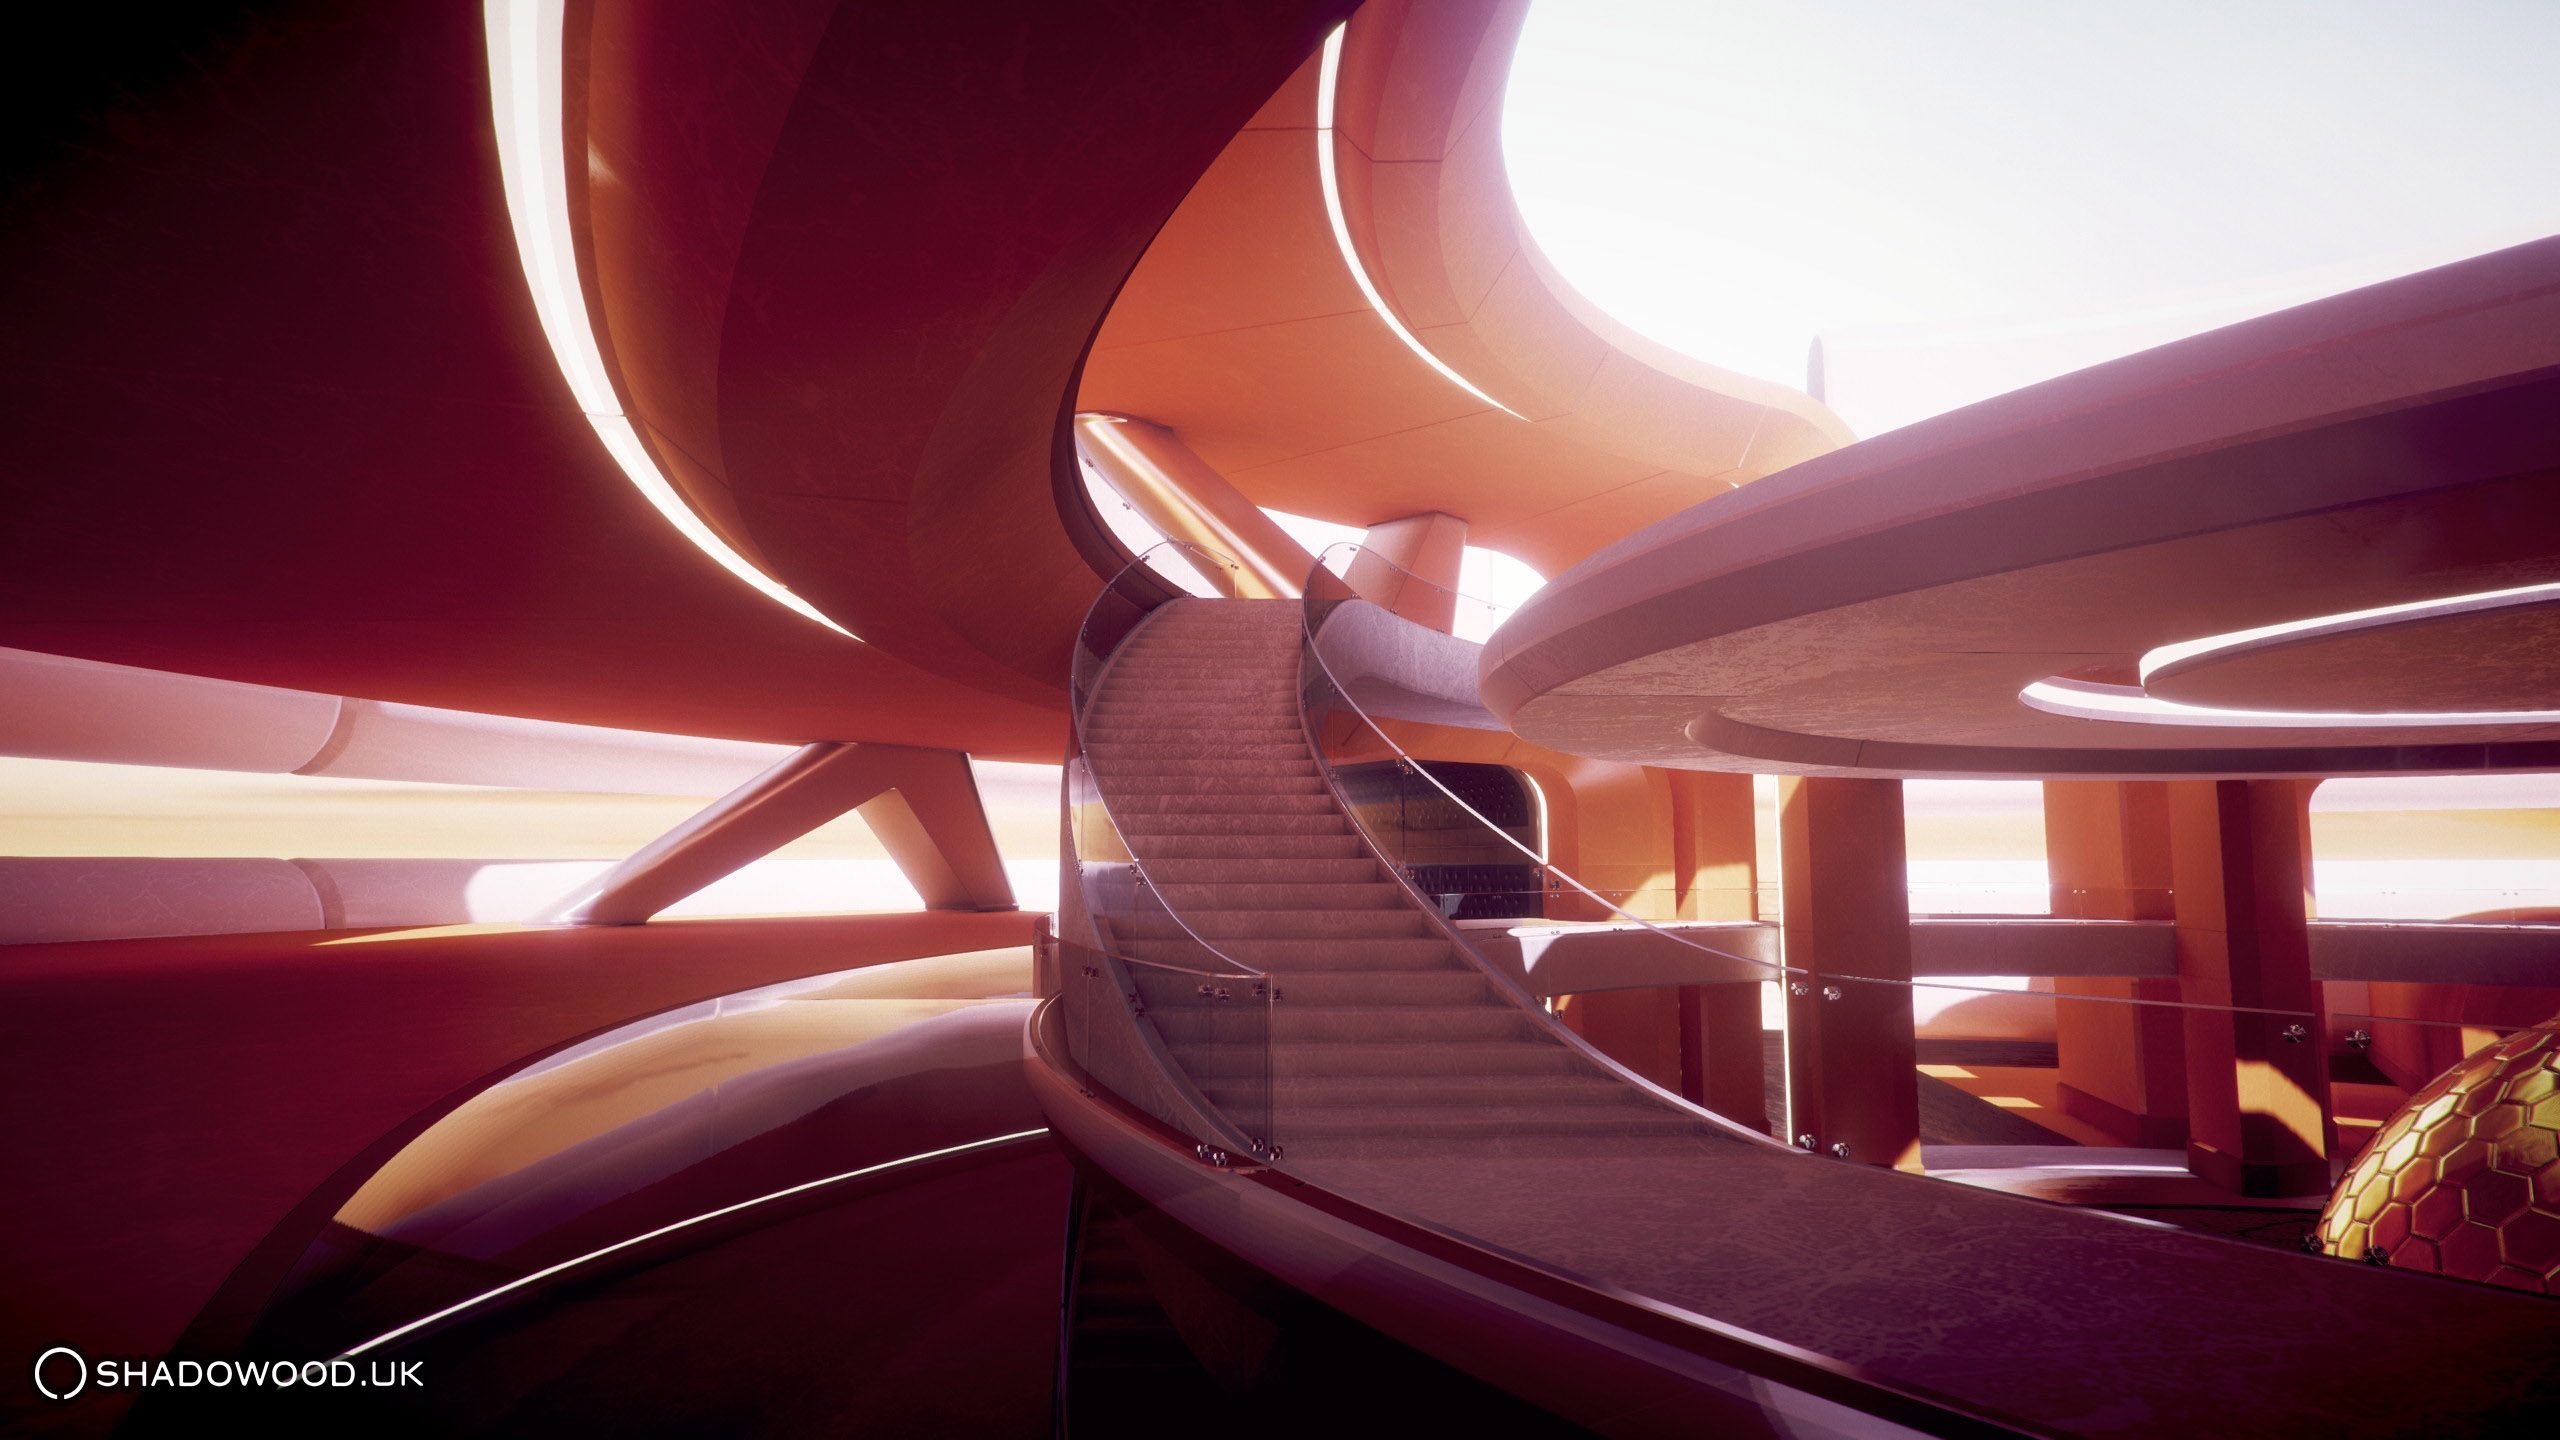
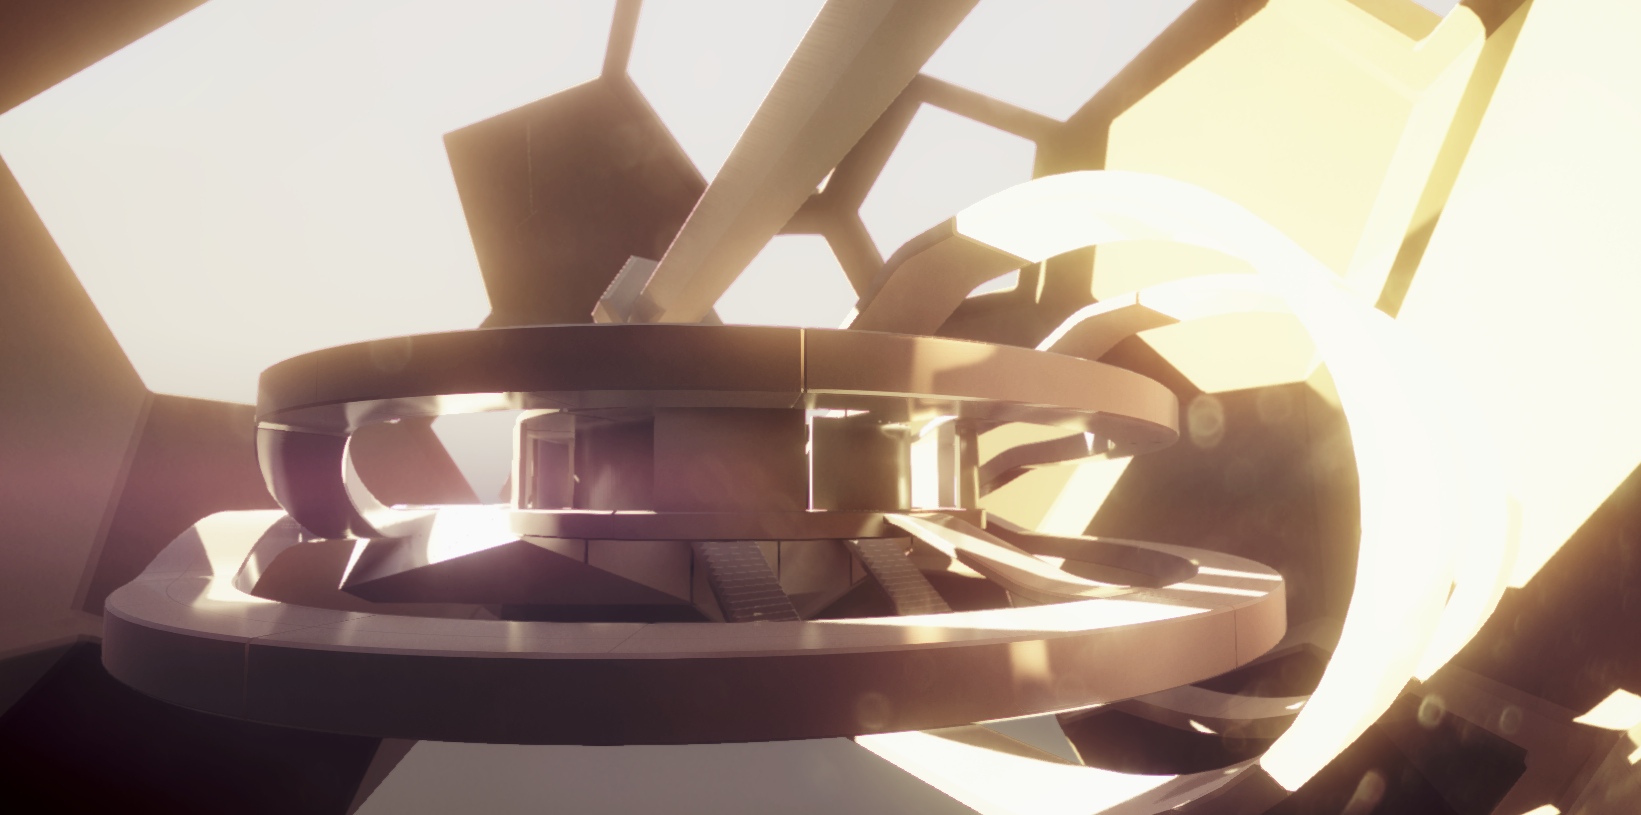
The Divine Unity Shrine - Ignore the Date, this was made public 25th Feb 2015
My work for Unity Technologies ( Unity 3D ) after much exploding of the beta and smashing of my face on keyboard, this is where my life went for.. a while
Video here, select gear in bottom right and select 1440p for super awesome 2k not blurry quality:
Link: www.youtube.com
My forum post at Unity here:
Link: forum.unity3d.com --- unity-realtime-reflections-and-gi-and-realism-exploration.266258
My Gallery of work here now moved to ArtStation:
Link: www.artstation.com --- heliosdoublesix
Unity has blog posted a bit about it here:
Link: blogs.unity3d.com --- gorgeous-arch-viz-in-unity-5
My previous blog post on using first using Enligthen in Unity 5 is below, scroll down.. keep scrolling, no one has ever made it to the bottom
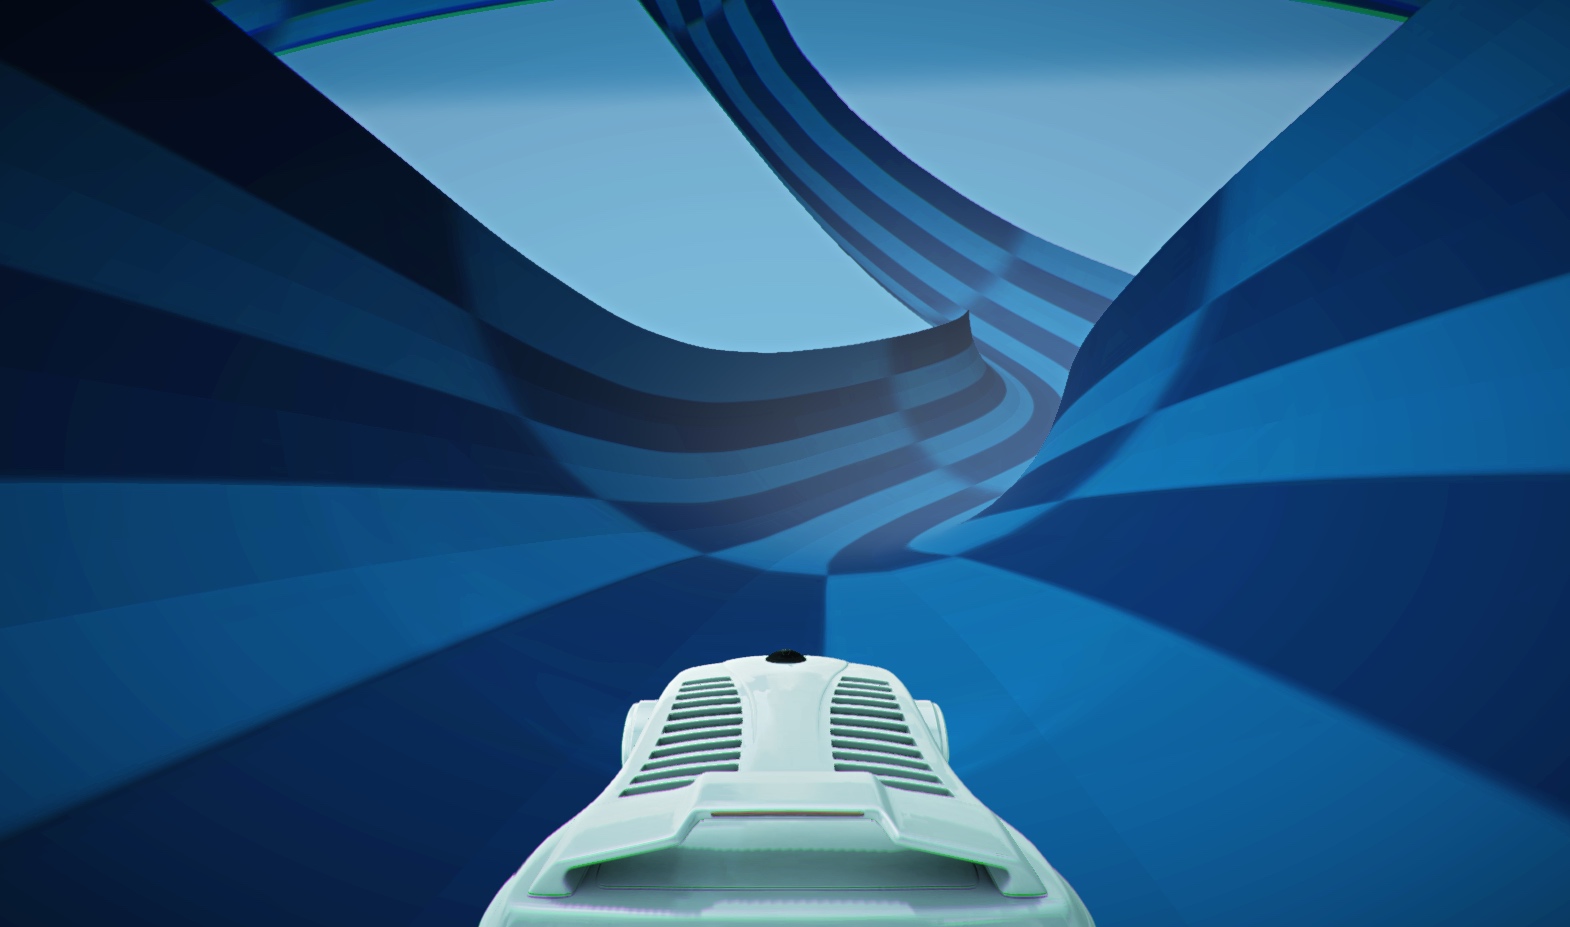
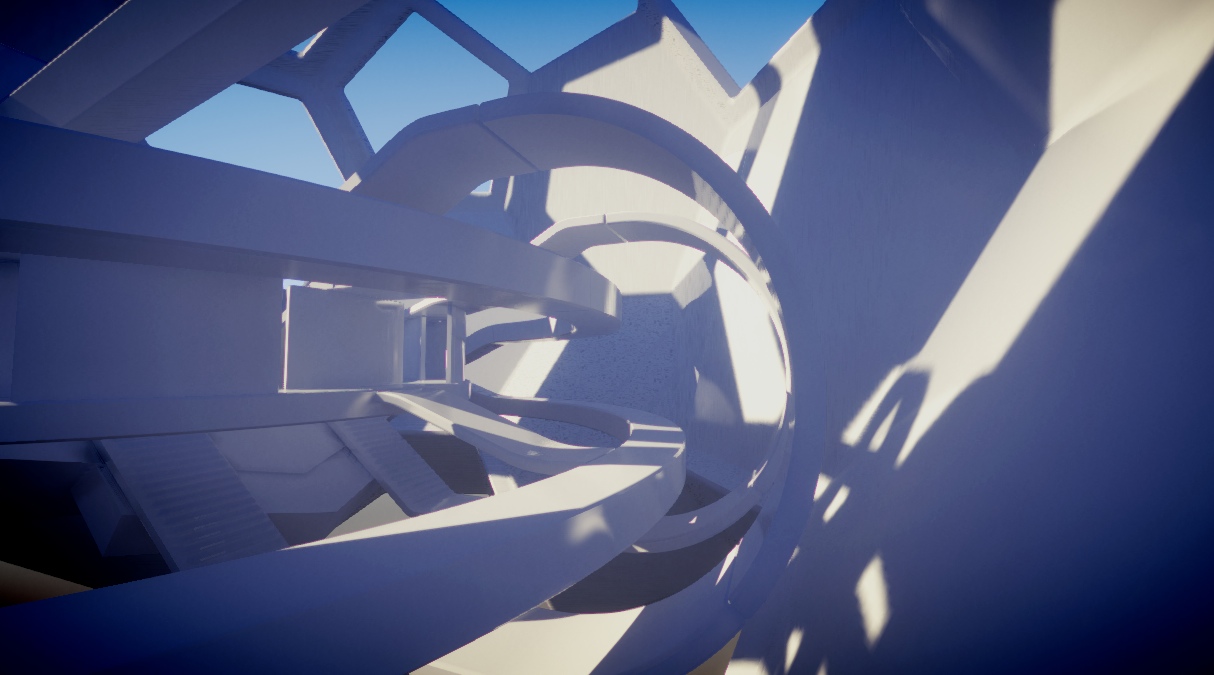
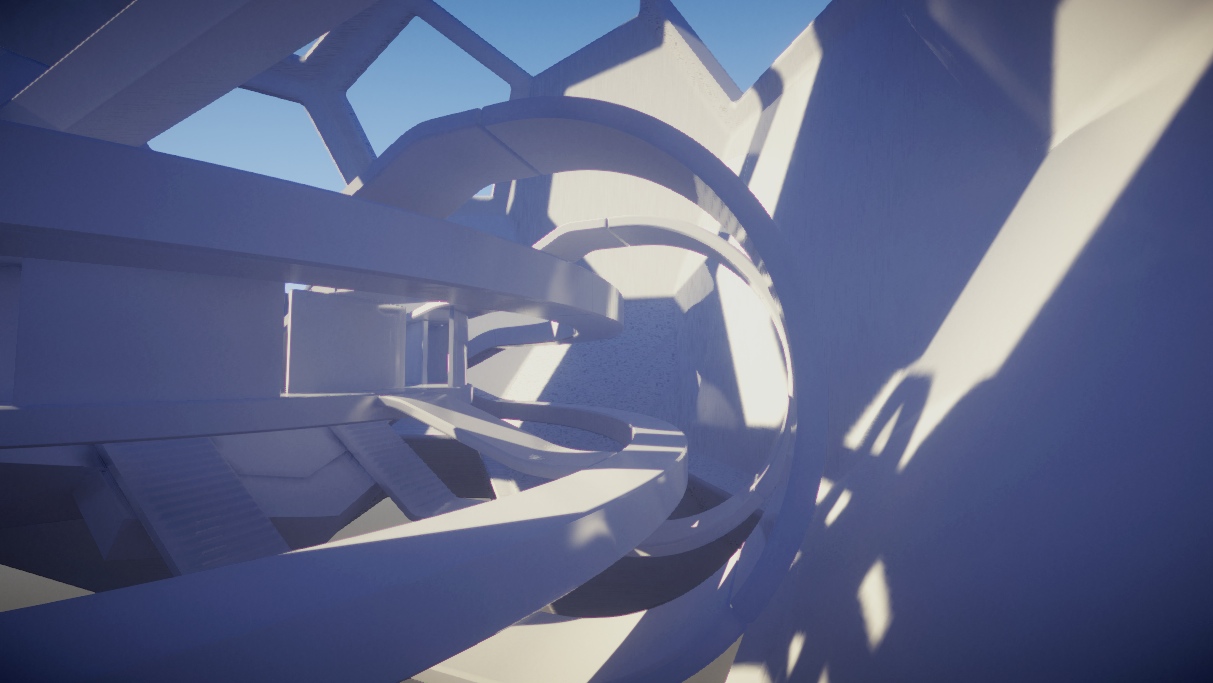
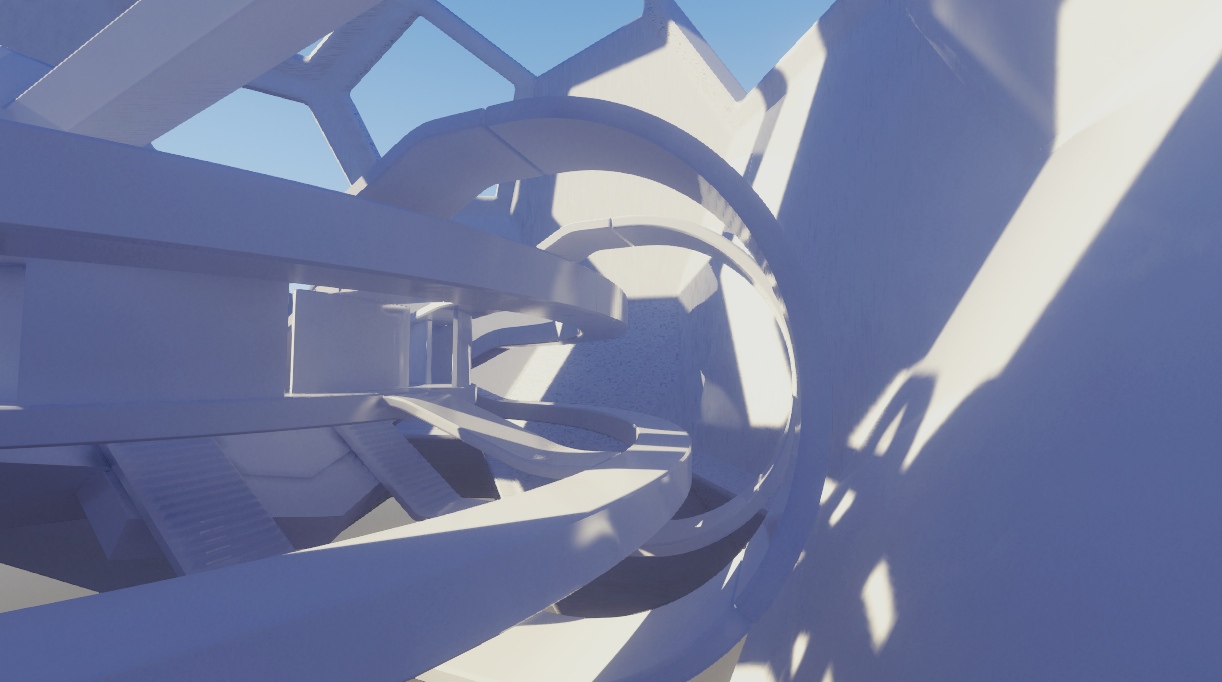
Entire Concept, Modelling, Animation all by myself *pats self on back*
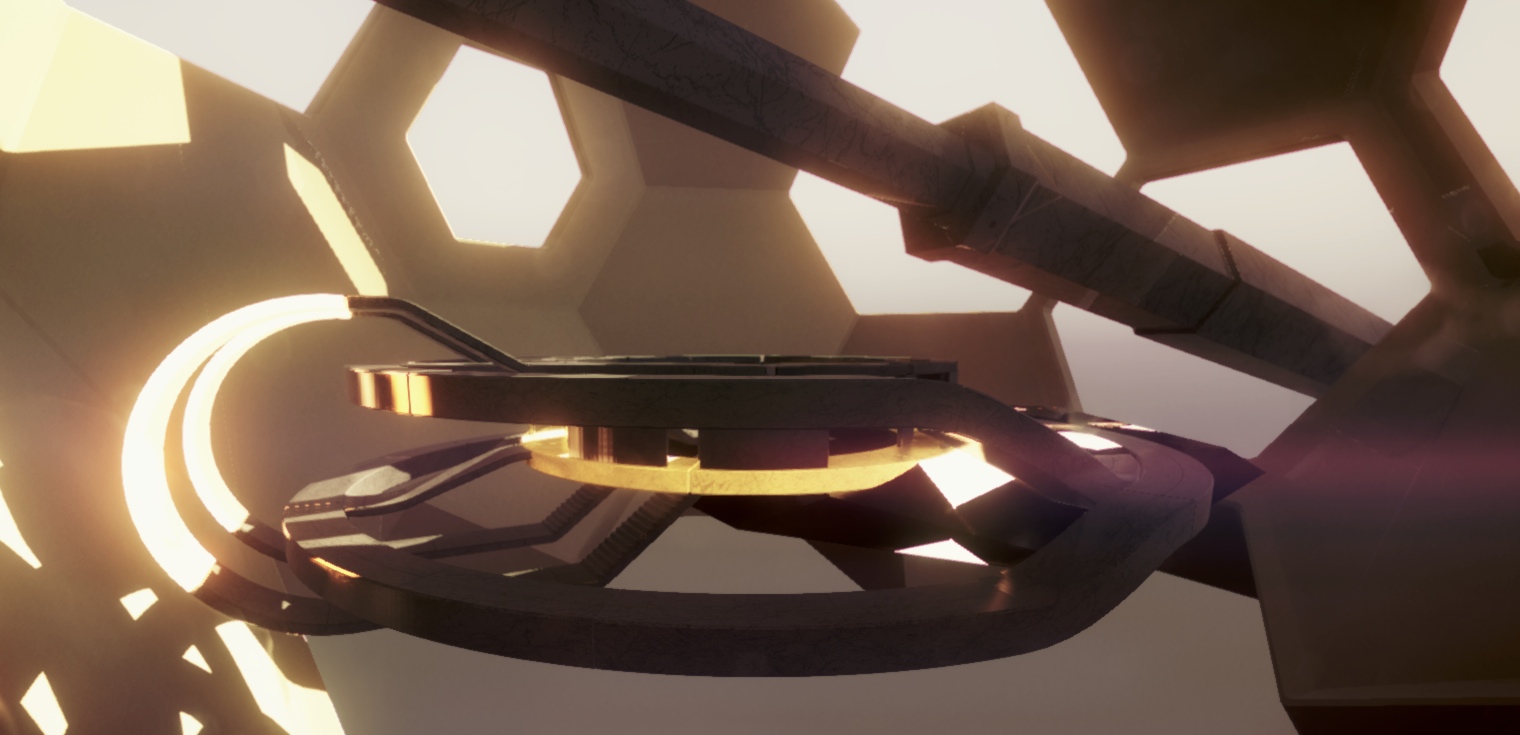
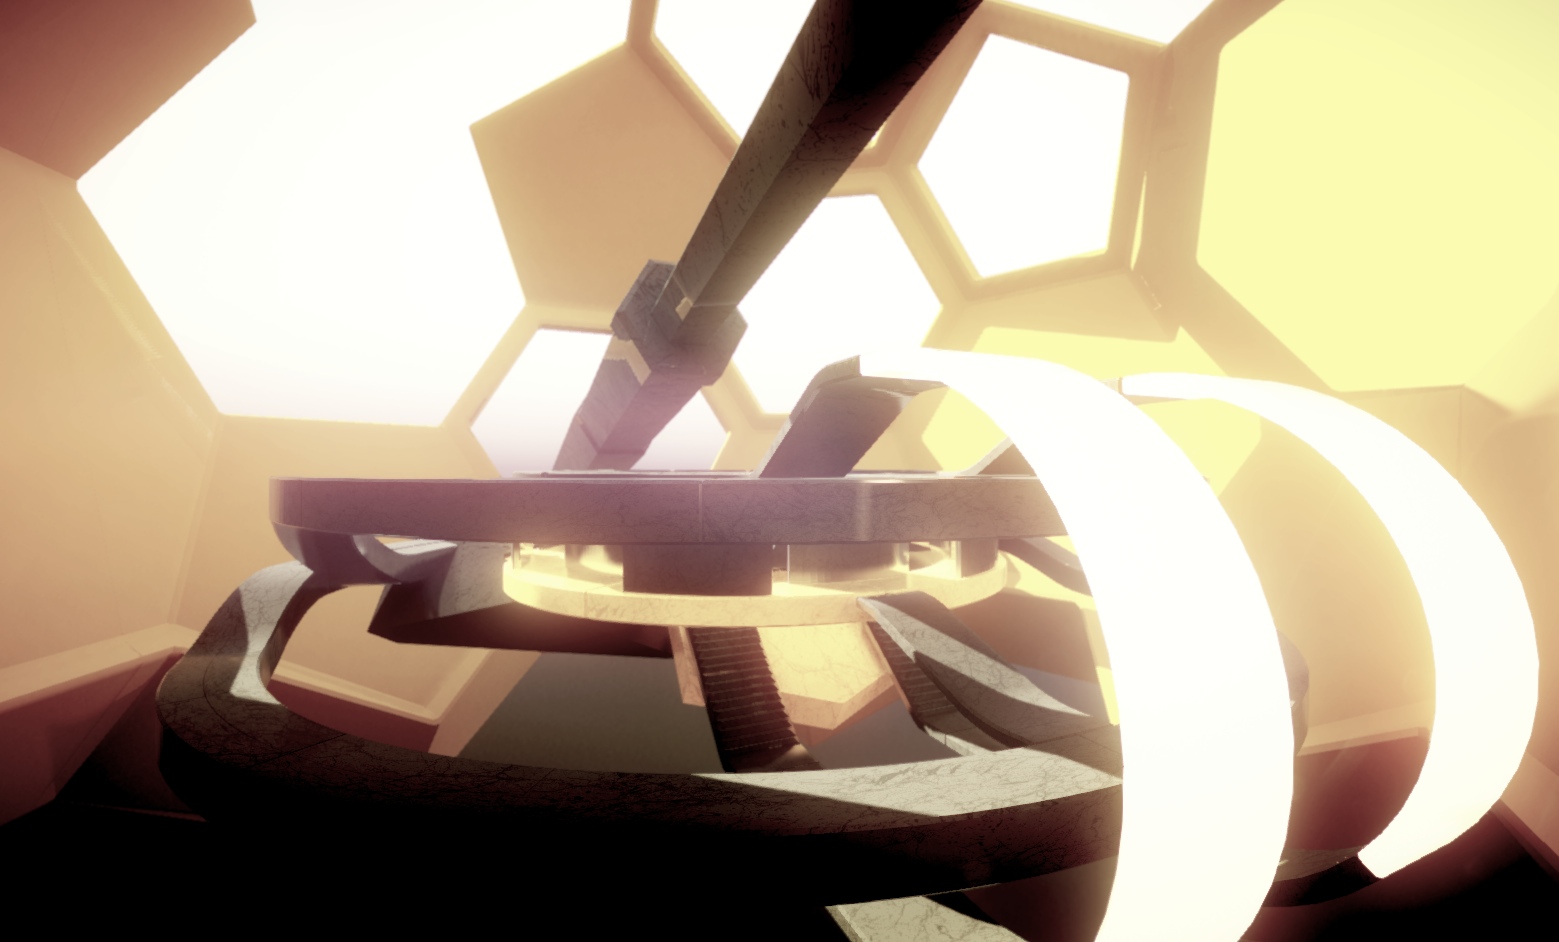
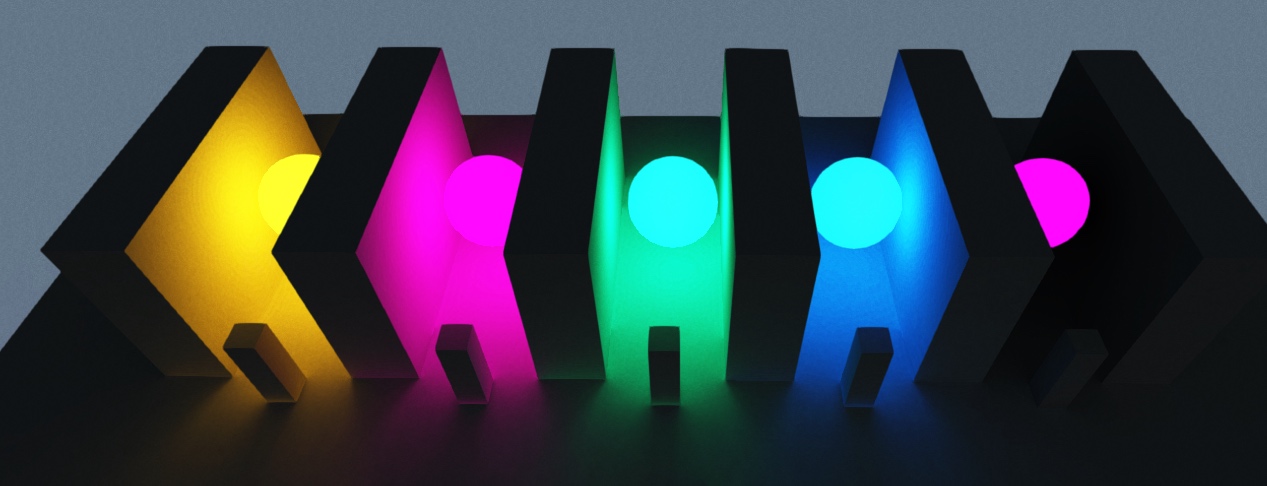
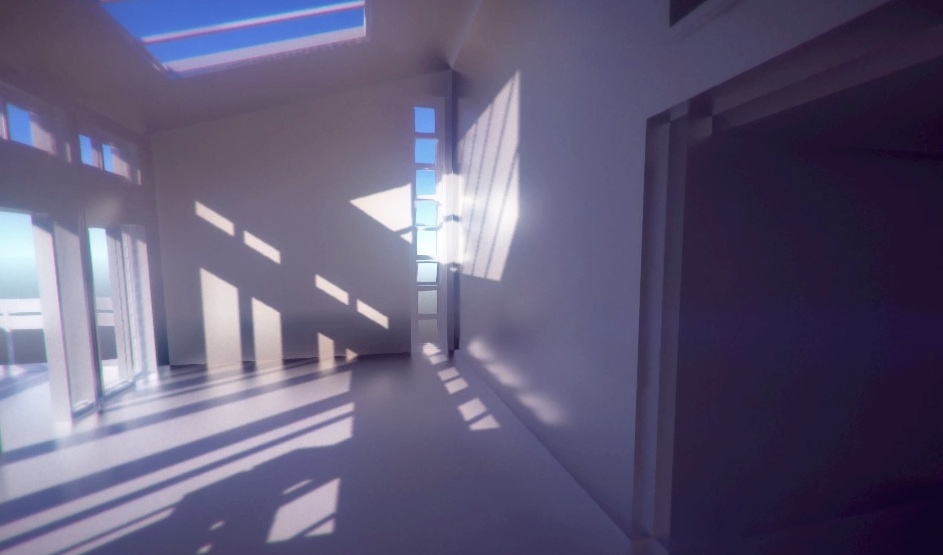
Created as a realtime 'Tech Demo' for Unity to show off Unity 5's new realtime bounced lighting ( Geomerics Enlighten )
I'll post more info on the process and such later
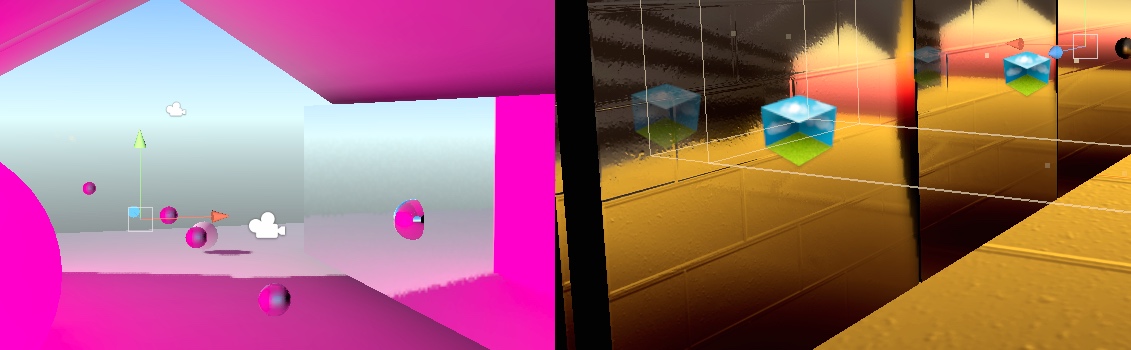
This is using no SSR ( Screen Space Reflections which is coming later at some point, along with some other magic )
This is semi dynamic realtime GI using Geomerics Enlighten ( set very very high ) so the sun and lights can move and change time of day etc, a floor could change to red and the bounced light would update immediately, that fact is not shown here very well because.. life happens and realtime reflection probes were broken when I made this
Some of the tools I built / hacked up while on this consist of:
Rudimentary Cubic Pano Capture - so you can take a panoramic 360 screenshot and view it in HTML looking around in all directions
Custom ScreenCapture - code using render to textures for arbitrary resolution support, used to capture and compress to JPG ( which sis faster than PNG ) at 4-5k resolutions, then a script watches for the results to resample to 2k thus removing most aliasing affects ( Unity are working on better anti aliasing and TXAA etc )
Animation Capture - steps thru selected animation clips frame by frame and outputs to special folders, end result is each animation clip produces a folder full of images, another script compiles those images into a movie using ffmpeg, then another script can assemble those movies into a final single movie with audio
Python Exporter for C4D to FBX - spits out multiple FBX files from several objects to reduce a heavy single scene into more sane chunks, also turns instances and arrays/cloners into references so Unity reconstructs the instance, so instead of 100 cubes, it exports 1 cube and 99 references ( empty objects ) and Unity reconstructs those empty objects to be a clone ( this is better for GPU performance, memory and size of the FBX goes from 100's of mb to a couple of mb )
Custom Exposure Shader - simple but needed for fade in and fade out, as it is not to black but an exposure change to make it 'photo' like Custom Tone Mapping - using a mess of curve adjustments and wizardry based on S curves from film and some of the nicer qualities of film to make it look.. nice, used Color Amplify for the LUT
Automation of Materials, Probes and other attributes so I can scrap the whole scene, reimport from FBX and it reconstructs everything the way I like it, with material set based on name of object, static or none static based on name or material, and so on, all so I could work iteratively moving back and forth between C4D and Unity, staying flexible to changing things all the time


And some older WIP shots below:
Below is my old post on using Enligthen for the first time with Unity 5
Edit: I have since found most of what I wrote first about the GI is entirely wrong
:-D
which is great news for the GI, however it does mean I am possibly an idiot. I will be rewriting this over time to be not wrong.It still has limitations with how high you can push the shadow / lightmap resolution, but those may well be fixed before release, essentially it seems you are hobbled to 512x res for lightmaps, if they can fix that to fully resolve GI at 4096k textures then it will be golden with 64x more pixels to play with, I think this may have to wait for the PowerVR stuff to be added later in the 5 release cycle though, so watch this space as and when I find out
:-D
I am now talking with Unity dev's, they have given me a lot of helpful explanations and information and asked me a lot of questions. It is still all unreleased early stuff and I think I am honing in on the problems at the root of it.
Jesper Mortensen of Unity said to me "awesome that you're using our GI stuffs! Better support for ArchViz is coming. Currently It's optimised for the RT use-case." So there is some hope, I had figured as much as the RT does It's job but the baking just hasn't been setup at all.
It looks like short of a few problems it can do amazing things, and those problems are likely to be either fixed by release or added during the 5 release cycle at some point, so I'm feeling positive about where they are heading.
And here is a link to the forum post I am putting this stuff under:
Link: forum.unity3d.com --- unity-realtime-reflections-and-gi-and-realism-exploration.266258
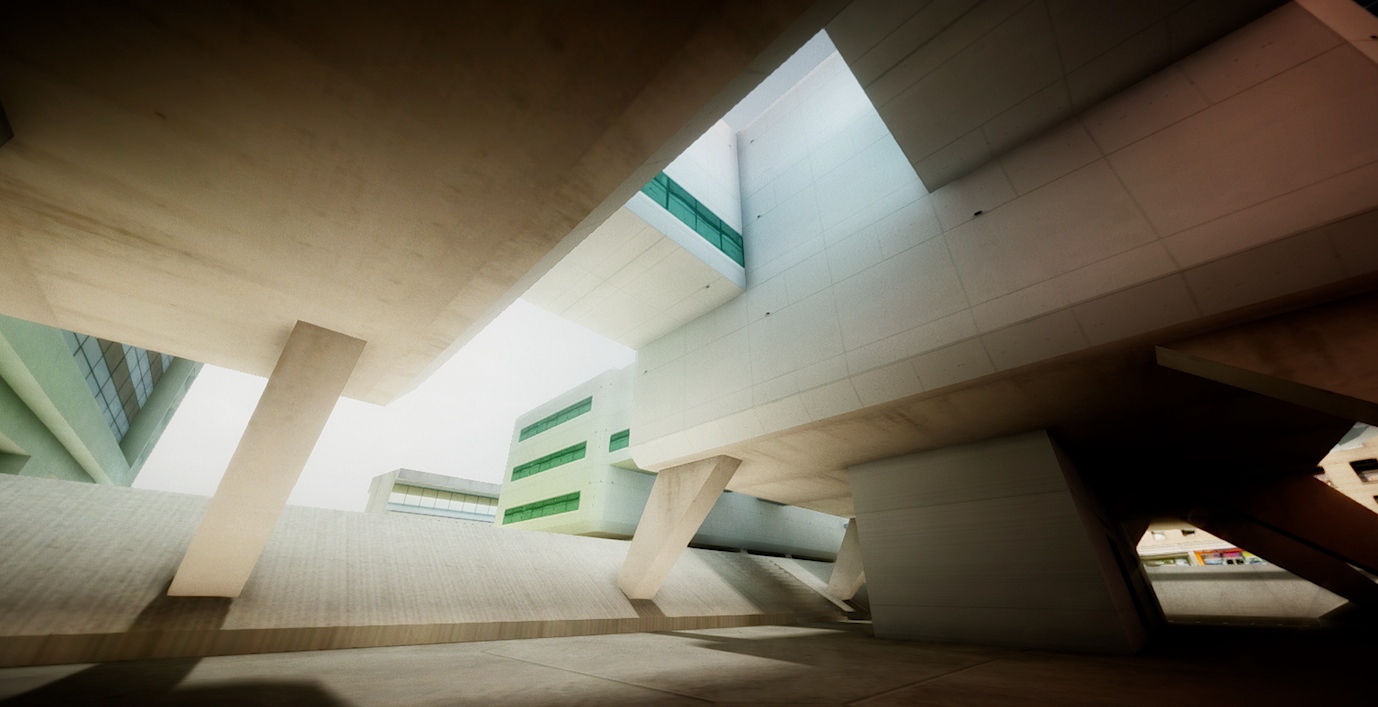
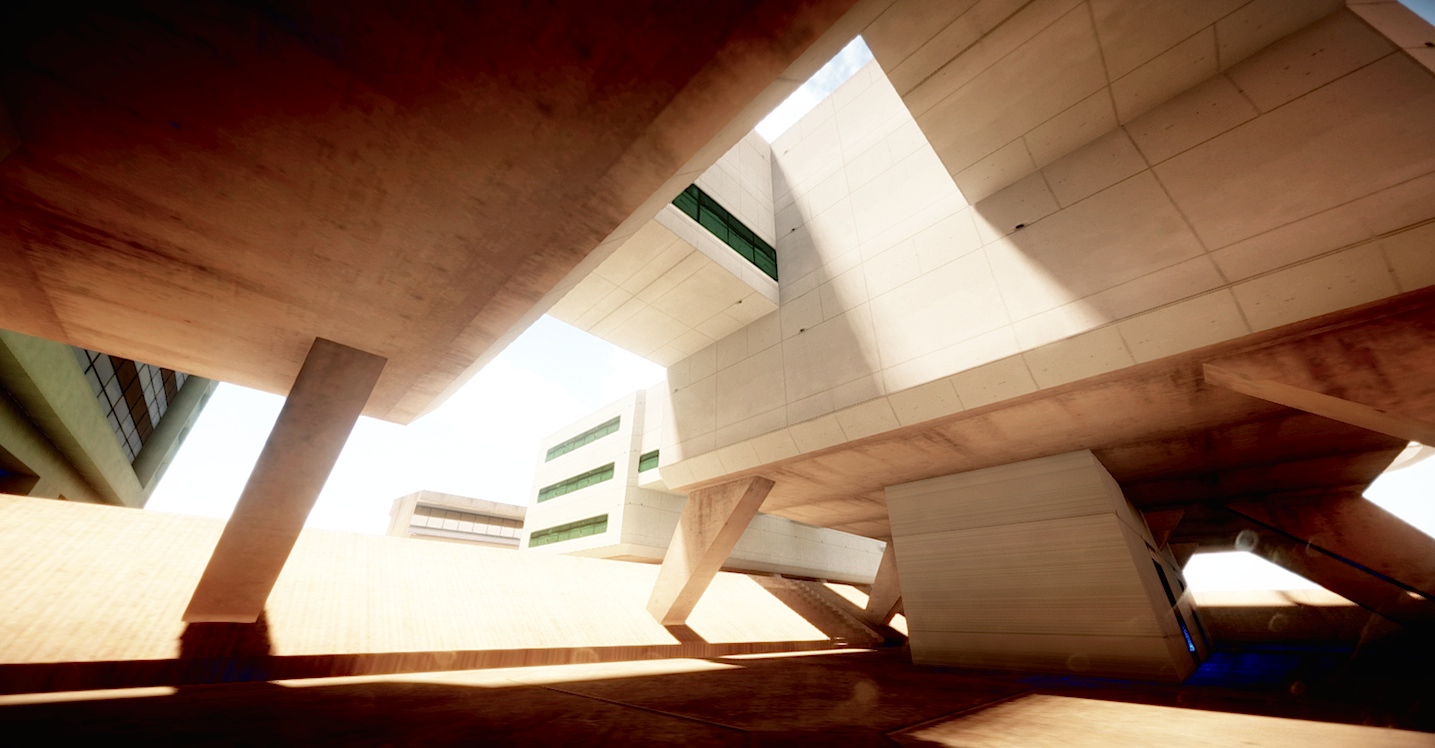
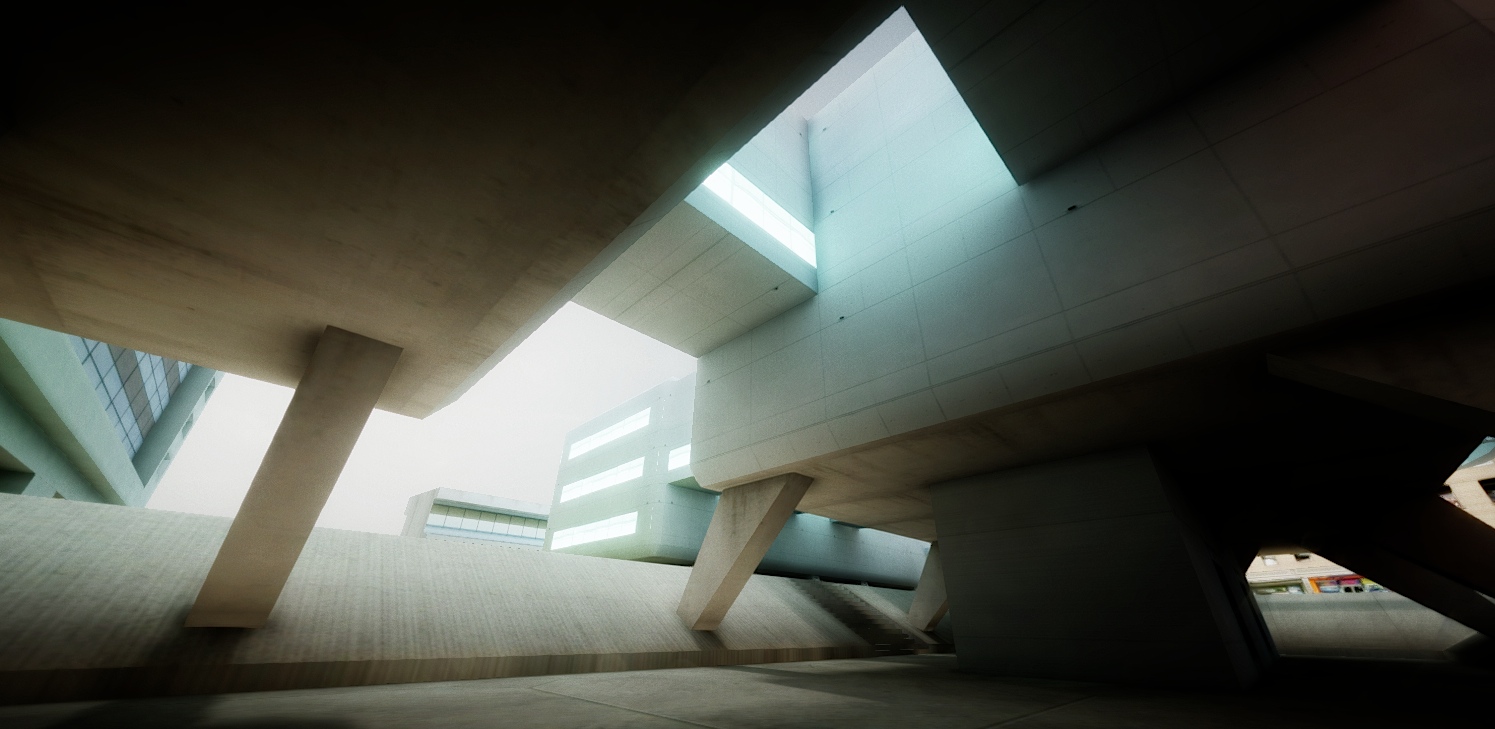
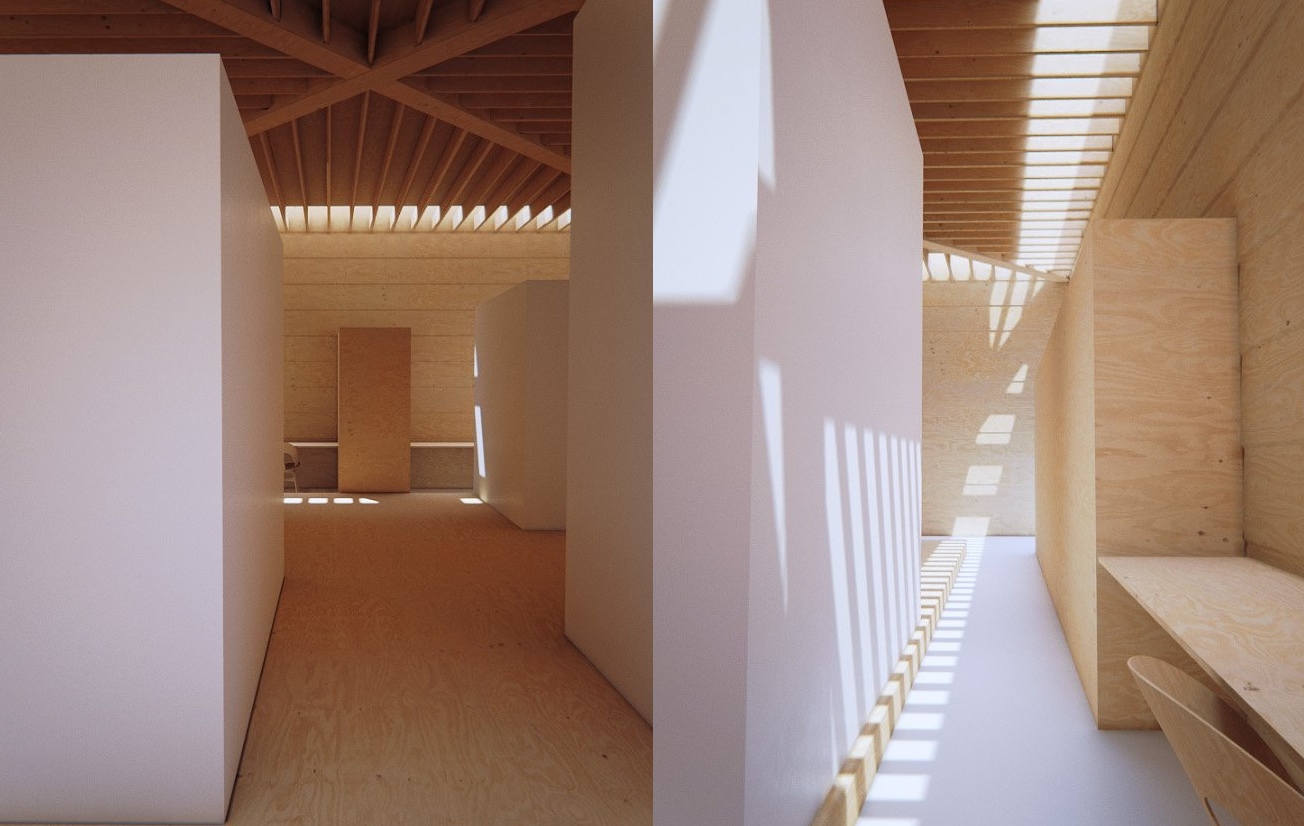
Below are some test images ( done in Unity 5 ) and a whole load of information on everything from lighting setup to setting up realtime reflections and post effects, it will become more organised and coherent overtime, this is a living document.
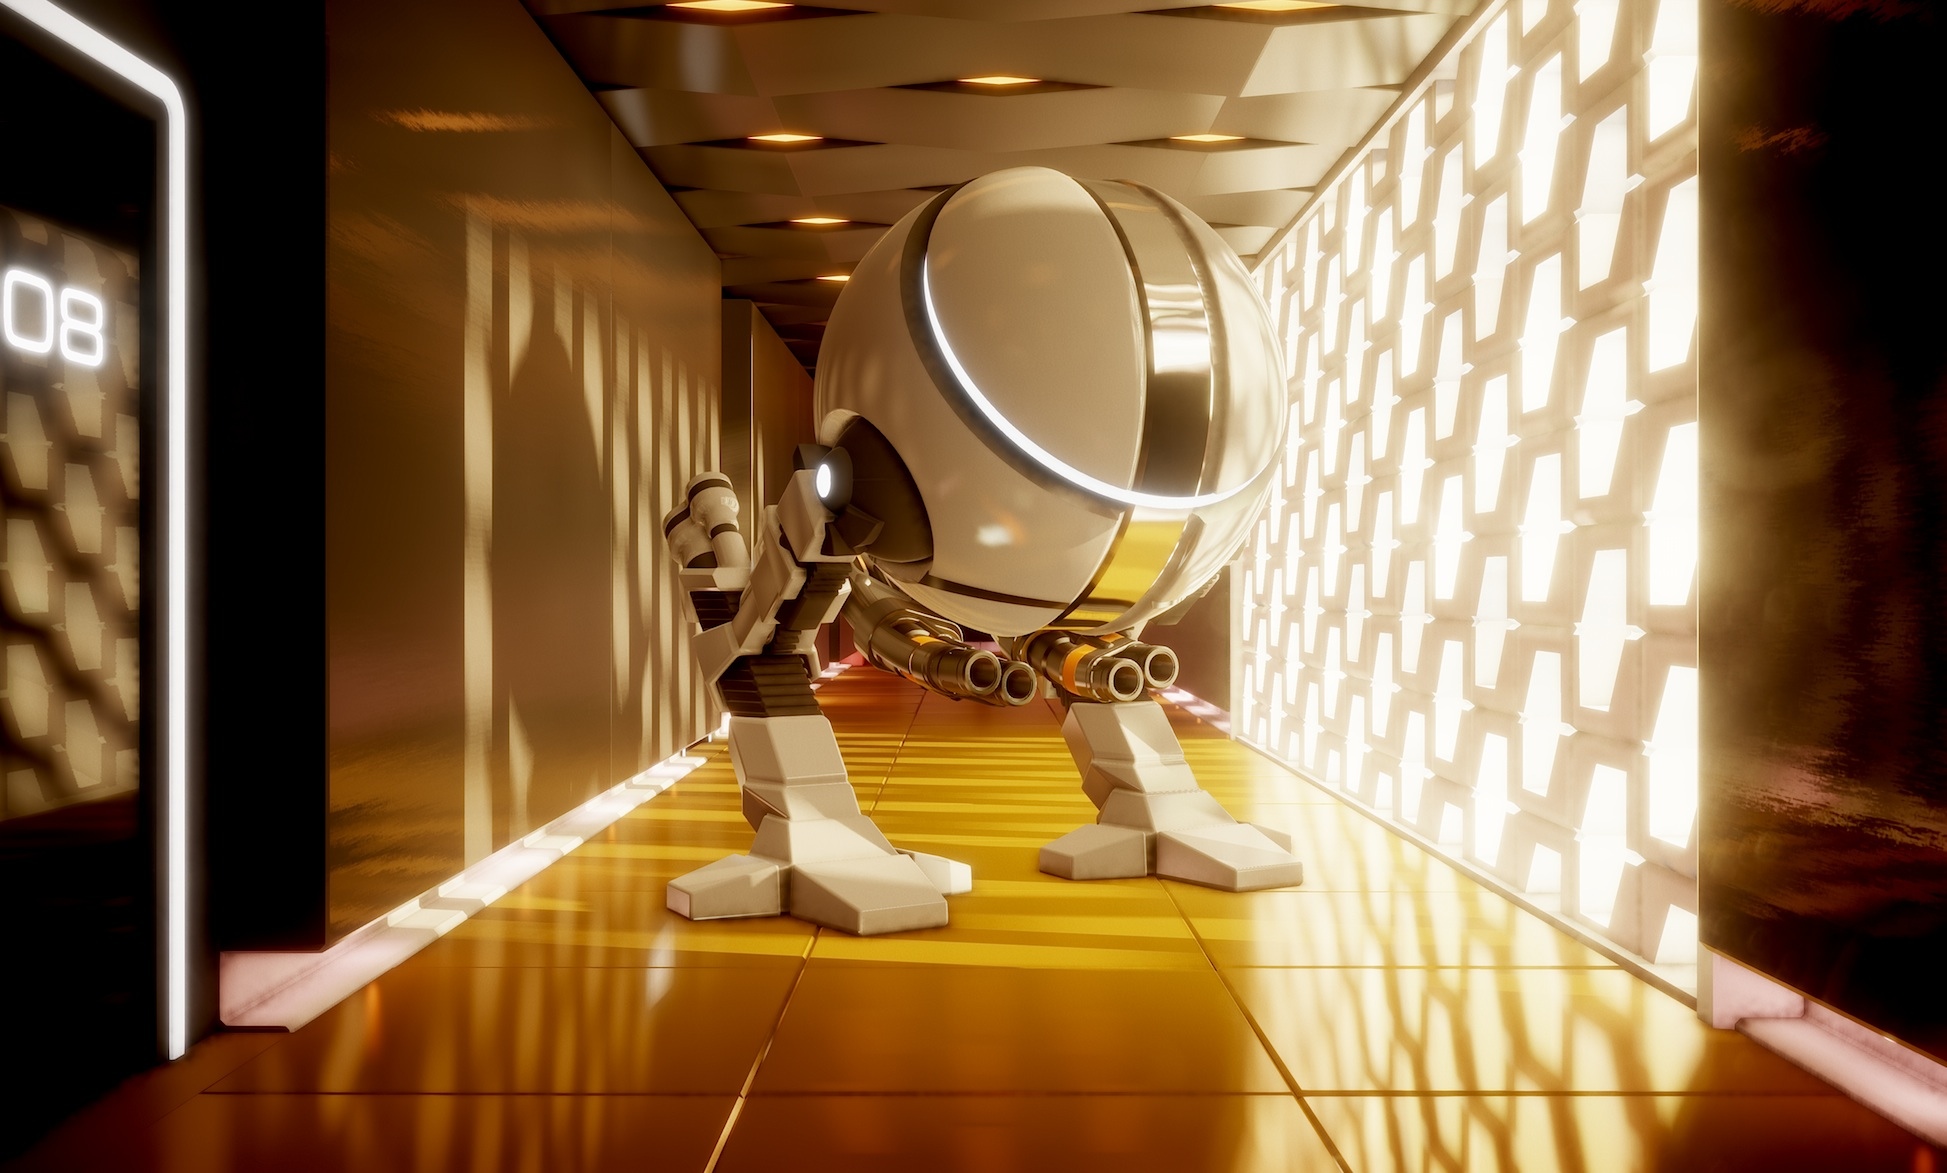
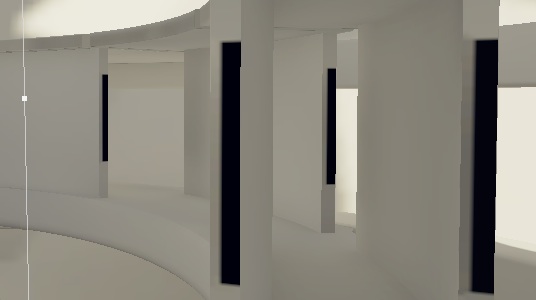
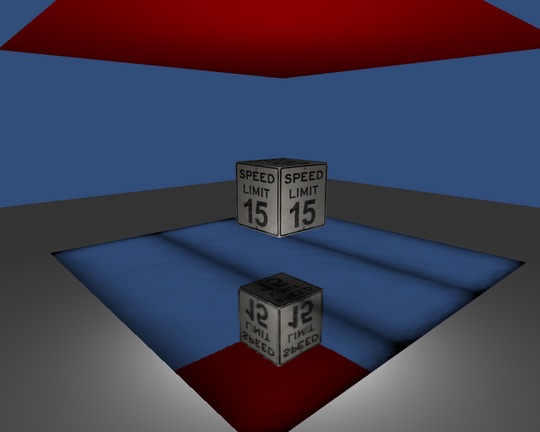
Ok that's hall security sorted out below. ( Scene and Model all mine ) I need to start taking the textures and scuffing / dirtying them up now and adding built in Ambient Occlusion so it self shadows basically. Oh and yes a reflection on the floor, but Candela refuses to work at all right now in the beta. Phew shaping up nicely now.

And older version of the same:

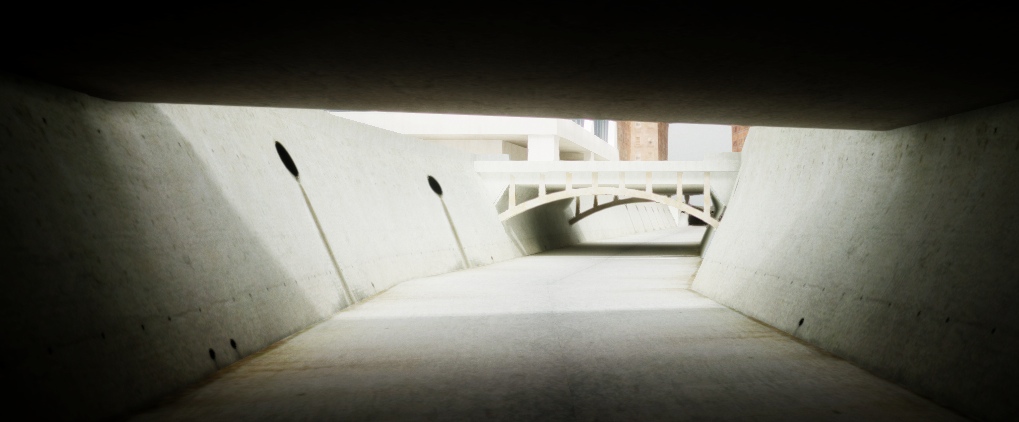
Below the building and city models are ripped from GTA San Andreas a 10 year old game:

Below I made a simple scene and did a quick fly thru, realtime GI for the sun obviously and baked area lights in places.
Also on youtube here:
Link: www.youtube.com
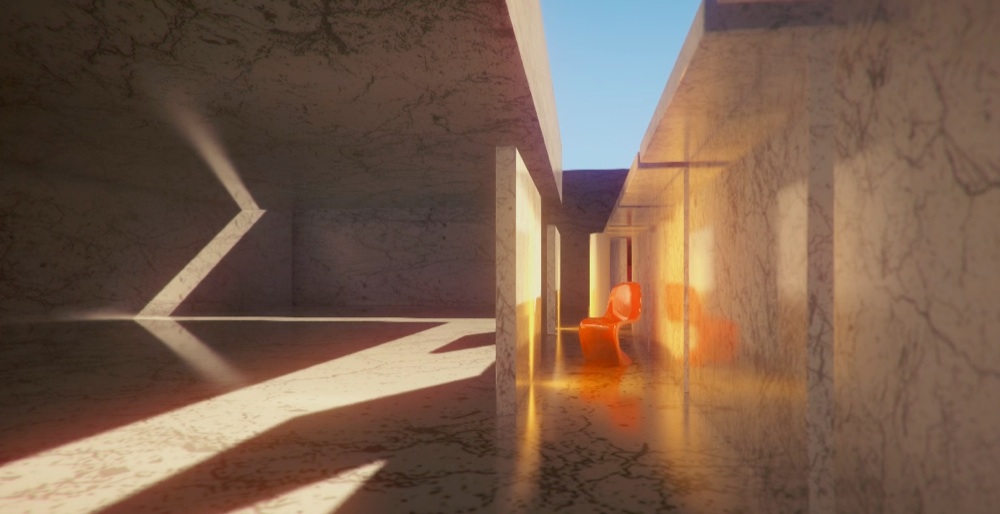
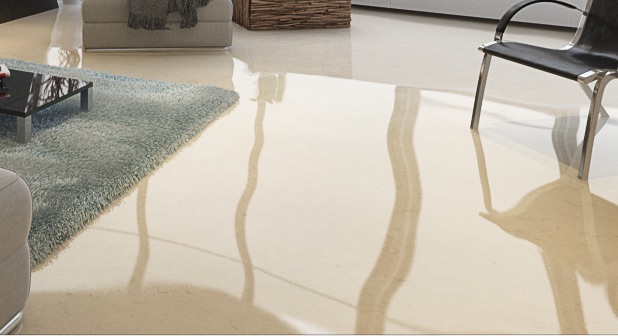
Getting serious now with the addition of the plastic chair! Even more serious with artistic angle and liberal depth of field applied

Trying to get surface bump to disturb the reflection, I had hoped to get rid of the fake distance blurring that elongates the reflection as it gets further away, and use a detailed normal map to achieve the diffusion / roughness.
The normal maps and or the effect are not accurate enough to subtly rippled a reflection
Vray / Offline rendered example below, albeit a bit extreme:

In Unity again below, the effect is not accurate enough to render the reflection as it shattered into lots of little tint very bright pixels. So I blur the end result slightly and a compromise is reached, looks ok in some situation, terrible in others:
This may also be due to lack of AA in normal maps, but not sure.
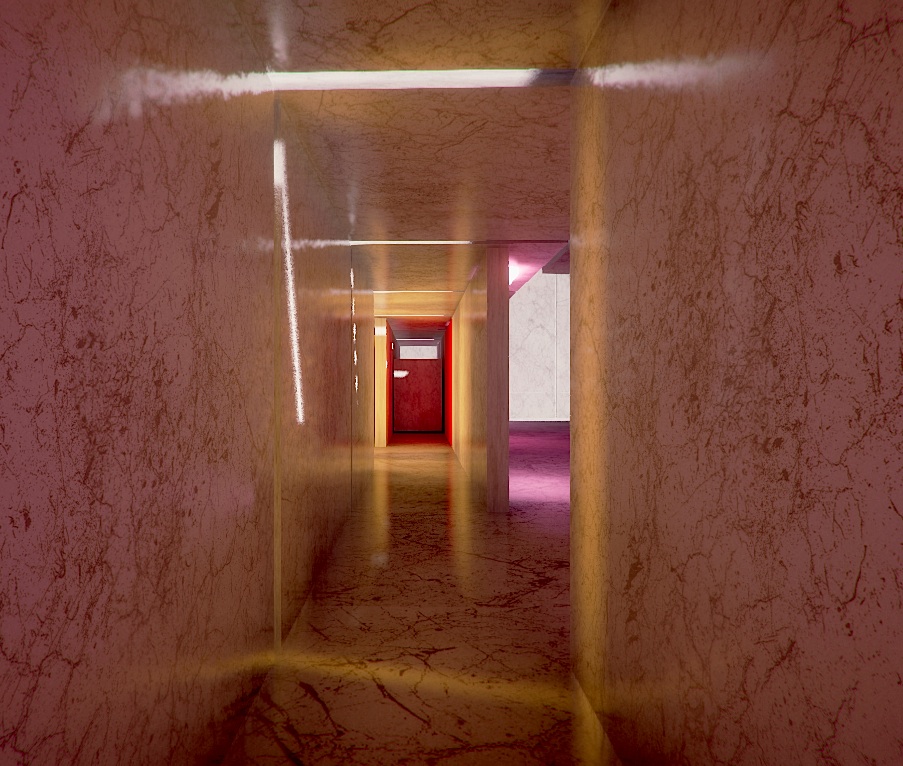
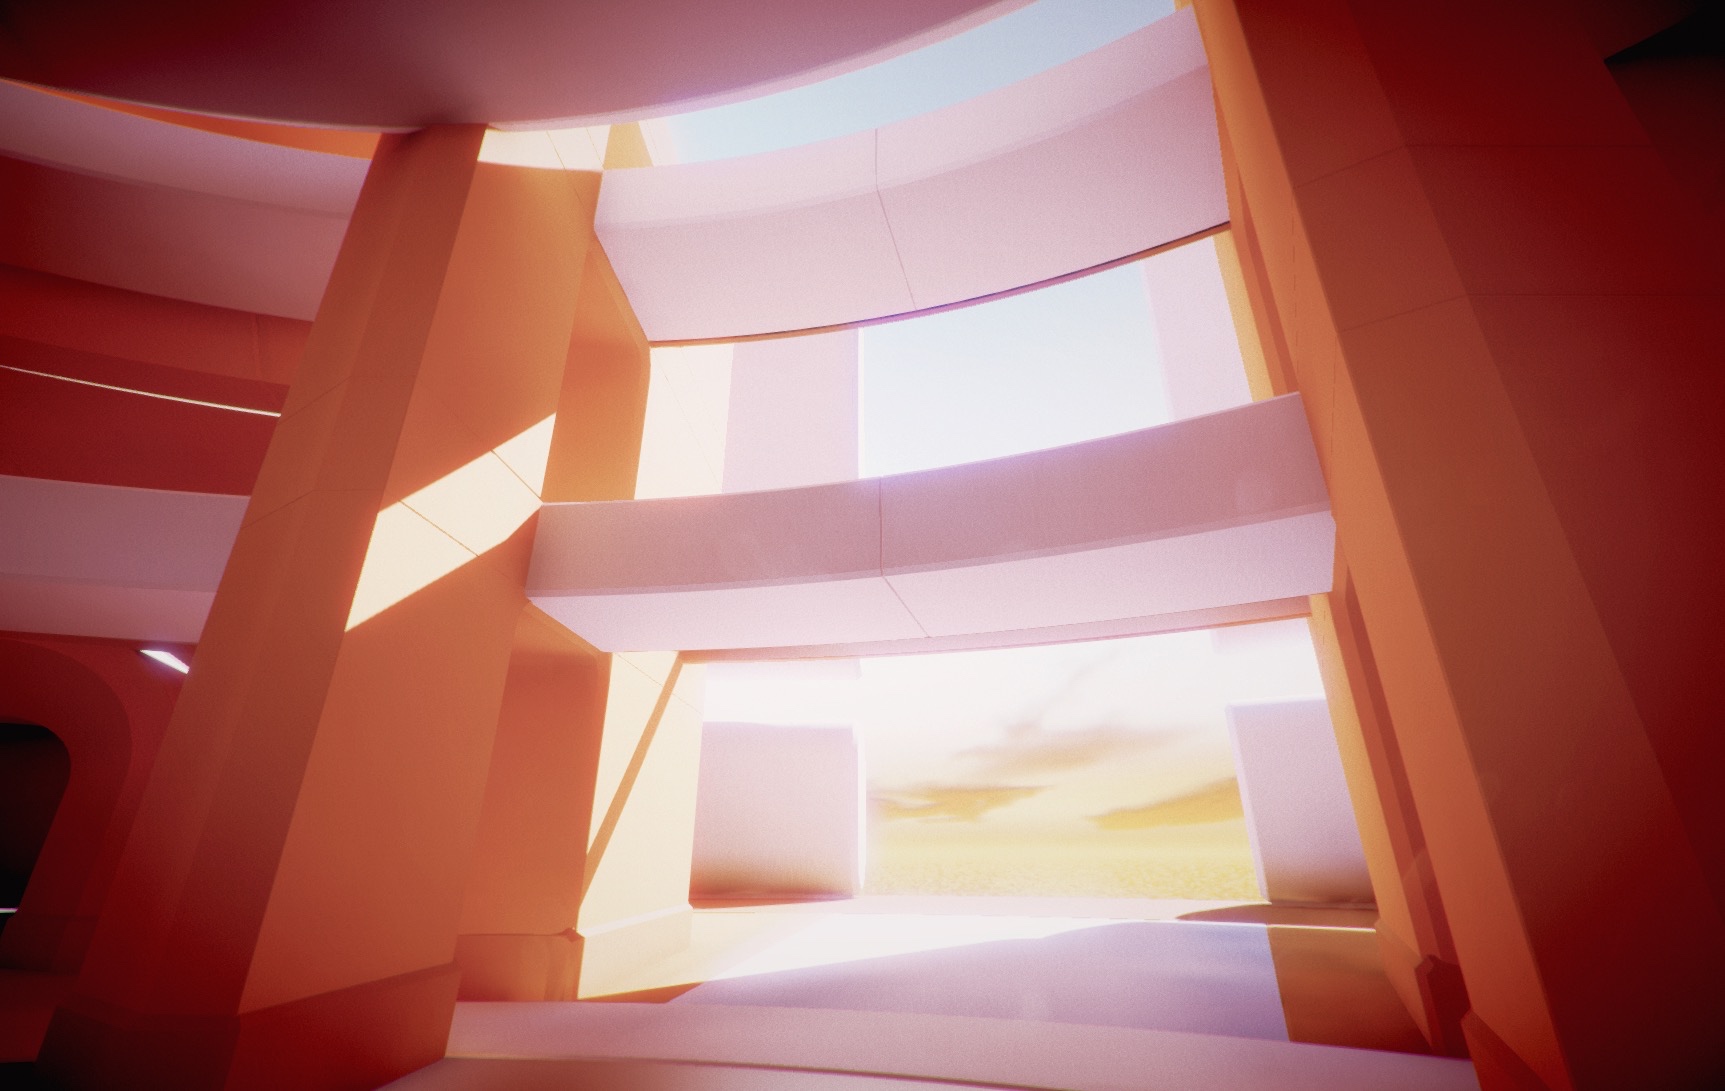
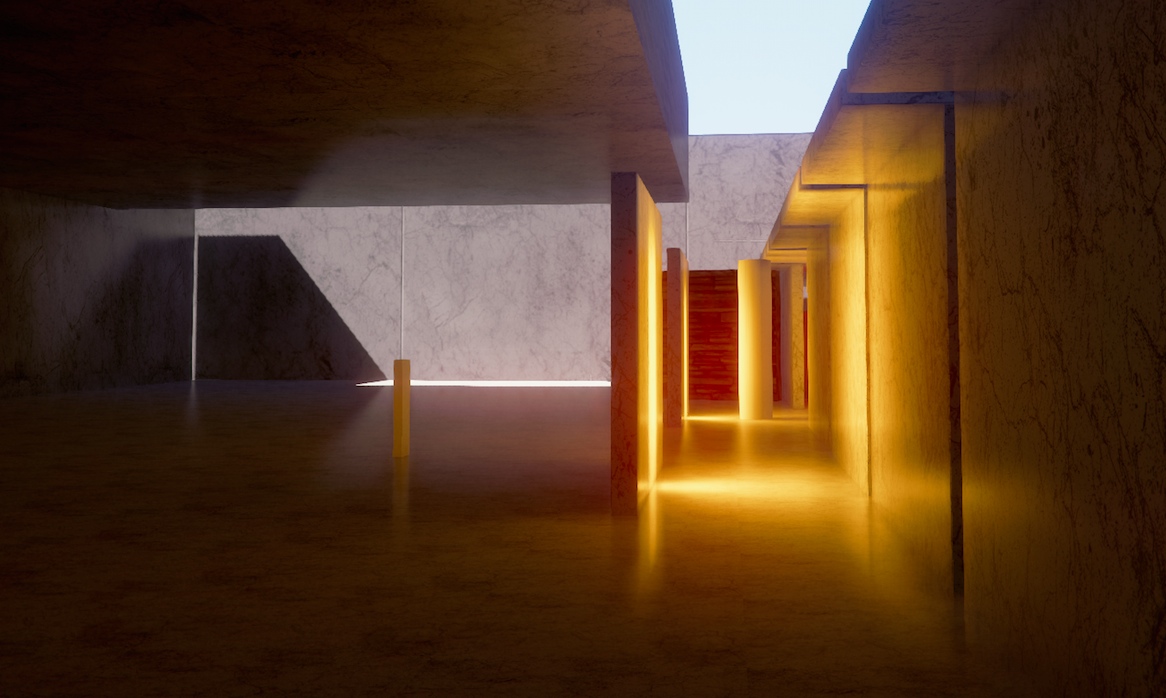
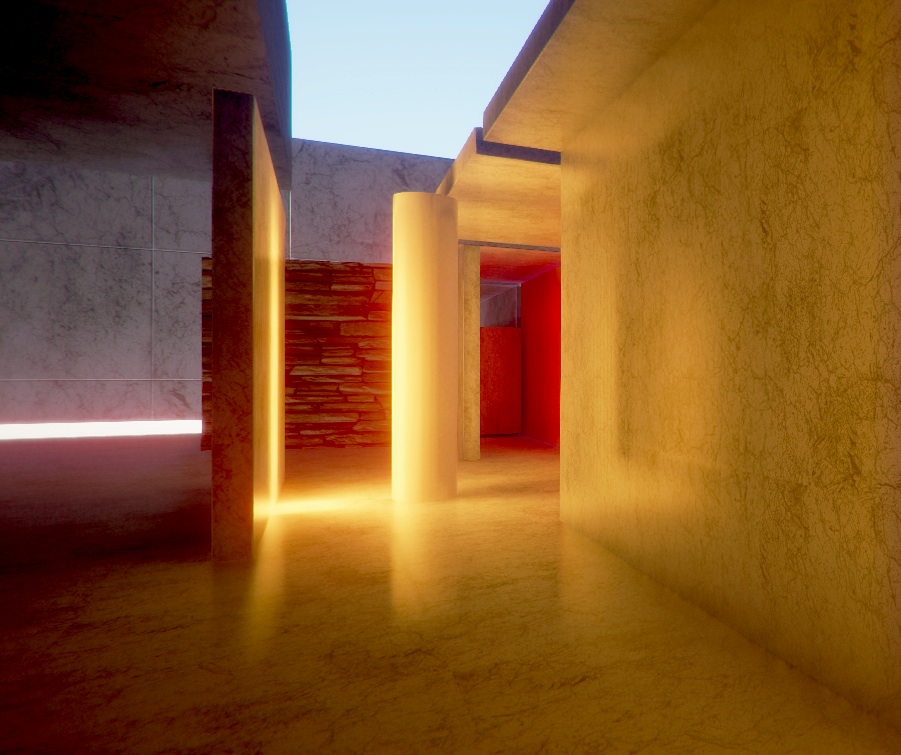
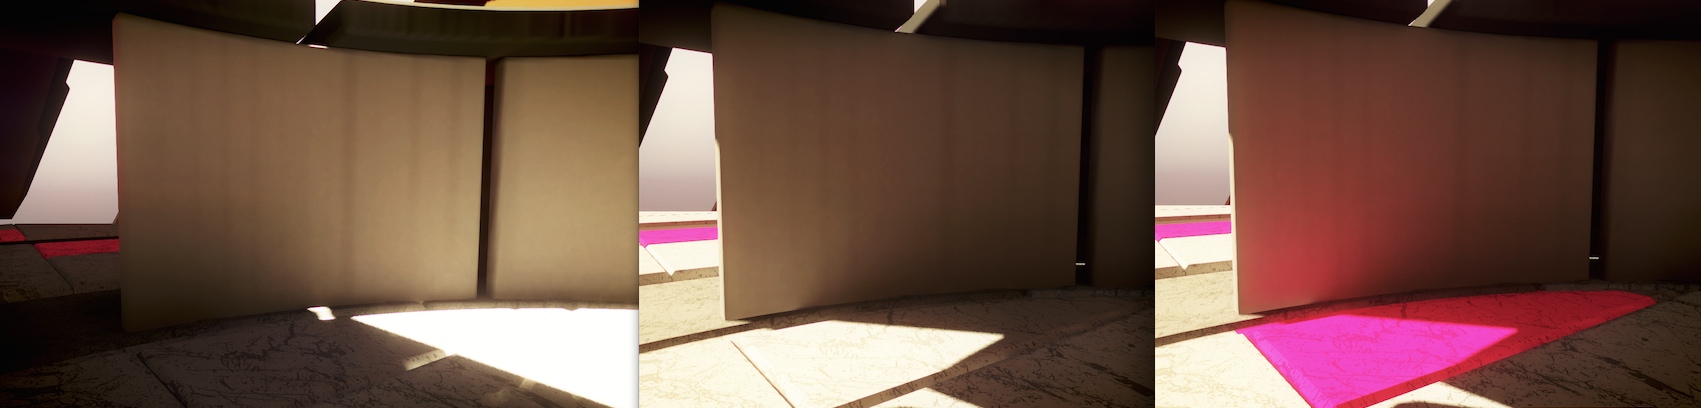
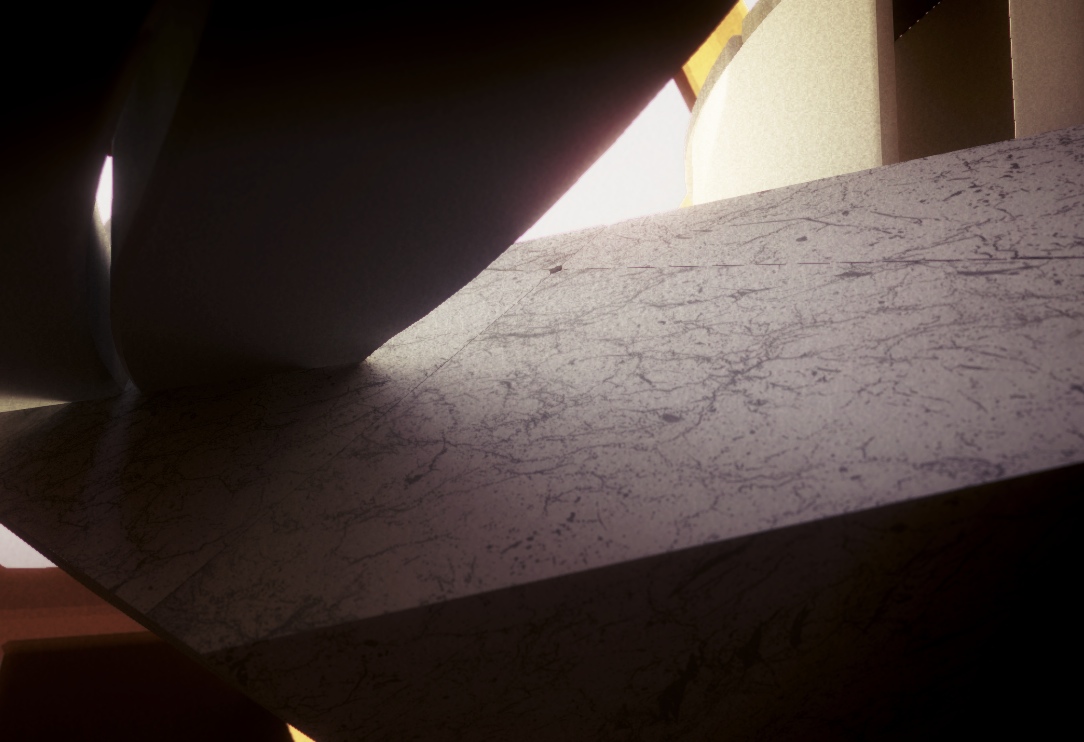
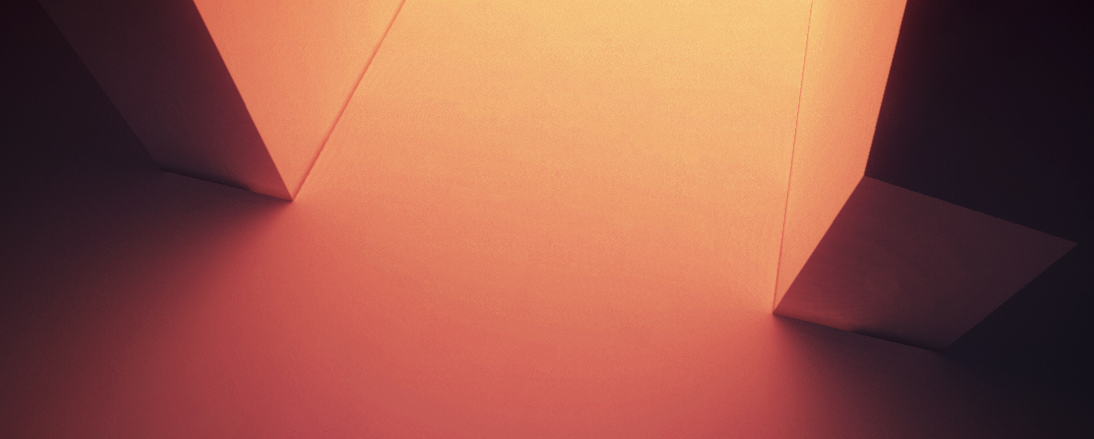
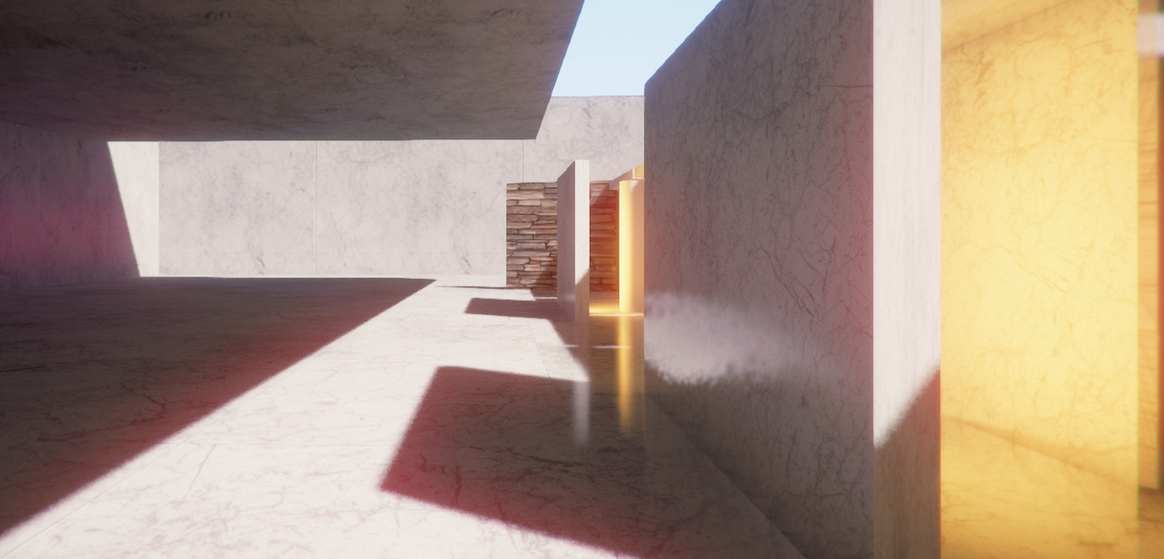
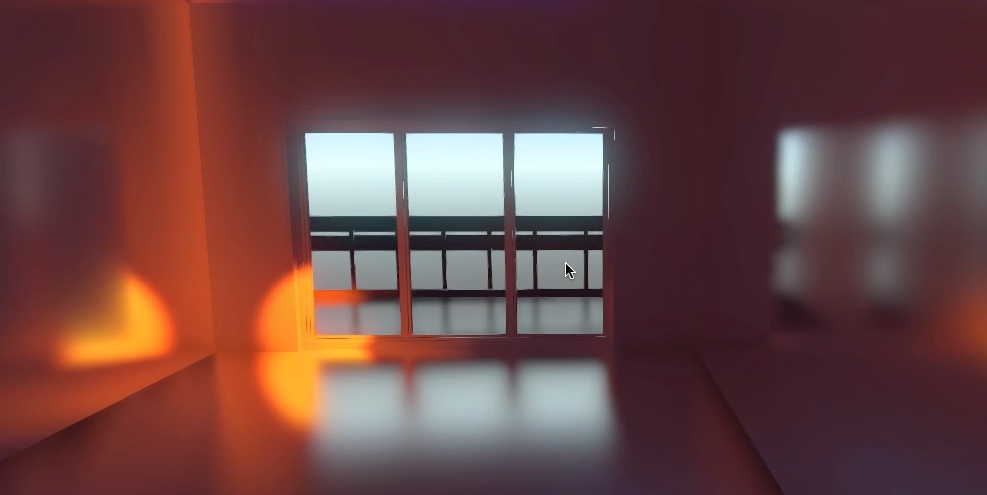
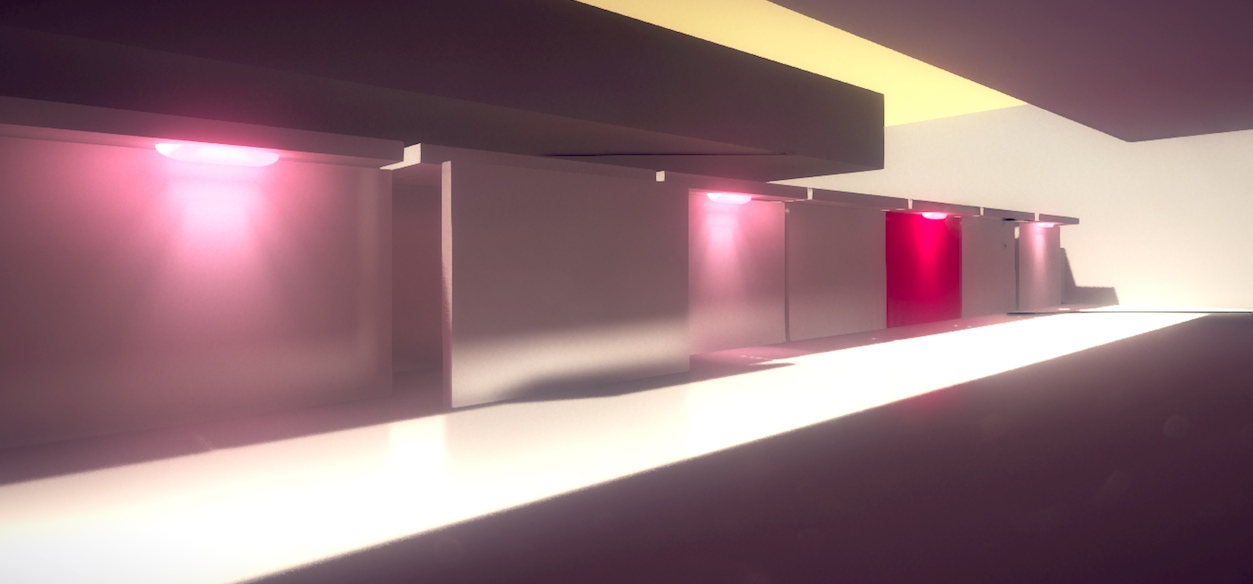
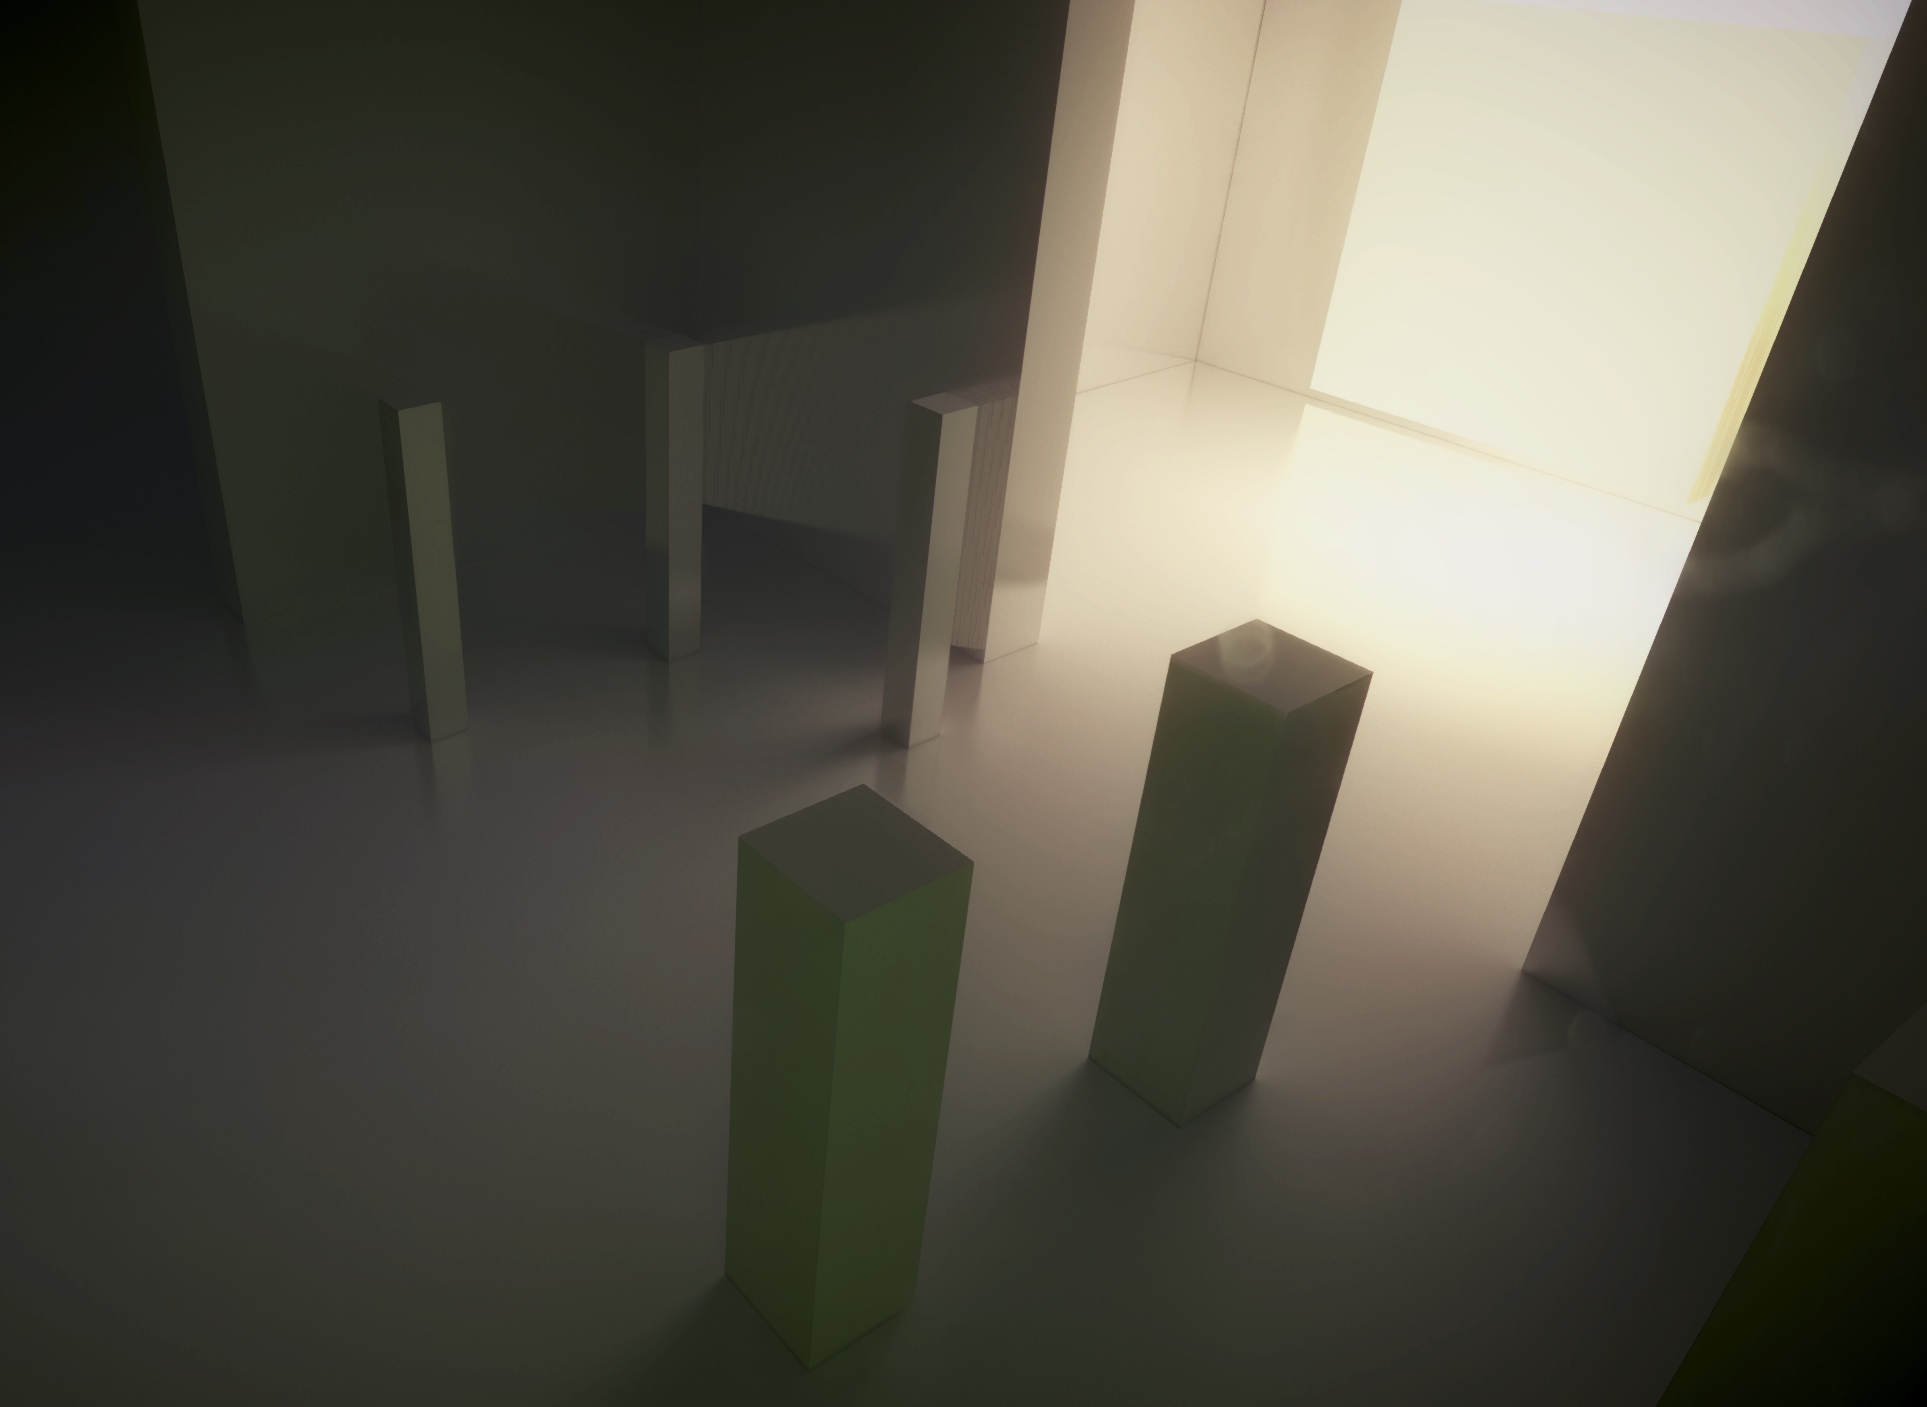
Ok lets go nuts and get all artistic, all images below are realtime GI so any changes are instant no re-rendering

Scale looks off here, which will be due to fine details missing, and size of textures and no normal objects to use as a depth cue.
Doubles up as a disco

Bring out the gratuitous lens dirt!
Also it is fun making materials emissive, this updates in realtime no need to bake again:
Realtime GI below turned up high:

And here is realtime Path Tracing in Unity ( not available to buy or use yet )
Link: www.youtube.com
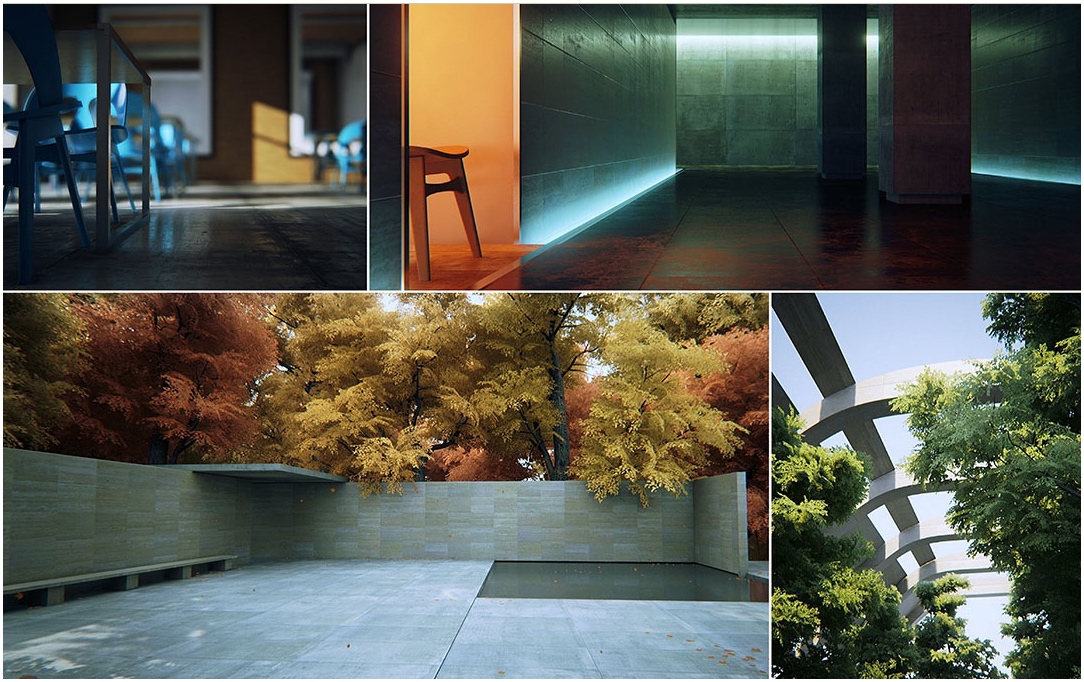
All this investigation stemmed from seeing some impressive Arch Vis videos here ( done in realtime in UE4 ) by Koola
Link: www.youtube.com
Link: www.youtube.com
Link: forums.unrealengine.com --- showthread
Link: www.ronenbekerman.com --- unreal-engine-4-and-archviz-by-koola
Link: docs.unrealengine.com
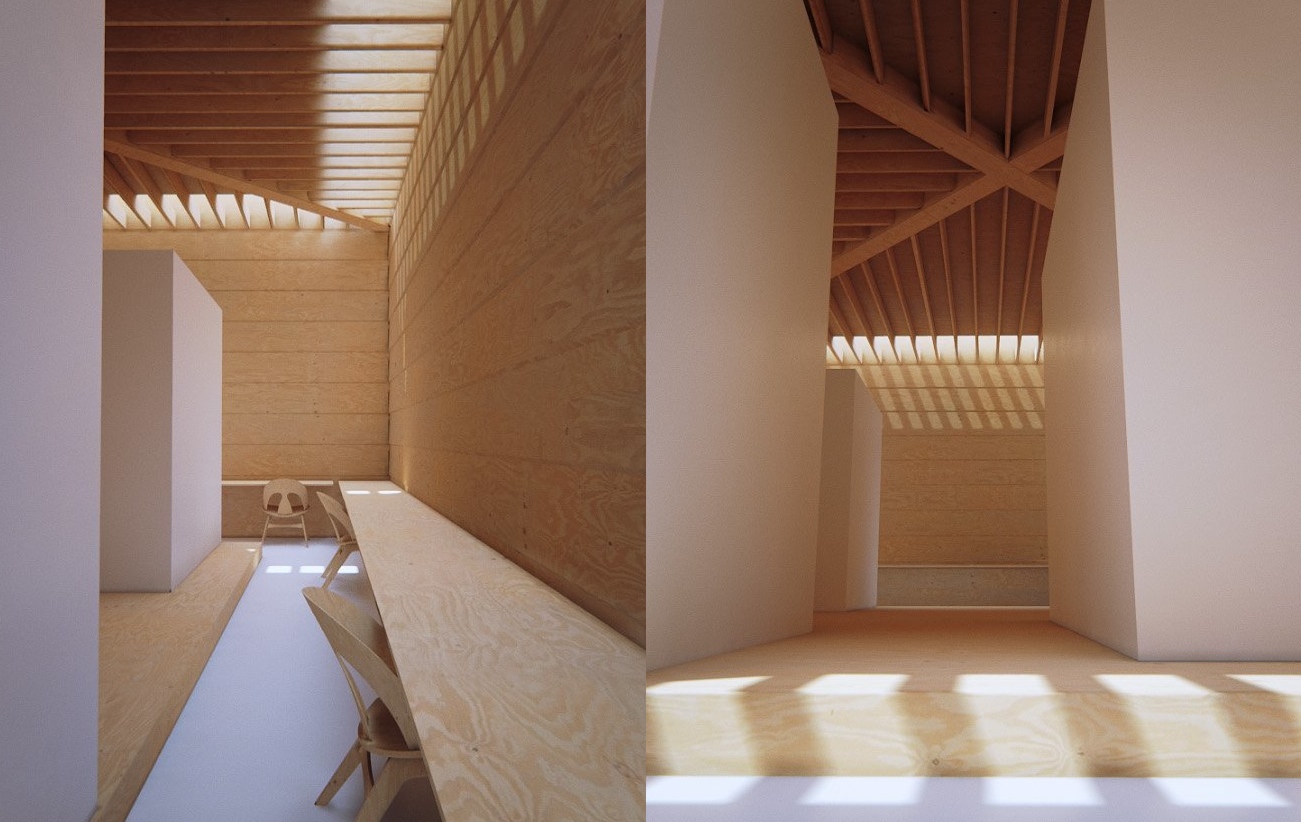
So these first few Images are NOT Unity, they are UE4:
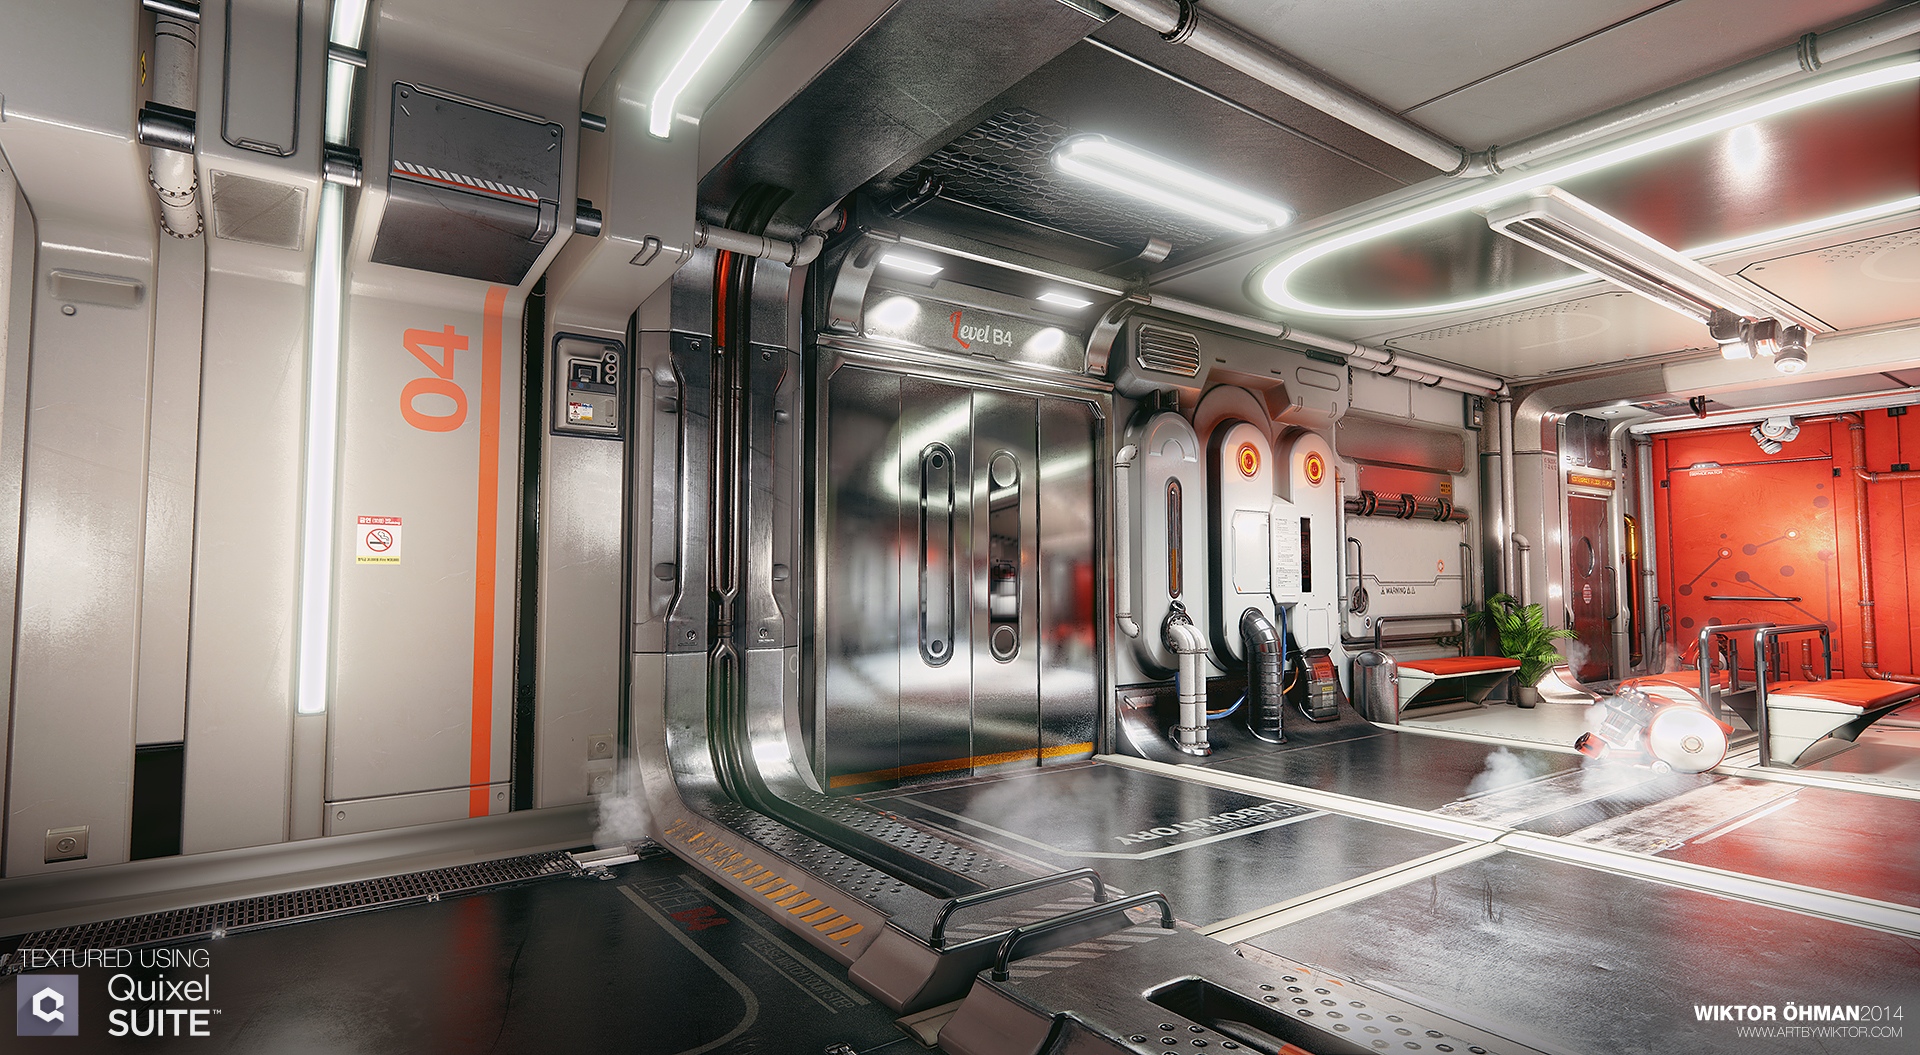
And this is in UE4 also as a demonstration of Quixel's painting tools and such. Inspired by Deus Ex
Video of it here:
Link: www.youtube.com
And now this by Mabone:
Link: forums.unrealengine.com --- showthread

Those already look better than anything I got in Cinema 4D with Vray.. though mostly because it crashed all the time, came with nothing correctly setup by default, and was insanely slow on my machine.
And yes this was achieved with UE4 ( Unreal Engine 4 ) Which is a very very impressive bit of kit if your machine can run it and you don't mind C++ A discussion on the pros and cons of that is a lengthy one, each to their own.
As a huge fan of Unity 3D, things like this inevitably annoy the hell out of me. As far as Unity has come over the years, Unity 4 cannot get even close to UE4 in terms of graphical amaze balls.
But Unity 5 I hear you cry! is coming soon!
And we have been promised all sorts of amazing newness like PBR ( Physically Based Rendering ) in Linear Gamma colour space with HDR Lighting. Even Realtime GI ( Global Illumination ) at long last, I have waited for this and other acronyms for half a decade after seeing the first Enlighten demo.
Also to clear up confusion before it begins, Enlighten in Unity powers both a pre calculated realtime GI and a pre baked static GI ( like how beast worked in Unity 4 )
The realtime GI has to perform a few minutes of recalculation for the light volume. Once done certain changes to lighting and materials will be realtime during game play. You can move point lights around, change the sky, move the sun and change / animate a materials colour or emissive color/brightness during realtime / game play. It is generally vague / cannot cast clear shadows from bounced light.
To cast nice clear well defined penumbra / soft shadows you can mix realtime GI with baked GI, baked naturally you cannot move or change anything during game play, and it generates sometimes huge lightmap files. The main drawback aside from being unchangeable at runtime and slow to compute, is it can suffer from glitches causes by UV problems, mesh overlaps and generally will require you to properly UV map every surface by hand, though it can auto UV map for lighting, but this isn't perfect all the time. ( UV maps for lighting can and often are entirely separate from UV maps for textures )
Of note though they claim the Enlighten baked GI is equiv to beast in the beta at least it is nothing like as good ( right now ), you get terrible leaking, glitches and problems, no detailed settings for quality to get a really crisps result like Beast has. So As it stands Unity 5 ( beta ) is a step down for baked lighting in many ways. I suspect it I just broken at the moment and will be fixed, so bear in mind all the problems I have in this article are generally with the Baked portion of Enlighten not the realtime, and I think Enlighten added the baking support especialt for Unity, it seems a bit odd to me to try and force a realtime engine to do high quality baking, and maybe the quality / fidelity is something that cannot be improved, but at least the glitchiness in theory can be fixed, we shall see.
And I just remembered this:
Geomerics to target movies with real-time rendering, ARM, has been given a £1 million ($1.7 million) grant from the UK government to bring It's video game graphics to the movie industry. Director of Geomerics, puts it succinctly, 'This will be a dramatic shift in the industry's production practices.'
UE4 has baked and realtime GI also, the baked lighting is clearly superior to what Unity offers ATM, the realtime option though is disabled by default and currently being worked on / has huge performance requirements.
Unity's realtime GI works on mobile devices however. And SpectraGI is coming to Unity soon with a completely realtime GI ( no recalculation anything can change at runtime ) which may or may not be any good.
Geomerics are the creators of Enlighten the realtime and baked lighting solution in Unity 5, which works on mobile no less
Some more info:
Geomerics Website
Link: www.geomerics.com
Advanced Lighting Effects with Global Illumination
Link: www.youtube.com
Geomerics Middleware & Dynamic Lighting for Gaming - GDC 2012
Link: www.youtube.com
Slides for above
Link: docs.google.com --- edit
Shipyard Demo, Roof is removed and building lights up in realtime
Link: vimeo.com
So can Unity compete now with UE4 graphically? kinda... almost.. so close UE4 ultimately wipes the floor with it in terms of high end graphics using cutting edge effects, but Unity is getting close
For Unity to even be getting close, is in of itself is a huge achievement from where Unity began. But I am a glass half empty kinda guy, in fact I even I complain about the glass itself
Realtime is nice, really nice, but I want super high quality baked lighting too. However when textures and other misc details are added it matters a lot less. So I am being quite taxing trying to get very plain minimalistic forms to render nicely. Also I have no decent textures and none of these shots have proper colour correction, just some thrashing at the curves tool in Unity which is terrible to use.
However I have burned most of my energy tied up in getting the baking of GI to just work and not glitch, not screw up UV's.
And this is all done in the beta version, things will change, things are being fixed and added still, I have no way to do reflections/specular masks yet for one thing, that alone will add a lot of realism.
This is an ongoing and ever changing document.. till I have had enough and go back to programming
:-)
HappyCoder84 sums up my thoughts for me:
"Unity5`s Enlighten does work. And it looks good, when certain lighting conditions and mesh design criterions are met.
The way is see it, the main problem is the modelling task has to be done in such a way that would minimise the possible lighting and shadow-related issues, which, in many cases, regardless of your modelling skills, forces you to limit yourself in the specific mesh design that works well with Enlighten. Which is OK for primitive geometry type objects like the ones you put in your blogs. But for something organic or complex with lots of separate polygon islands and uv's, it quickly becomes PITA. Much more so than the lightmass.
As you mentioned, Unity5 Enlighten`s baked lighting looks terrible.Currently, Realtime GI produces best results.
But it`s low quality by nature, as it has to run in real-time. The larger the scene and the more objects you have, the heavier it gets.
Baking time is really long,,, at least 10 times more than Lightmass (production setting). And it increases exponentially as the number of objects goes up.
Someone above mentioned "trade-off" between visuals and performance. It`s true.
But when you actually compare it to the same scene built in UE4, you will think differently as the difference is like day and night.
I wish they would improve the baking method."
From Rafael Reis regarding UE4
"Unfortunately the Lightmass is not a unbiased render, so there'b4s a lot of problems with artefacts, glitches and etc. If you change the Static Light Level Scale to 0.2 (vray uses 0.02 for lightcache) your rendering times will increase a lot, but you will kill almost all artefacts from
indirect illumination. I do use this settings and it'b4s was the only way I have found to avoid the lighting artefacts... but I have a dual xeon deca-core and
the building time is not a problem for me."
As I have not used it personally it is tempting to think the results are always perfect as no one shares the images of it not working
:-)
Problem is you cannot dial the Unity GI up to 11 and converge on perfection, not in my tests anyway, not yet.
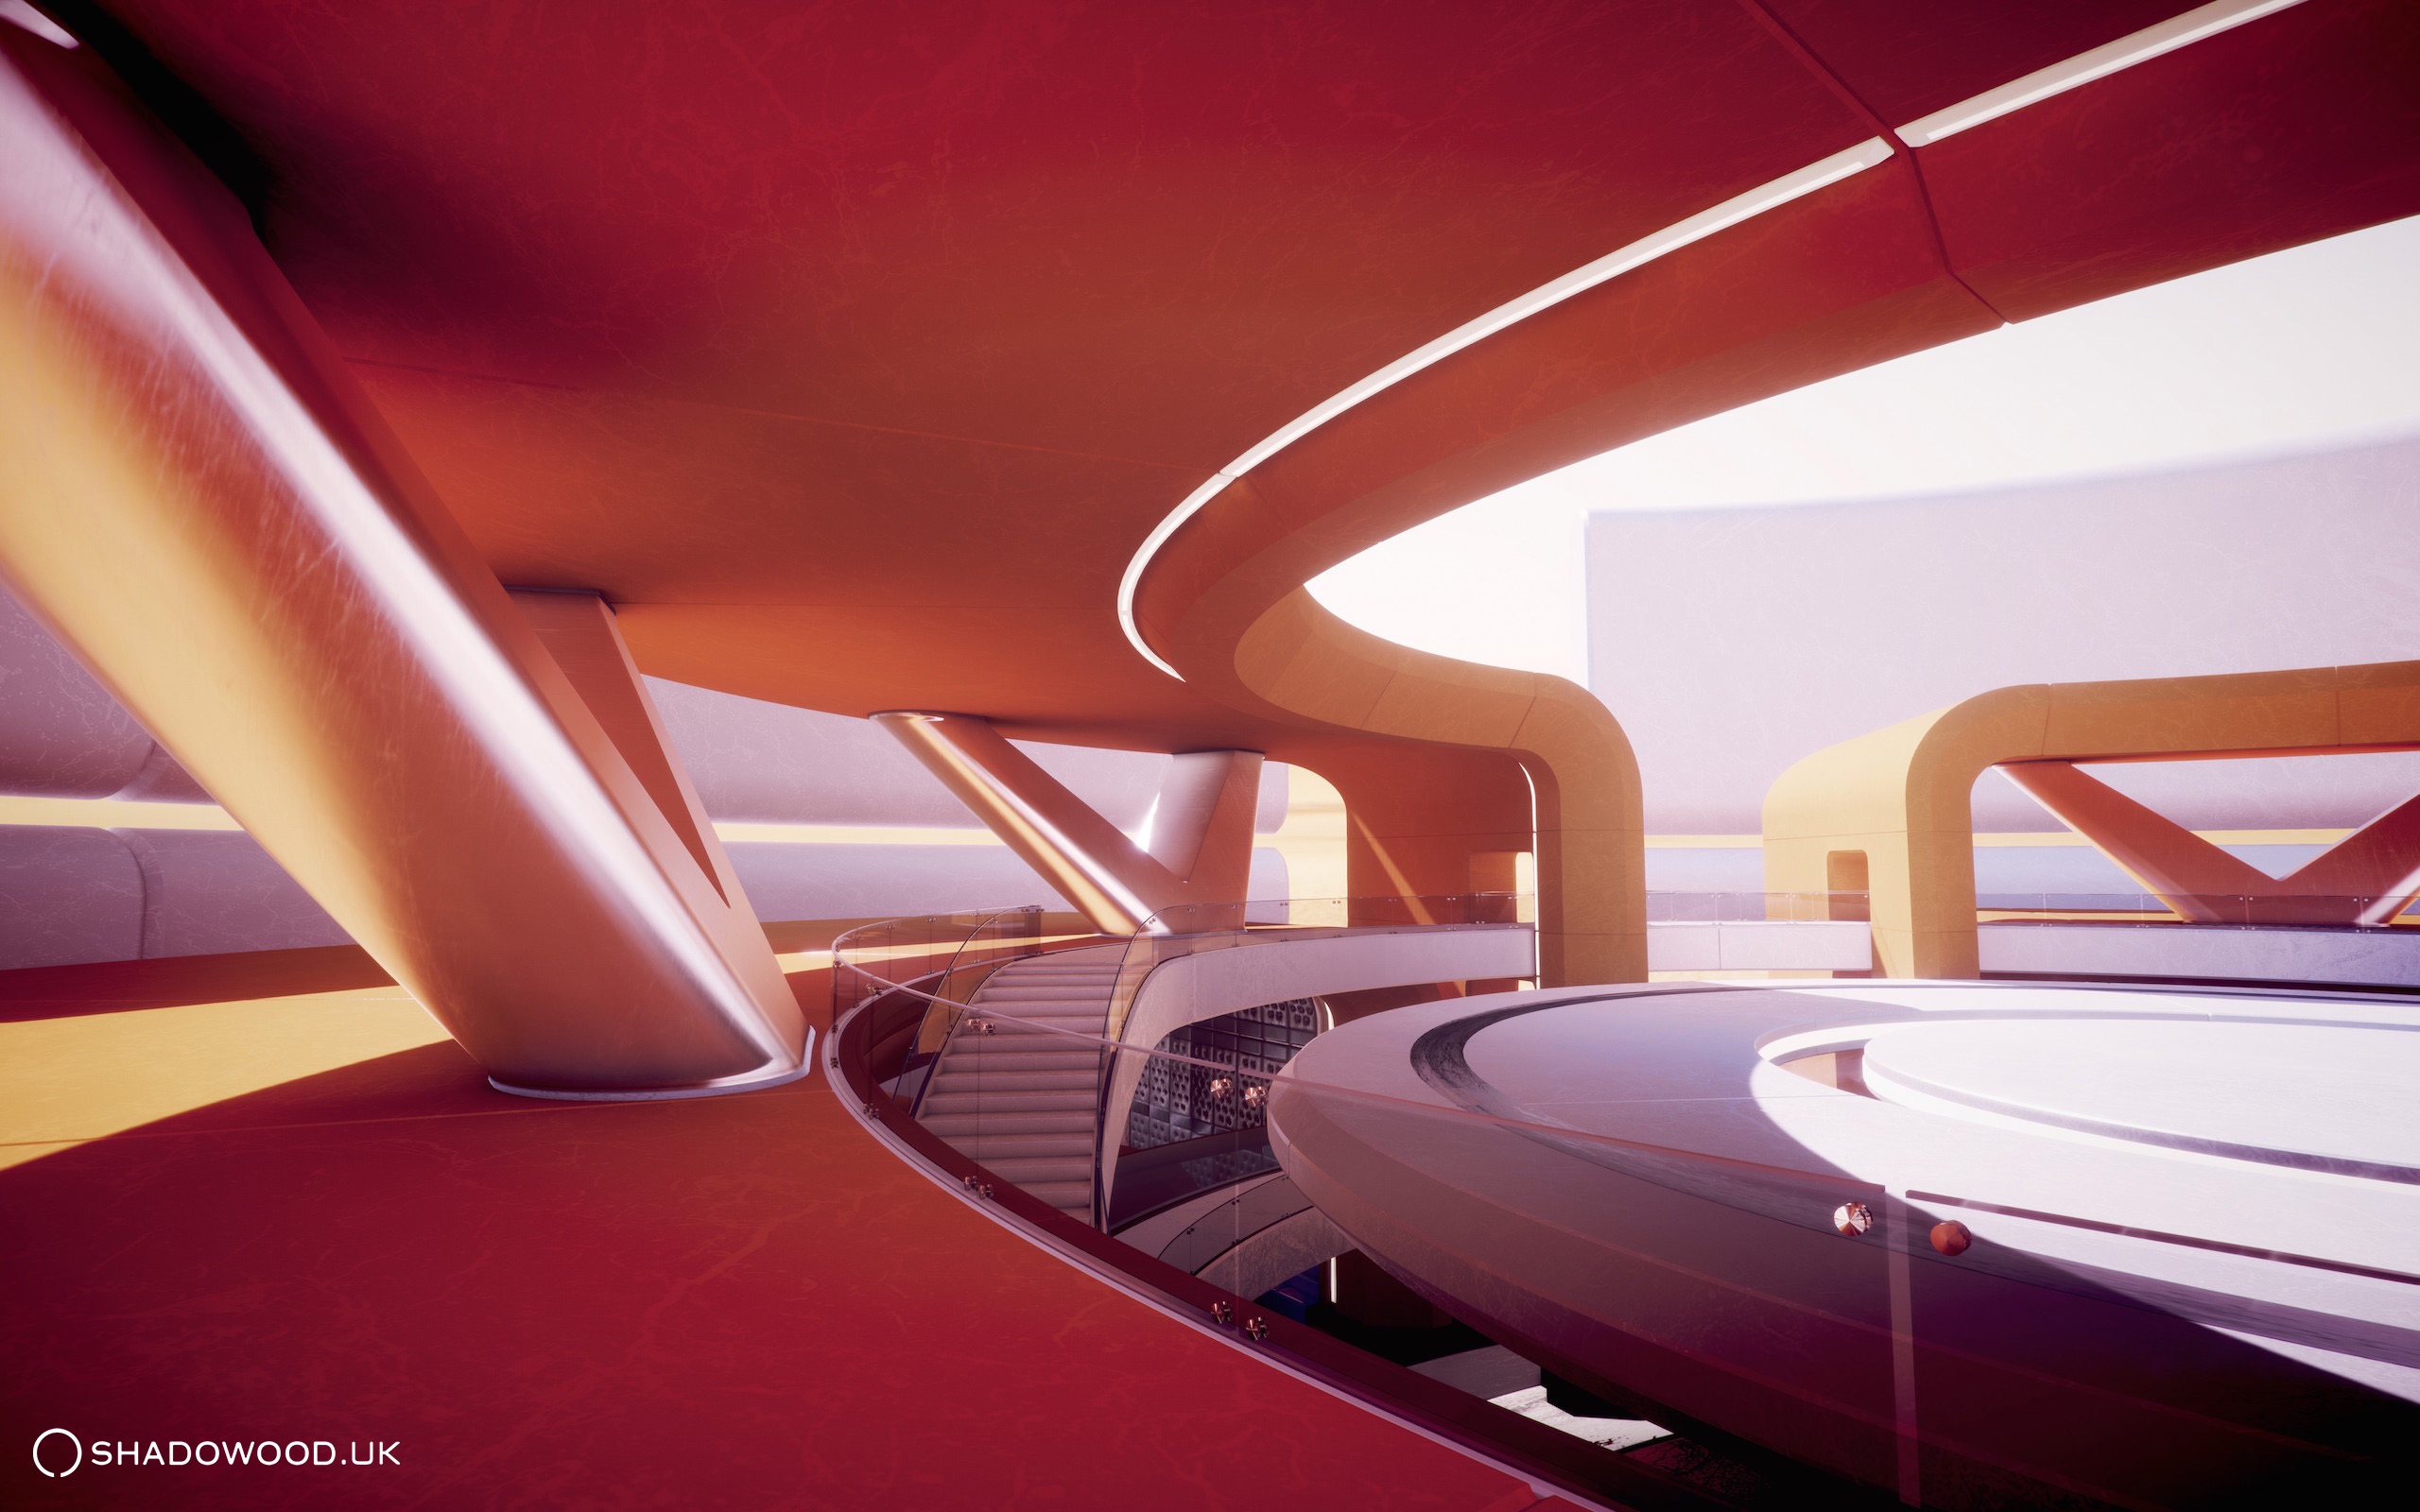
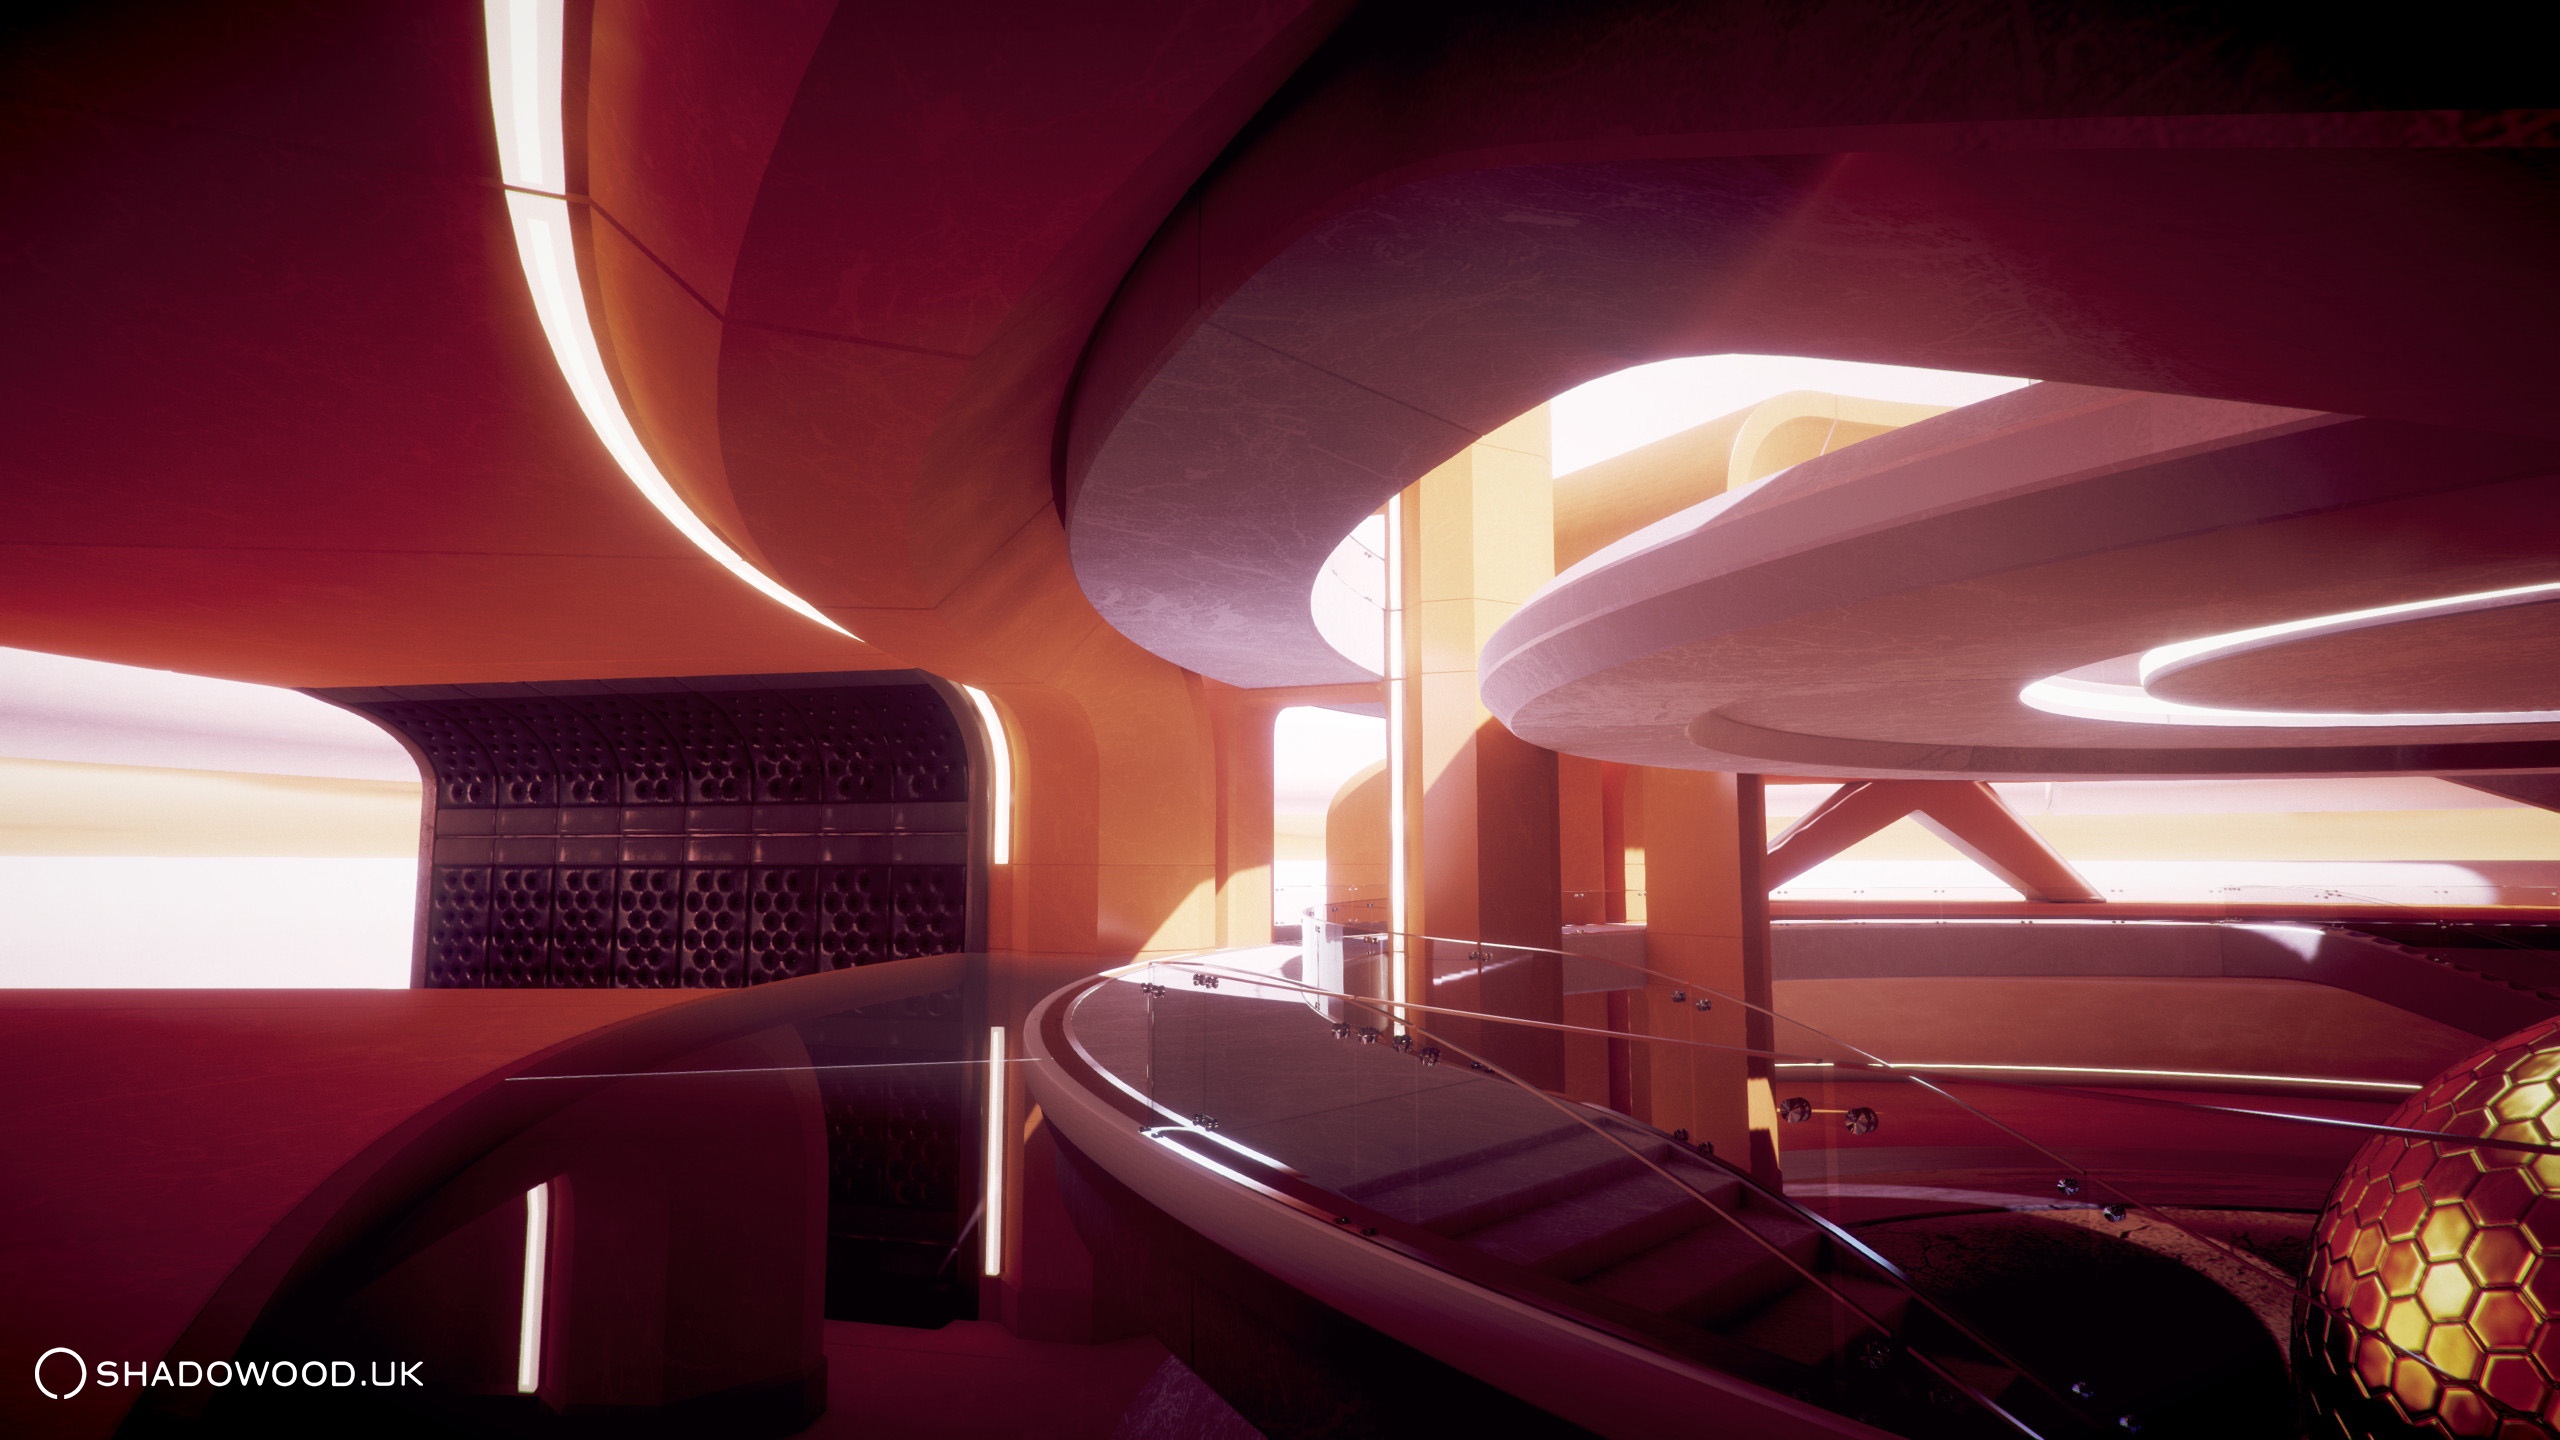
These renders by Me in Unity using Candela, note in Unity 5 I could not get masked specular reflections or masked roughness to work ( as it needs update to Candela ), but even so still stunning.
Also these are realtime GI for the sun light ( so it can move during game play ) and baked GI for the area lights.

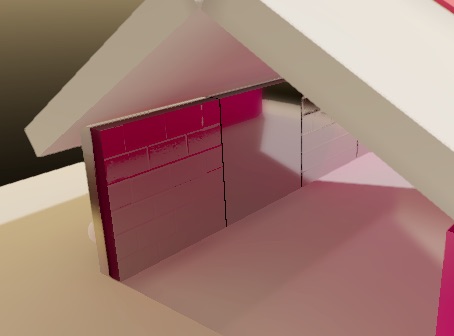
Humble beginnings with a simple 'house' model
:-)
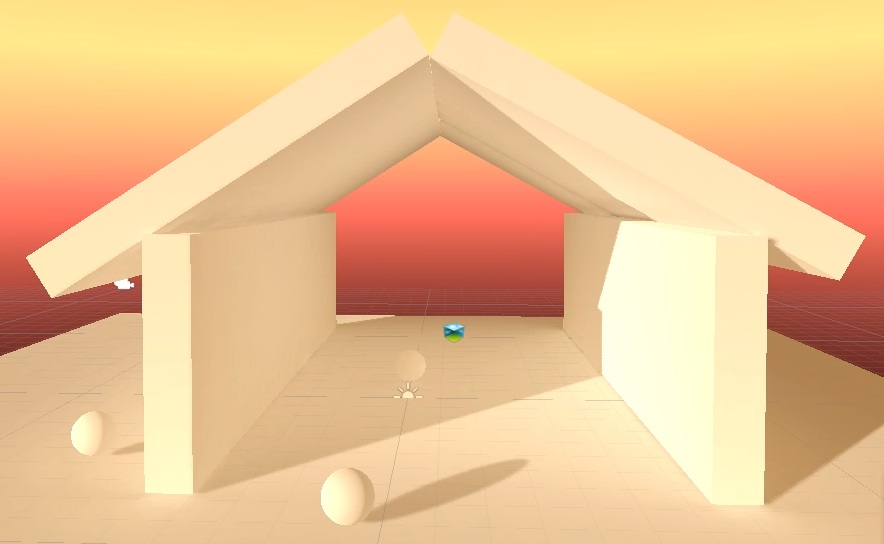
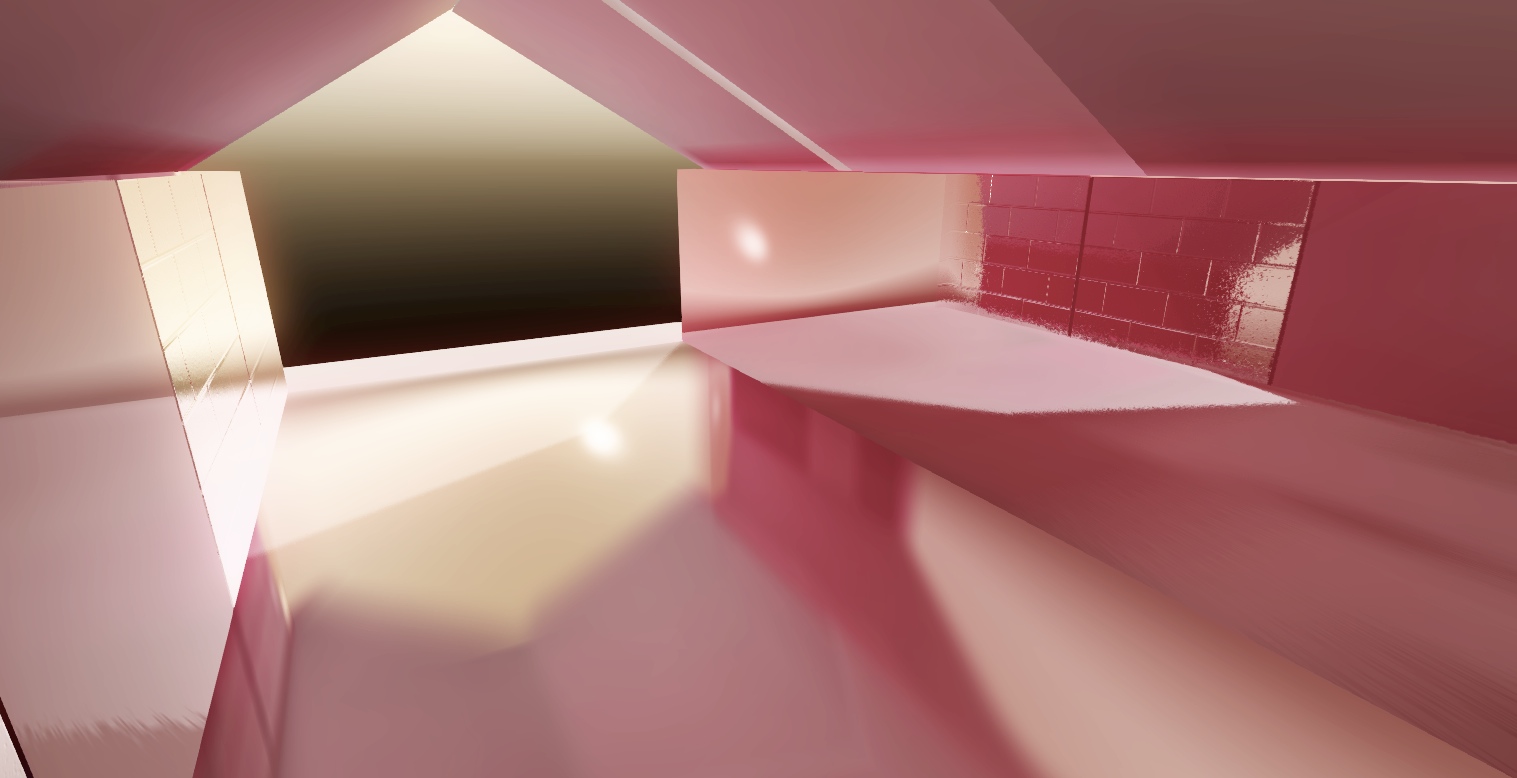
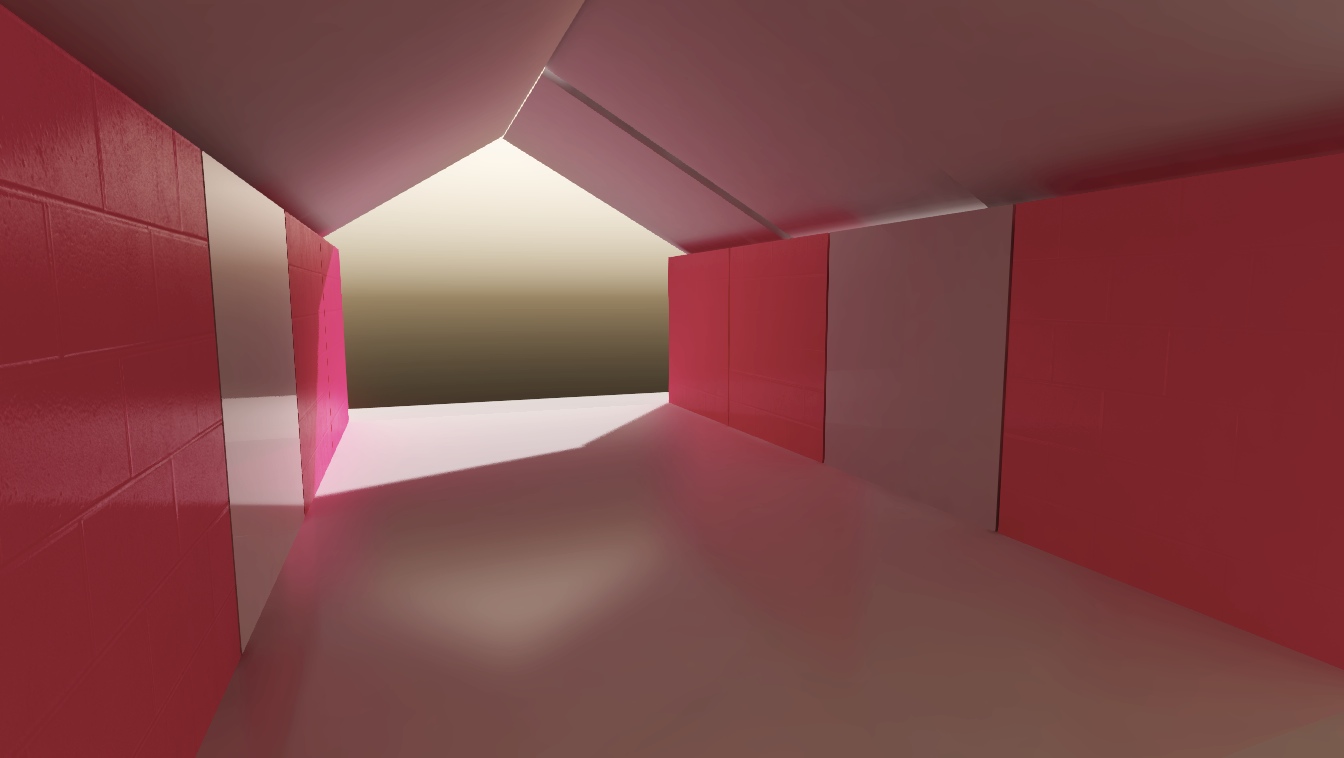
Ok lets try something more ambitious, a whole house!
No uv mapping was done so this is all realtime GI as the baked GI just goes nuts if you don't uvmap everything properly. So it is a bit rough in places, but that can all be fixed with some effort.
And for fun animated spot lights in realtime GI with Candela reflections ( in beta they do not shadow other areas of the house properly yet )
Some things that do not work or are limited right now
1. Realtime GI is no good for shadows ( I have found now that it is actually, fancy that )
Realtime GI supports only Direct Light and Sky, so basically light coming in from far away, not moving inside your scene.
They will be adding in point light support by release I imagine, so a light can move around your scene and in realtime spread light around bouncing from wall to wall.
The realtime GI is very low detail, ( by default ) and will only captures the broad bouncing of light for ambient lighting effectively. If you want detailed penumbra shadows you have to set the precompute res high.
2. Realtime GI cannot go ultra high res even at slow FPS ( I have found that it can actually )
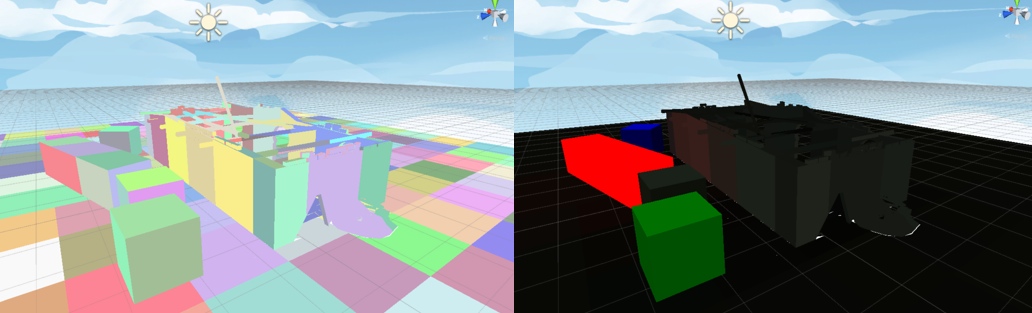
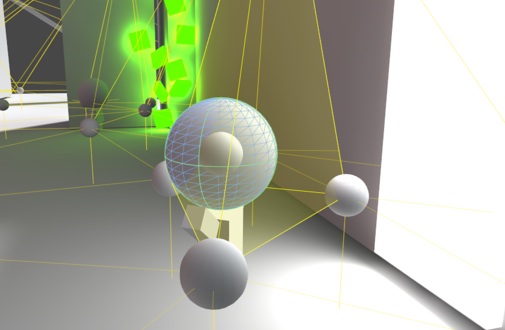
You can set per objects GI settings here:

Too large clusters will result in light/shadow bleeding and too small clusters slow down the precompute.
The Irrad Budget improves the quality when set high.
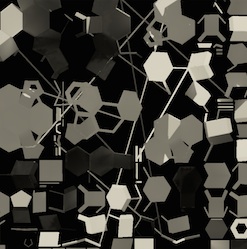
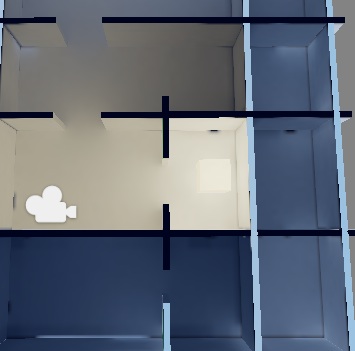
You can visualise this in the scene with 'GI - Clustering' and 'GI - Lit Clustering':
3. Area Lights in Reflections
Unity guys say "Area Lights might come after 5 is released" the scope of this statement I think belongs to seeing them in reflections.
FYI the guy at ShaderForge showed off a Shader for showing Area Lights shapes in reflections with blurry reflections very nice, but a bit jacky till Unity open up the engine more.
I think it may be similar to BG Light Engine already on the asset store, though people say it fails on Mac: and has been abandoned:
Link: www.assetstore.unity3d.com --- 16483
4. Limited shapes of Area Light for Baking AND Cannot bake light cookies 2D or 3D
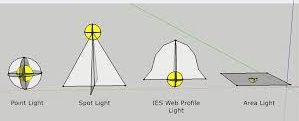
The lights you can bake are limited to Direct, Spotlight, Area ( 2D rectangle only ), Point ( with 2D cookies, 3D cube map cookie not working yet? )
So you cannot create a capsule, cylinder or sphere, shaped area light. Saying this you can make a mesh emissive and it will spit out light into the world, but it will not be accurate for shadow casting like an area light. You cannot put a cookie or image/light gel on the area light but you can on a spot light. It has no options for how direct or straight the light is coming from an area light, it just has some kind of default setting. Ideally you should be able to specify how sharp/straight the light is coming out, ultimately a very straight light coming from an area light would act like a laser beam, but in more practical terms it would allow you to say how sharp looking / or diffused the light is scattering. This is useful if you don't want to have to model things around your light to block it creating straight shadows say for down lighting. An approximation of this might be possible with light cookies though but light cookies ATM do not bake ( they are adding support they say )
FYI when making an object Emissive it can update the GI in realtime but not with the Standard / Unified Shader yet, you need to use Legacy Shader with Legacy Deferred Rendering. I think this means the shader can change colour while you are playing like play a movie or anything. "The reason for material changes not being picked up automatically at runtime is that tracking this data is currently expensive. We are looking into ways to make it cheap and automatic."
FYI UE4 Can do Capsule shaped area lights
I also don't see any support for blending between 2 cookies based on distance, so one blurry. UE4 Does this so you get a nice fall off.
The only thing that angers me more than this is the fact you cannot eat light baked cookies either
5. IES Type Lights
Cannot do IES type effect like this yet ( UE4 can ) though Unity said they are adding later some day... one day:
In theory once you have cube map cookies you can fake a IES like effect and they said they are adding that soon... well at least for 2D cookies *fingers crossed for cube map cookies*
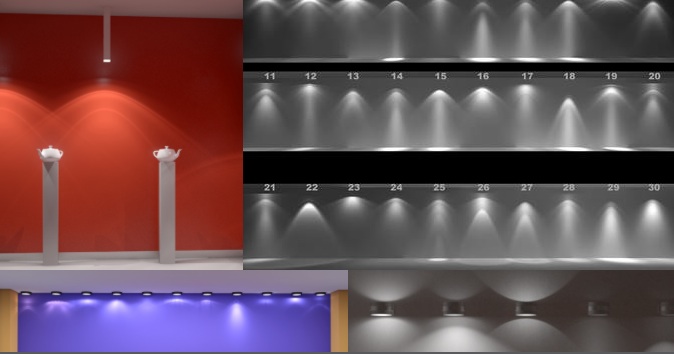
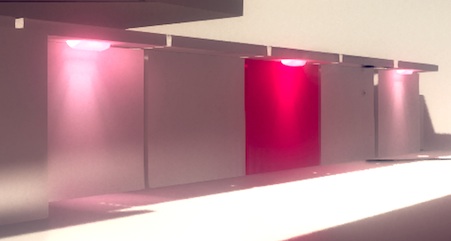
I somewhat faked the effect below with 2D cookies on realtime lights mixed with a normal area light for the GI
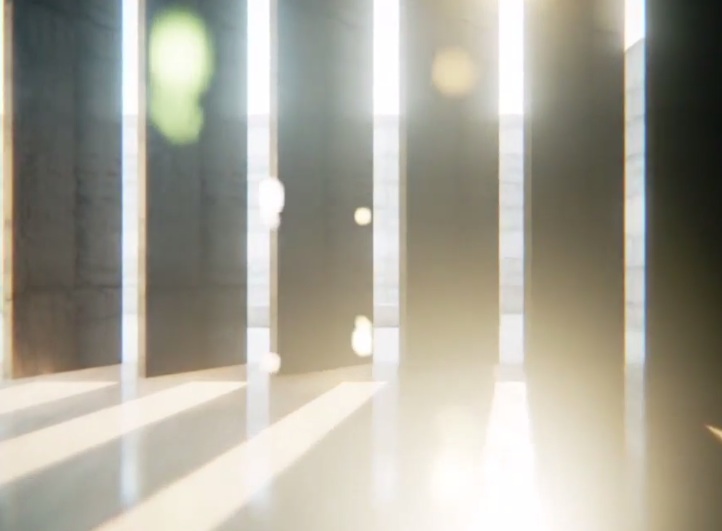
6. Crepuscular Rays ( God Rays / Light beams )
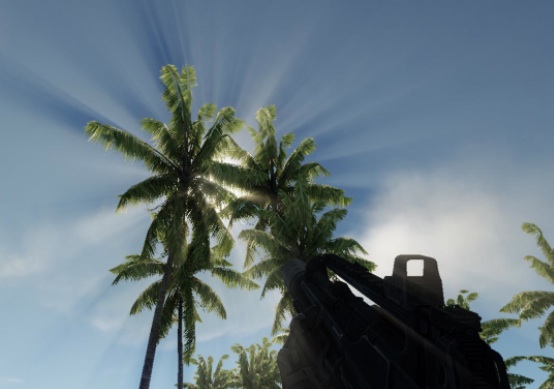
I cannot find a good way to do this in Unity yet
:-(
Ah found one by someone who works at Unity no less, Mr Robert Cupisz
Link: github.com --- LightShafts
This I suspect is the one used in the Unity 5 video show real
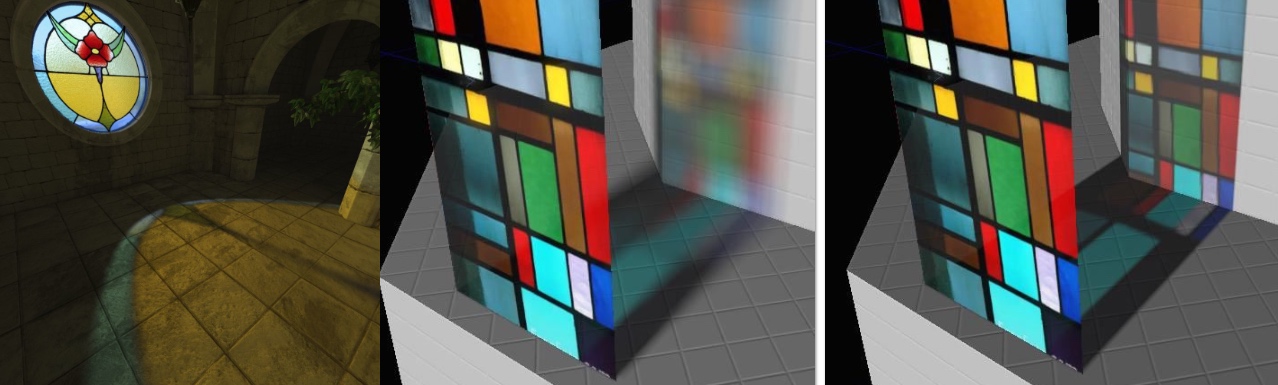
Below done in Unity
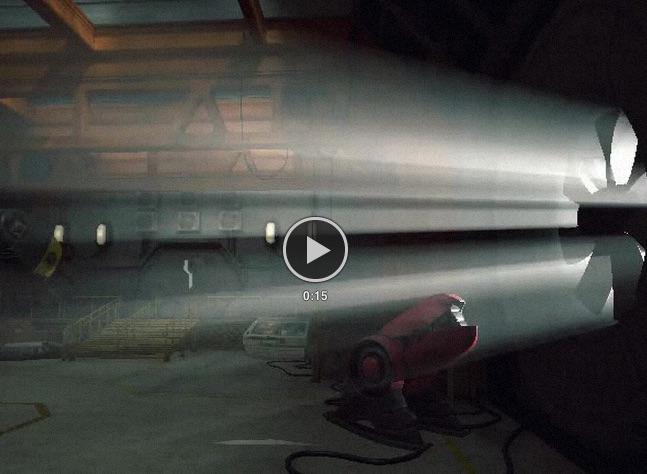
It Works with directional and spot lights, user-defined attenuation curves, cookies and color filters (stained glass kind-of-thing). Works on dx9, dx11 and opengl on osx.
Some other material on the subject
Dynamic volumetric lighting and shadowing with temporal upsampling
Link: sebastien.hillaire.free.fr
7. Motion Blur and Vector Motion Blur or Local Blur
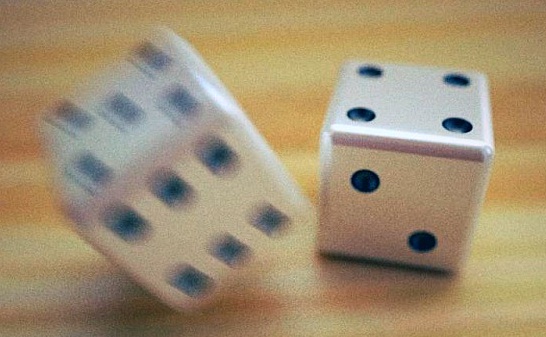
Unity has a built in motion blur that works when the camera moves, simple. But for objects moving around you need Vector motion blur which is provided by:
Link: amplify.pt --- amplify-motion
8. Baking is a Total Nightmare
For custom meshes. You will want to kill yourself. The realtime GI is fairly forgiving but baked GI will show up all the errors and then some.
I find it hard to believe the new GI suffers just as bad with seams as the old Turtle Beast powered one. Surely this is a basic thing to solve with math and cleverness.
As if UV mapping isn't torturous enough, but now you have to UV map really really well. If your UV faces are not perfectly joined together it will result in terrible glitchy ugly baked lighting.
It is so bad and so crippling I MUST be doing something wrong.
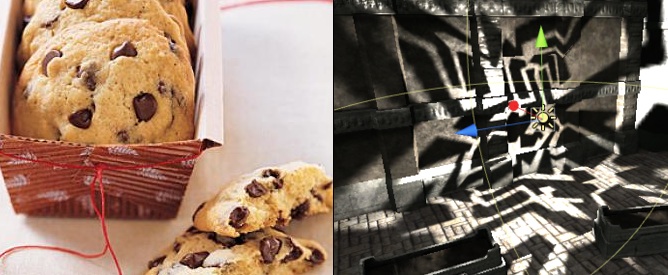
Even at max settings I don't think it is good enough to pull off things like this ( UE4 ) look at the subtle shadows and how tight and sharp they are around the legs of the chair. I could be wrong, the subtle quality here is staggering, Vray like quality.

To be fair I have not played much with these settings which may hold the key, but have found very little explanation of them. And having just played with them a glitch went away in a troublesome area but I have no understanding of what I am really doing other than randomly changing things and hoping for the best.
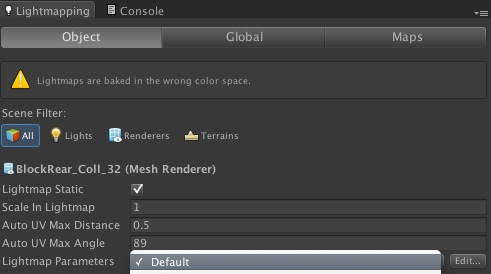
If you edit that Lightmap Parameters it is saved as a separate file in your project and looks like so:


And whoever wrote the UV spacing code should be violently eviscerated:
Though Enlighten this year have been showing off "AutoUV tools that automatically generate low-resolution UVs, removing the need to author any simplified geometry." So maybe this is relying on Unity's UV unwrapping which is shocking apparently.
Key take away is to never have long thin sections of UV, say you have a really wide but narrow cylinder. Break the UV into separate pieces, but this creates seams in the lighting!!!! so better break the model up into separate pieces and pretend it was some kind of building limitation say they can't make pieces of walkway bigger than 8 meters
:-)
Oh screw you, how can it be that bad. No I do not have any weird overlapping polygons, or bad UV's
Hours of baking at high quality and still this nonsense.

This is what happens with lots of long thin UV's this is the built in Uv mappers idea of how to do the job:
What might help is if I could have used the Generate Lightmap UVs' option on import, With my more complex scene that just crashed. When it was working, it was hit and miss, difference being with no way to fiddle with it if it did screw up. This would be more useful if you could set import options per sub object in a huge file, not just for the whole file. I did'nt feel like splitting my scene up into a million FBX files naturally that part is that UV map is out of your hands, as it is a combination of every object in the scene and you cannot manually edit that.
9. Waiting... Waiting...
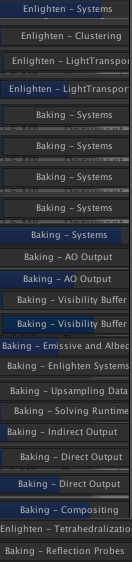
The above is all made worse by the fact it shows multiple progress bars with no clue as to how many are left, you keep thinning oh It's nearly done, then boom another progress bar. The only pass It's missing is Reticulating Splines
You will be waiting for GI baking a lot, even though it is realtime, it has to bake the light volume which can take a long time still. This is on top of waiting for any normal GI baking to happen as well, so you have to wait for 2 bakes often.
In future they are adding PowerVR realtime GI it is only used for the editor view ( in demos they have shown so far ) as far as I know so you can get an nice interactive view of what's going on while you move things around THIS IS A HUGE DEAL, as it makes the workflow much more iterative without moving a wall.. waiting... move a wall again... wait. It resolves over a few seconds so is not aimed for dynamic use while playing a game but makes sense for the Editor.
Enlighten have been talking about "Support for GPU Compute, including running Enlighten as a background asynchronous compute task."
So things will continue to advance, Enlighten reaches a some what unique compromise that has the best quality realtime-ish GI with the trade off of having some precompute and not being able to only have some things dynamic.
10. Subtle wavy Reflections
You cannot have subtle smooth ripples in a reflection like this ( CG render ):
Due to inaccuracy in normal map / and or the Candela SSR post effect. It may be possible in cube mapped reflections and such though, I need to do more testing.
It does indeed seem like this is a limitation of Candela itself
11. Cubemaps / Reflection Probes are terrible for walls and floors Don't even bother
You have a few ways to tackle reflections now
Camera Reflections
Good for mirrors and other large flat surfaces, it uses a second hidden camera to capture the reflection essentially, thus has obvious limitations and I guess doubles your original draw call count with each reflective surface.
Link: wiki.unity3d.com --- MirrorReflection3
Though no one seems opt have this fully integrated with normals maps, lighting and such, but it should be possible.
Probes
Samples a reflection from a single point in all directions creating a cube map, then any object near by can use that reflection, but the object will look as if it is reflecting from the position of the probe even if it is far away. So the solution is to have multiple probes, but this does not help with large surfaces like walls and floors as the reflection is not from a single point but along the entire surface, and when you move from one probe to another it will jump suddenly. Unity may improve this and add blending between different probes so it is less jarring but even still it is limited to use on scenery objects and character really. Probes can be updated in realtime to reflect dynamic objects or changing in lighting, but that could get expensive with high res and multiple probes.
Box Projection
Next step up from probes you get box projection / parallax corrected cube maps. This uses takes a probe and projects it onto a box then uses that box a the reflection. So if you have a box shaped room all the walls can reflect the floor and the floor will reflect the walls quite convincingly, however it will not reflect anything in the middle of the room, and currently Unity only supports box shape which is incredibly limiting. It also has a problem with thick walls as the reflective objects need to be completely inside the bounding box so your reflections can never align properly in this situation ( they are working on this ). It also suffers the same problem as probes when you move from one probe to another it will jump suddenly. Again these can be updated in realtime but it gets even more expensive, which might be a deal breaker if your lighting changes a lot. Say an animated fire or a blinking light would totally throw it
Image Proxies
Added on top of Box Projection and you get some nice benefits, higher resolution, realtime updating of animated effects like fire, but you have to manually author all the planes to reflect, and it can be expensive for the shaders. Unity were looking into this but are leaning towards SSRR and friends. You can also fake a kind of occlusion where characters in your scene mask reflections by turning them into lots of little billboards.
Link: www.fxguide.com --- game-environments-parta-remember-me-rendering
Enlighten Reflection
Not tried this as it is not in beta yet, but Enlighten can recreate reflections from the data gathered during there GI calculation. This should give good general reflections of objects in all directions I think, but at a lower resolution. This will not reflect dynamic objects but will update with changes in lighting.
PowerVR Raytracing
They will be adding this at some later point after 5's release. It is capable of full raytracing so that includes reflection amongst many other uses. However it seems Unity are only licensing it for the lightmap creation in editor. PowerVR also make the mobile gpu chips in your phone so this would work on mobile too ( high end though I suspect ) This is completely dynamic and awesome and thus probably quite expensive and not coming to Unity as far as I know or at least not for a long time?
Link: blog.imgtec.com --- implementing-hybrid-ray-tracing-rasterized-game-engine
Link: gamasutra.com --- Practical_techniques_for_ray_tracing_in_games
SSR, SSRR
Candela is the current go to Screen Space Reflection tool for Unity, they are also working on a 'Total Reflection' package that sounds interesting.
But as eel las this Unity will also be working on own SSR solution, expected around Unity 5.1. SSR creates fantastic reflections but can eat your GPU all up as it runs and updates constantly in realtime. It is limited to reflect only objects currently on the screen, which can create some odd visual problems depending on the shape of your geometry. It can create fantastic blurry reflections where it gets blurrier further away from the object.
Area Light Reflections
Shaderforge and Livenda are working on reflecting area lights, even an area light with an image on it so you can reflect a neon sign from behind you and such. This lets you have basic primitive shapes like spheres, rectangles and capsule shapes reflected. I think the main limitation is these shapes are not occluded by objects between the light and the reflective surface. This can update in realtime but is limited to reflecting lights and basic shapes not geometry.
The End goal is to have it blend between all of the above using data from one solution when another fails. Unity will be working on something for that and I suspect so will the guys at Livenda with Candela / Total Reflections and SpectraGI.
Enlighten have been talking about "Improved support for probes with automatic placement and visibility-aware interpolation."
Below basic reflection probe cube map, ok for scenery objects and characters but disastrous on walls and floors:
Box Projection shown below you can see it is giving a good impression, not perfect you will get alignment issues, and it is limited in usefulness to corridors and other cube shapes but a good tool to have.
This has the benefit of running very fast inc mobile, and will work nice in VR.
Also ignore the terrible textures and lighting
:-D
It is pretty limited, think in terms of if you have a room this will help reflect all 4 walls and ceiling wonderfully, if there is anything in the middle of the room, it breaks, if it is not a rectangle it breaks ( not sure if they are adding other shapes )
But when that fails the theory is you can blend it with other reflection method where needed, such as SSR for things currently in the screen to reflect ( either Candela or Unity is writing custom SSR for one day in the future ) or the Enlighten system can actually be used to render reflections as it stores various data from the lighting process, this is a form of dark magic I cannot understand, and it is not in the beta yet, but will be added soon. I suspect it is limited in resolution but can reflect things behind you nicely.
In regards to doing mirror like reflections on planar / flat surfaces:
Link: wiki.unity3d.com --- MirrorReflection3
Right now the box projection is limited to eel, a box shape, not sure if they are going to expand on this with Image Proxies and more complex shapes as otherwise it is limited to very basic scenes. More info on Image Proxies and such here:
Link: www.fxguide.com --- game-environments-parta-remember-me-rendering
You can start to see the limitations here, as the end of reflection box here means anything outside this house will reflect flat, so that sphere is capture as if it is part of a flat wall at the end of the home, hard to explain easier to see in motion.
Also note the floor is blurry on purpose you can change how blurry the reflection is per material.


You Can reflect reflective objects too if you need, though don't expect miracles
And without reflecting reflections below:
Note how it screws the floor up when you reflect reflections, thankfully you can exclude objects from reflections so I can just exclude the reflective floor: and leave it reflecting the walls
Changing viewing height works too
And here with some better lighting and materials
:-)
The reflection of the walls in the floor are not quite aligned due to a current limitation which should be easy to fix
Lighting here is all realtime GI, though if you change the lighting the reflections will not update, I think they were looking at realtime updated reflections but have canned it for now, not sure
Note how I have a separate piece of floor only inside the house and only that part is reflective, it would break the illusion and look terrible if the entire floor was reflective in this situation.
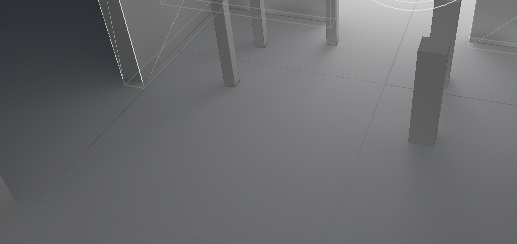
Also if we had a column in the middle of the room or something that would ruin it
I think the plan is Unity will be making own SSR solution that will tie into this and it will blend between the two
YI here is more on Parallax Correct Cubemap Box Projection goodness
A Unity asset called Reflection Manager:
Link: www.youtube.com
Link: www.assetstore.unity3d.com --- 17616
Link: forum.unity3d.com --- released-reflection-manager.246946
Link: forum.unity3d.com --- 230523-CubeMapper-Parallax-reflection-demo
And Marmoset are working on something too
Link: www.youtube.com
Link: www.marmoset.co --- skyshop
12. Unity fails to interpolate / blend between multiple reflection probes as an objects moves around
they just pop in and out very noticeably so I'm sure that's a bug? it works fine in UE4.. naturally
13. Indirect Lighting affecting Normal mapped/ Bumpy objects
Light probes which are meant to light up dynamic objects as they move around a GI lit scene so when in shadow they go dark, and so on. These seem to fail to light up the diffuse and specular on a normal mapped / bumpy texture. this means you get NO impression of bump/normal unless a point light is near by, if it is all lit indirectly it will appear flat.
Though aaaagin Enligthen have talked about "baked directional irradiance and support for normal maps."
15. Movie Export

Once you have made a lovely fly thru you cannot export a movie. Unless you export each frame as a PNG ( which is very very slow and seems to be in wrong gamma or something also! I have to set the saturation up by 30.. 30 what I'm not sure but it takes hours for a few minutes )
On Windows you can use AVPro for a fee. Sure you can capture direct from the screen but you will get a jittery frame rate, even if you can't see it I probably can and so can others with greater visual acuity, even if they just feel it looks like a game not like a movie or a nice render, pans will feel especially awkward.
Yah UE4 can do this... jesus
Also maybe again I have missed something, but after you have done a nice keyframes animation from inside Unity, you cannot playback or see multiple timelines / animations at once. So if you animated 2 objects doing a dance, you could only see one object at a time being animated as you edit the keyframes, making any kind of scene composition impossible / tedious beyond even my vividly sadistic imagination. What the hell Unity...
Script to capture frames to images, No audio then naturally, and the PNG output is not multithreaded and is very very very slow.
Link: wiki.unity3d.com --- ScreenshotMovie
16. Unified Standard Shader is Basic still
The all singing all dancing Standard / Unified material shader is lacking quite a lot, though I presume you can extend this system and it will be absorbed into things like ShaderForge shortly.
ShaderForge guy says "I'll make sure Unity's version of it is tightly implemented in a way, so that SF can use the same shader code, for consistency. will also make use of Unity 5s new systems, like the real-time GI etc, as well."
For one, no manual control of fresnel. No back lit materials like plastics or fake SSS or really fake SSS with light wrap around. No multi layer shader type stuff for Car Paint Laquer where it has both a blurry reflection and a sharp reflection along with particles reflection inside. Also needed for good Wood shader. You cannot change specular highlight separate from cube map.
16. Transparency Nope, Reflectance Nope
Below UE4
Light does not pass thru transparent surfaces. So your indirect or even direct light shining on a stained glass window will not cast a colourful shadow inside. You will have to fudgely fake it with a light cookie on a spotlight.
Though Enligthen have been talking about "Support for more flexible surface properties, including transparency where the degree of transparency can be set dynamically at runtime."
I have not seen a way to set how much GI bounces from a surface / material, and how rough that surface is scattering the light. So say if you placed a mirror and a light shines down on it, you cannot have it bounce more on that surface.
Given that Unity went with the more basic implementation of PBS ( versus how Allow shader and UE4 work ) you will have metals in your textures with a black diffuse, which would make it not bounce any GI the opposite of what you want. I could be wrong though. Though aaaaaagain Enlighten have talked about "Support for the latest physically-based shading techniques."
17. Materials
I may be stupid or have missed something obvious. But It would appear on import if I have 100 objects all using a nice material called Purple, it imports and I get 100 Materials that are all copies of that Purple, one for each object. This is beyond maddening. However if they did all reference one Material as you might expect. You would then complain that you cannot adjust the Tiling / Offset of the texture per object. And I can't quite fathom why this is the case for both of these things. Needless to say it makes working with Materials and offsets somewhere near the chew my own legs off end of spectrum of things I enjoy doing.
I must be wrong, as this is complete insanity.
And this isn't even to mention it fails to import the tiling scale and offset from C4D / FBX.. screw you, seriously, this makes me so sad *has a moment* I hate you Unity
Apparently the C4D FBX exporter has changed for better and worse over the years, like some kind of sad joke. So this could be blamed on C4D.
Link: www.cactus3d.com --- CDFBX
And every time I update the C4D it sits and opens C4D again in background taking minutes each time.. even though C4D is already open... go figure.
And importing the normals: seems to make things very bad for the GI so I have to check calculate:

Saying all this (glass half empty man here ) I am glad it can do this ATALL, I can change a model in my entire scene in C4D and it will get picked up by Unity, while keeping all the materials I have added in Unity, any positions I have changed and so on.
Apart from every now and then it will fail to update properly and I have to throw the entire lot out and reimport
:-/
18. Realtime Shadows are a bit Rough
You have 2 Shadow options in Unity, Hard and Soft. Hard looks terrible. Soft looks kinda alright most of the time.
There is no 3rd wonderful high quality option capable of penumbra shadows and such.
Unity is looking into improving the realtime shadows though, but who knows when
This is Unity's idea of 'soft' on the right, left Area Light shadow baked.
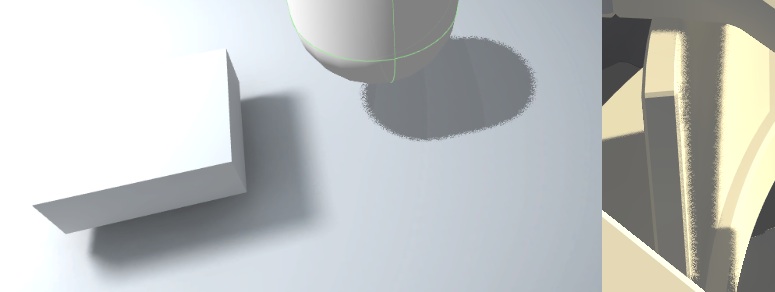
Maybe this is worth a look: Shadow Softener
Link: u3d.as --- 5pi
19. Lightmaps are HUGE
For what I feel is high quality they can take up hundreds of megs still as they are EXR's

If I ZIP up the resulting standalone build, it shrinks considerably, and yes I do have compression turned on. You can put the lightmaps into an asset bundle and then they get compressed similarly so that makes it not so bad in the end but is an extra step most will forget about.
20. Realtime GI Casting Shadow
I have been unable to have the realtime lighting affected by say a roof falling off a building and then letting light in. I know this is possible with enlighten so possibly a limit in beta for the same reason point light support is missing.
Indeed the yard looking to add this probably after 5's release once they have a sensible interface for setting this all up.
21. Baked GI Is Not Accurate Enough to Bounce it indirectly
In Koola's work he used indirect light by using white planes illuminated by spot lights thus bouncing and diffusing the light.
I tried lighting a whole scene with a really really really bright sphere in the sky, the realtime GI seemed to work ( albeit dodgy quality ) but the baked GI oddly did'nt work at all like it ignores emissive values above a certain value.
This seems like a bit of a bug, but even if it did technically work, I suspect the quality would be too rough or take too long to compute. You can also not set the bounce count of materials like you can with lights.
Though it should work much better bouncing a light off another object than using an emissive object, due to how much simpler the calculations are.
I need to look into this more
23. The GI is not Physically Accurate
When making objects emissive the size of your object / polycount and quality settings ( cluster size ) will actually change how much light it emits... that is so wrong, who wrote this GI code!
This does appear to be a bug, so this should be fixed by release
24. Most Unity Post Effects are Janky / Bordering on Terrible
The quality of most of the post effects especially Unity included ones is a bit rough / dated. Some things on the Asset Store are approaching nice these days. But for instance the post effects inside of a texture painting tool ( Substance Painter / Designer ) is better than what Unity does. Though I think they license Yebis
They are looking into this also.
Yebis Post Effects Middleware ( FYI Yebis 2 is really really expensive in the millions )
Link: www.siliconstudio.co.jp --- en
Best video example of Yebis, as website has a lot of old and really crappy example
Link: www.youtube.com
Link: www.overclock3d.net --- rendering_engine_mizuchi_tech_demo

This is adds up to making life difficult as out of the box even Unity 5 is ugly and dated till you find all the post effects you need. You have to go and research what asset you can buy to fix the problem. And the Asset Store is not always the highest quality either. Basic things like a Vignette are lacking. There's no reason why the community / asset store cannot fill this gap... but it hasn't yet. You open up UE4 and it looks gorgeous right away with all the post effects you would expect out of the box and setup with good default values. You open Unity 5 and all you get over 4 is a default light and skybox, a start, but you get no points for effort in the games industry.
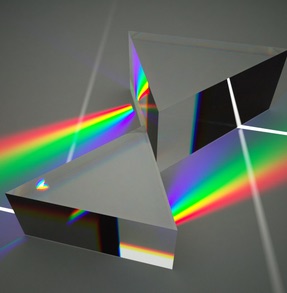
25. Refraction, Dispersion, Lazers!!!
And of course nothing fancy like light splitting in refractive objects and such
:-)
so no Lazors:-(
Unity are working with PowerVR ( they are behind some of the fancy graphics technology in your phones ) and they have realtime ray tracing that in theory can actually do all that exciting stuff. So although I put this here kinda jokingly this soon will be possible to some degree even on mobile.
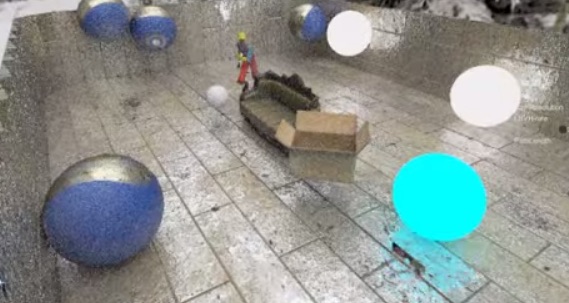
Article on PowerVR ( try really hard to ignore how bad the textures models and such are; and focus on the ray tracing and ability to do penumbra shadows, infinite shadow detail, refractions, correct ordered transparency, refraction, reflection and so on )
However it seems Unity are currently only planning on using it for the realtime Lightmap generation in the editor.
Link: blog.imgtec.com --- implementing-hybrid-ray-tracing-rasterized-game-engine
Link: gamasutra.com --- Practical_techniques_for_ray_tracing_in_games
Now instead of problems lets look at what we can do
:-)
Reflections Reflections
Unity are themselves working on a SSR solution, also Enlighten has some magic voodoo for using the data it gathered while calculating the GI for use in reflections, more on this when they add it ( I think will be part of Unity 5 on release )
Enlighten call it "Dynamic cube maps for indirect specular effects, giving high-quality glossy reflections with full mip-map support."
Not sure what that looks like in practice though, or if it coming to Unity any time soon but it sounds magical and automatic.
Till Unity get a handle on it we have Candela SSR / SSRR
Link: www.livenda.com --- candela_ssrr
Link: www.assetstore.unity3d.com --- 15851
Candela doesn't work very well in Unity 5 yet, I can't get masks and roughness masks to work so basically everything in my scene is reflective the same amount everywhere no matter what
:-P
It also fails to reflect the sky.This will be fixed though soon I'm sure.
This effect does not work well in VR Virtual Reality FYI
These renders below are also done with Candela with Unity ( but not by me )
These guys are bringing out a new package called Total Reflections ( code name ), and a realtime GI solution ( SpectraGI )
Some example of it rendering area lights:
Link: www.youtube.com

UE4 and Cryengine both have experimental SVOGI ( Sparse Voxel Octotree GI ) solutions. The SVOGI in UE4 got ditched given how performance hungry it is and they want to target consoles so now they are looking at LPV which even so that is disabled by default.
Guys at Candela say "The LPV ( Light Propagation Volumes ) solution being worked on for UE4 is not by any stretch a 'proper radiosity' system as mentioned by HappyCoder84, LPV suffers from many issues (light bleeding is very distracting if not taken care of or at least minimised) however it is still a good method for small levels. The biggest issue is Performance! forget about it, and is mainly viable on DX11 hardware."
Cons with SSR is it is Terrible for VR, and expensive to calculate forget mobile for now.
It can only reflect things already in the scene view, so you cannot reflect things behind or above you etc.
If you need fast reflections even from objects behind you then It's either crummy reflection probes or Box Projections, Parallax Corrected Cubemap. Unity just added these to Unity 5 beta but I haven't used them just yet.
These will work nice in VR.
Or use a basic / hack / Surface Reflection like so:
Link: wiki.unity3d.com --- SurfaceReflection
FYI here is more on Parallax Correct Cubemap Box Projection goodness
A Unity asset called Reflection Manager:
Link: www.youtube.com
Link: www.assetstore.unity3d.com --- 17616
Link: forum.unity3d.com --- released-reflection-manager.246946
Link: forum.unity3d.com --- 230523-CubeMapper-Parallax-reflection-demo
More info on Voxel based GI:
Link: on-demand.gputechconf.com --- S4552-rt-voxel-based-global-illumination-gpus.pdf
General Workflow Tips
Unity5 comes as standard with PBR shaders, though you can use PBR with Unity 4 with some of the shader packages on the asset store. There are 2 key types of PBR also, I'll have more info on PBR in the future though.
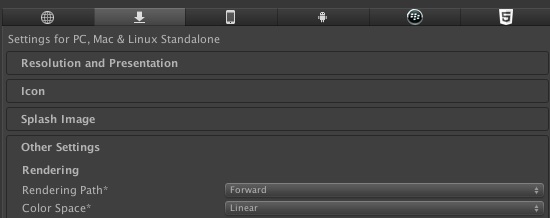
If you want to use PBR and you should if you want it to be realistic. You will also have to use Linear colour space ( Set in Player Settings ) and set HDR on your camera, otherwise you are wasting your time.

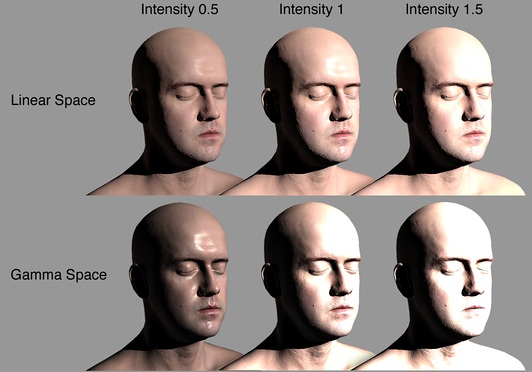
If you use HDR you also need to use tone mapping otherwise it will look rubbish. Tone Mapping is an image based screen effect available with Unity, and should be placed last in your effects typically:

Tone Mapping / Colour Grading is essential stuff, it is the part that makes stuff look all film like, or dramatic, versus a crappy CG looking render or a bad home video.
Your computer display much like a photograph can only display a small range of brightness value so you have to find a way to artfully squash the real world down into that space.
Film does this using chemicals tuned by eye for a pleasing outcome, different films approach it differently and give you different looks.
Then digital cameras came along and peoples photographs started looking really bad because they just crush the light down in a linear and boring fashion, they also suffered from having a very limited capacity for what brightness they could capture, so any bright areas would just clip to pure white. This is pretty much shoe computer games looked before tone mapping came along, and even now a lot of games get this completely wrong so we have people like ENB come along and try to help bandaid the problem.
Then digital camera's got better, and people started using Instagram to fake film like looks with varies success.
So the tone mapping techniques are different ways of squashing down the high range of brightness values that exist in your scene, into the small range of values your display can show. Instead of saying hey this is bright so make it pure white, hey this is even brighter so... make it pure white also = ugly.
Why a Filmic Curve Saturates Your Blacks
Link: filmicgames.com --- 190
Link: filmicgames.com --- tonemapping
the top row is Reinhard per-channel, middle is linear, and bottom is Filmic.

Here is Reinhard compared to Filmic
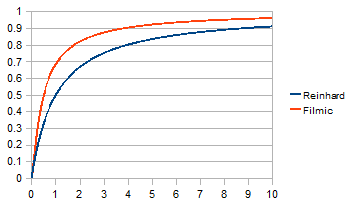
Here is a close up at the bottom end of the curve "That's the 'trick' behind the filmic curve. By the way, real film has been doing this effect for decades. That's what film purists refer to as the film S curve"
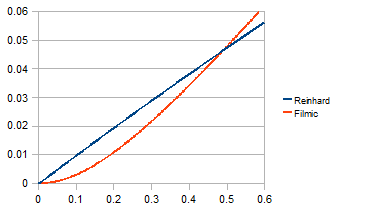
The Unity Tonemapper comes with a few presets and the ability to use your own curve. It includes this 'Filmic' curve calling it 'Hable', though it also goes by the name 'Uncharted2' for obvious reasons.
Also seriously consider using Color Amplify for Unity which uses a LUT to do It's colour correction and so works well on mobile too.
Here is a good article on the code to performing tone mapping and HDR auto exposure and such based on the same stuff:
Link: frictionalgames.blogspot.co.uk --- tech-feature-hdr-lightning
And Valves solution: for handling zombies on fire no less
Link: www.gdcvault.com --- %28103%29-Advanced-Visual-Effects-with
In use I have been more a fan of 'OptimizedHejiDawson' and 'Photographic'
Some more info on those here:
Link: filmicgames.com --- 75
Link: content.gpwiki.org --- D3DBook:High-Dynamic_Range_Rendering
Link: interplayoflight.wordpress.com --- readings-on-physically-based-rendering
Link: mynameismjp.wordpress.com --- a-closer-look-at-tone-mapping
Link: research.tri-ace.com
Link: www.slideshare.net --- ss-38733183
Delta Voxel Cone Tracing:
Link: www.tobias-franke.eu --- franke14dvct
Link: www.tobias-franke.eu
However Unity lacks an automatic exposure tool right now ( thought they are having a look into )
This is important when you go from outdoors in bright sunlight to dark indoors which can be 10000x brightness change, and thus you need to alter exposure intelligently, this is harder than it sounds.
I may look into solving it myself.
A Good Bloom is needed now to take care of those lovely over bright highlights HDR has provided you. Unity's built in bloom is not too bad:
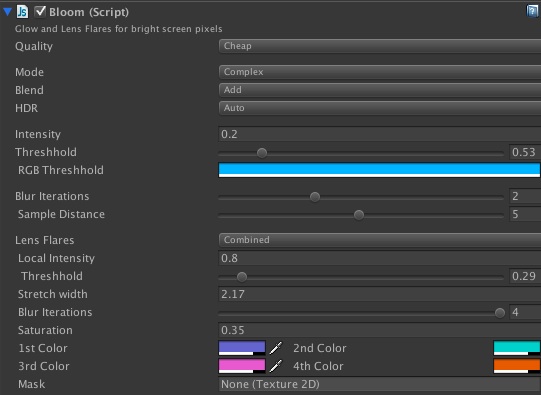
It supports a kind of anamorphic style lens flares, eat your heart out JJAbrams:
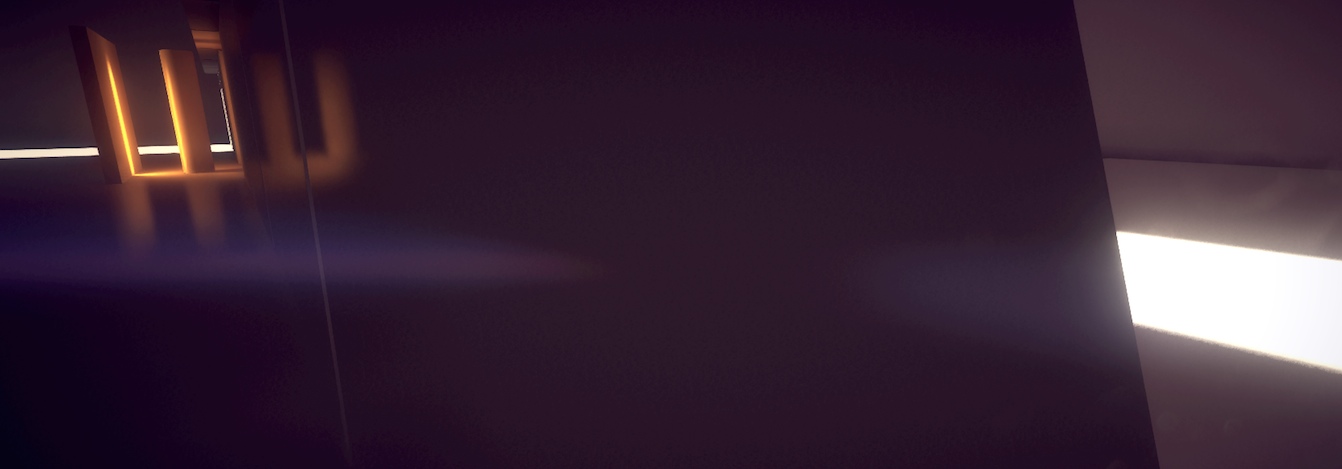
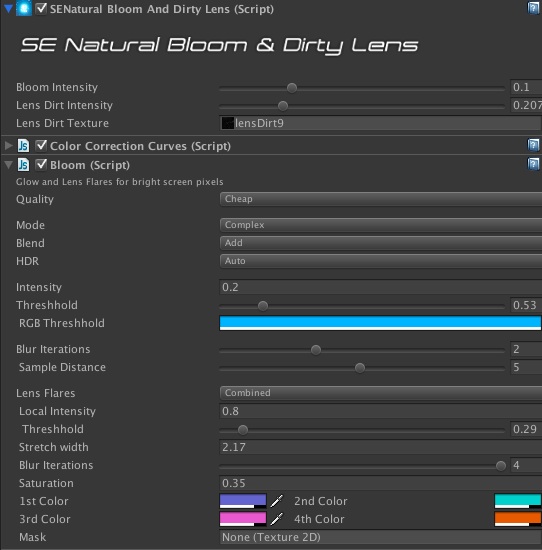
But for one better or in combination use SE Natural Bloom and Dirty Lens ( Sonic Ethers Bloom )
Link: www.assetstore.unity3d.com --- 17324
And another competing Asset:
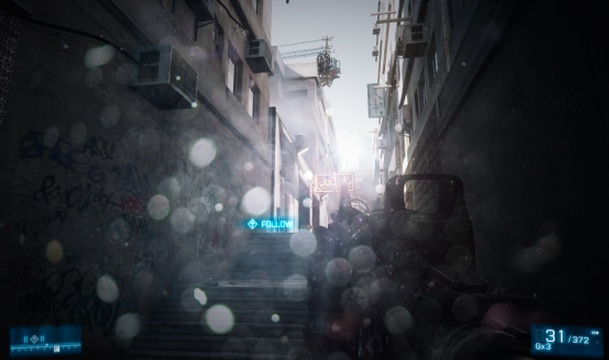
Lens Dirtines
Link: www.assetstore.unity3d.com --- 11915
This gets you nice Dirt lens effects as well as bloom, made famous by battlefield, which does it famously bad below ( Not Unity ):
And below in Unity, toned down to very subtle so it only shows up around bright highlights:
Color Mapping, Correction, Tone Mapping
One thing that works best after Tonemapping can be any colour correction.
I recommend Amplify Color ( though it is a bit broken in Unity 5 beta at the moment, it refuses to build for me but works in Editor )
Link: www.assetstore.unity3d.com --- 1894
Or you can torture yourself and try and use the Unity curves post effect, but you will age rapidly from using this.
Lens Flares
Not found anything really suited to this yet
Pro Flares looks pretty good, but it is not a post effect but meshes placed in front of camera, so will perform well but isn't quite 'next gen' like a procedural lens flare.
This would be amazing to have:
Realtime Physically-Based Real-Time Lens Flare Rendering
Link: resources.mpi-inf.mpg.de --- lensflareRendering
UE4 naturally has an amazing lens flare / bloom bultt in, even more impressive in motion:
This is also impressive but for After Effects, image below I created with:
Link: www.videocopilot.net --- opticalflares
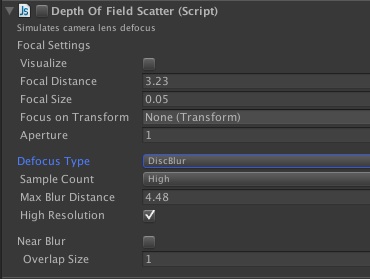
Bokeh / Lens Blur and DOF
Not played with this properly yet, I am using a normal DOF as I don't have DX11 on Mac, but If I were on Windows I think you can get a bokeh / lens blur style depth of field.

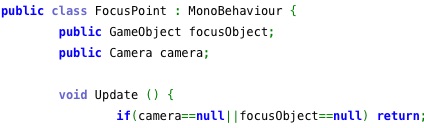
Regarding DOF I wrote a simple script to auto focus on whatever is in front of camera, very basic though for now:
Auto Focus Unity Script
Link: pastebin.com --- 3zgT3mZZ
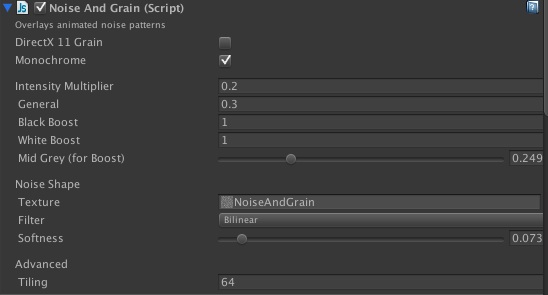
Noise and Grain can be a nice touch too:
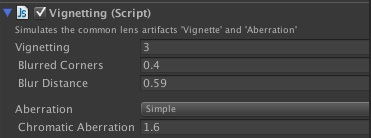
Mustn't forget Vignette and it comes with Chromatic Aberration which I think is misnamed as it appears more like purple fringing, if we are going to get pedantic.
Ok I have found purple fringing is a confusing subject. Typically light gets split into red and blue around edges of camera lens, though now modern high quality compound lenses correct this effect and get only a minor purple green shift. Both of these only occur around the edges of the frame.
I was confusing it with purple fringing which is a form of blooming which only happens in digital cameras and occurs across the whole picture not just in the middle and only around bright areas because of infrared light from the sky.
All of the technical naming aside, I personally think Purple /Green is not very attractive. I prefer the effect where the colours are splitting around the edges and you get a red/blue fringe which I think is traditionally what AAA games mimic.
Also the Unity Vignette is a bit rubbish, it appears to just blacken the image, it does not change the contrast so looks pretty bad! ( thought it works better in HDR mode inherently, which you should be anyway )
So lets fix the Vignette Shader to be not so rubbish, though to be fair I suspect the bundled Unity post / Images Effects were meant more as examples, but people keep using them in production code
:-P
Disclaimer, I am not a professional shader writer, but it looks pretty good to me so qualifications enough.
Open the source for it 'VignettingShader.shader'
And find this part:
float mask = 1.0 - coordDot * _Intensity * 0.1;
half4 colorBlur = tex2D (_VignetteTex, i.uv2);
color = lerp (color, colorBlur, saturate (_Blur * coordDot));
Then insert:
float Contrast = 0.7f; color.rgb = (color.rgb -0.5f) * (1f - Contrast*( mask - 1f )) + 0.5f;
To result in:
float mask = 1.0 - coordDot * _Intensity * 0.1;
float Contrast = 0.7f; color.rgb = (color.rgb -0.5f) * (1f - Contrast*( mask - 1f )) + 0.5f ;
half4 colorBlur = tex2D (_VignetteTex, i.uv2);
color = lerp (color, colorBlur, saturate (_Blur * coordDot));
You can tweak the Contrast value: 'float Contrast = 0.7f;'
Or add a slider to the UI if you so feel the need.
Comparison Before and After, see the contrast is only increased around the edges, not in the middle.
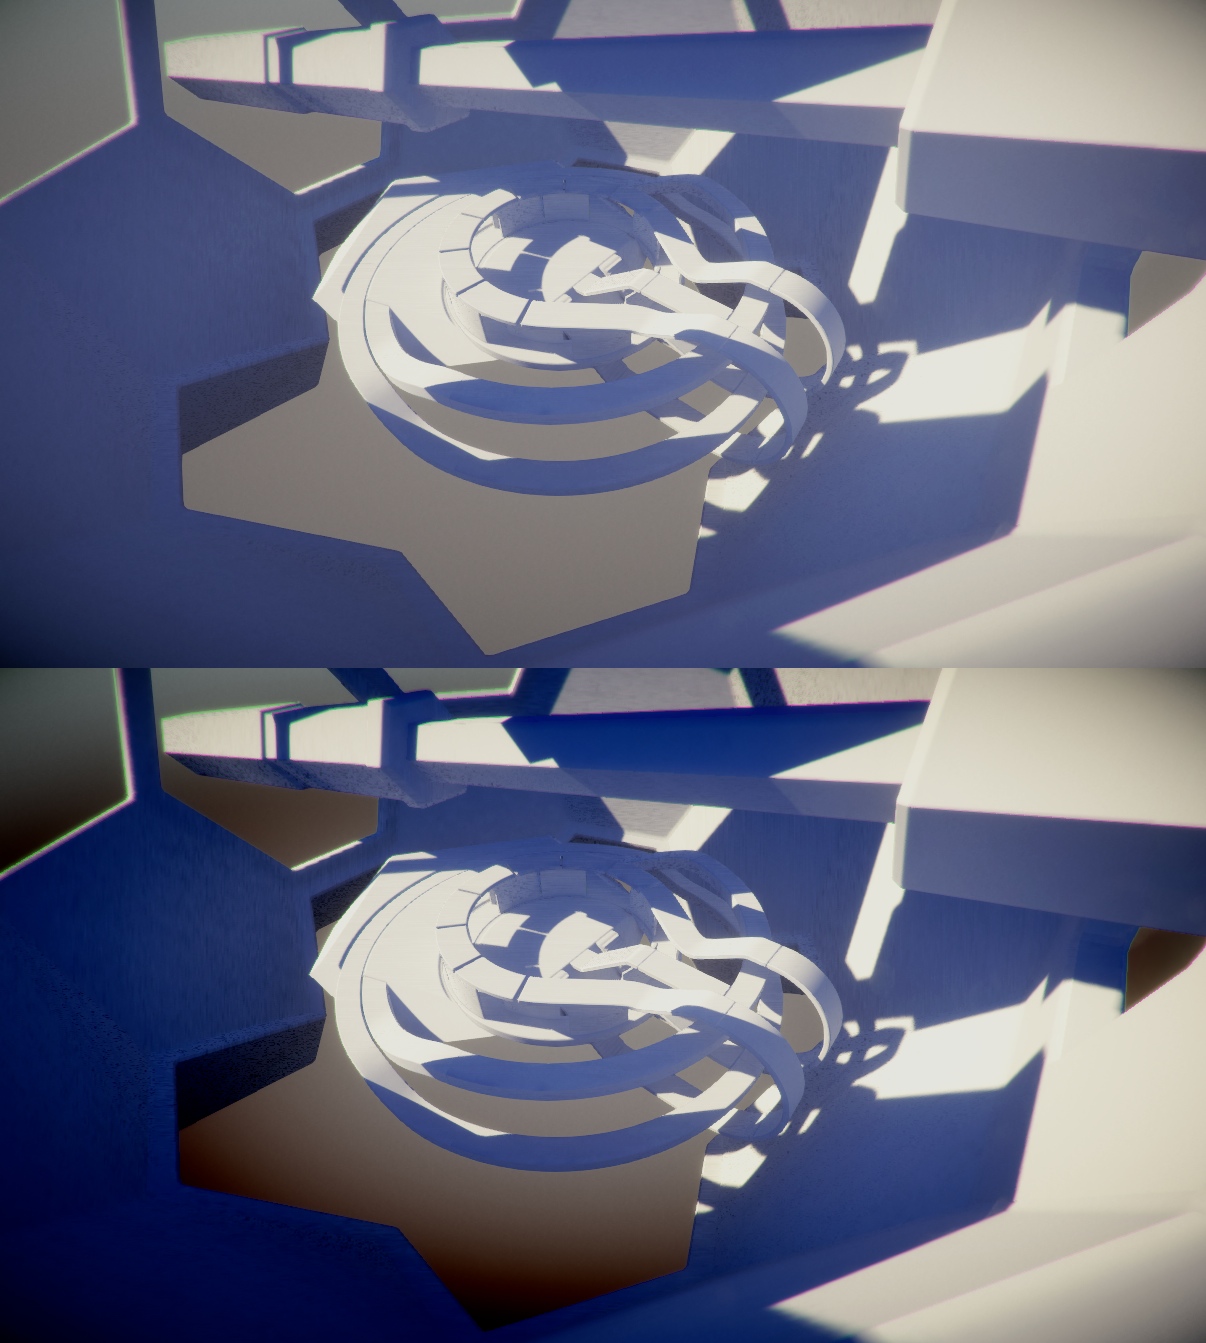
Can go one step further and push the contrast out to just the edges / corners by changing it to this:
float mask = 1.0 - coordDot * _Intensity * 0.1;
float Contrast = 2f; float ContPush = 0.5f; color.rgb = (color.rgb -0.5f) * max((1f - Contrast*( mask - 1f )-ContPush),1f) + 0.5f ;
half4 colorBlur = tex2D (_VignetteTex, i.uv2);
color = lerp (color, colorBlur, saturate (_Blur * coordDot));
This allows you to set the contrast higher but push it to the outer edges of the screen:
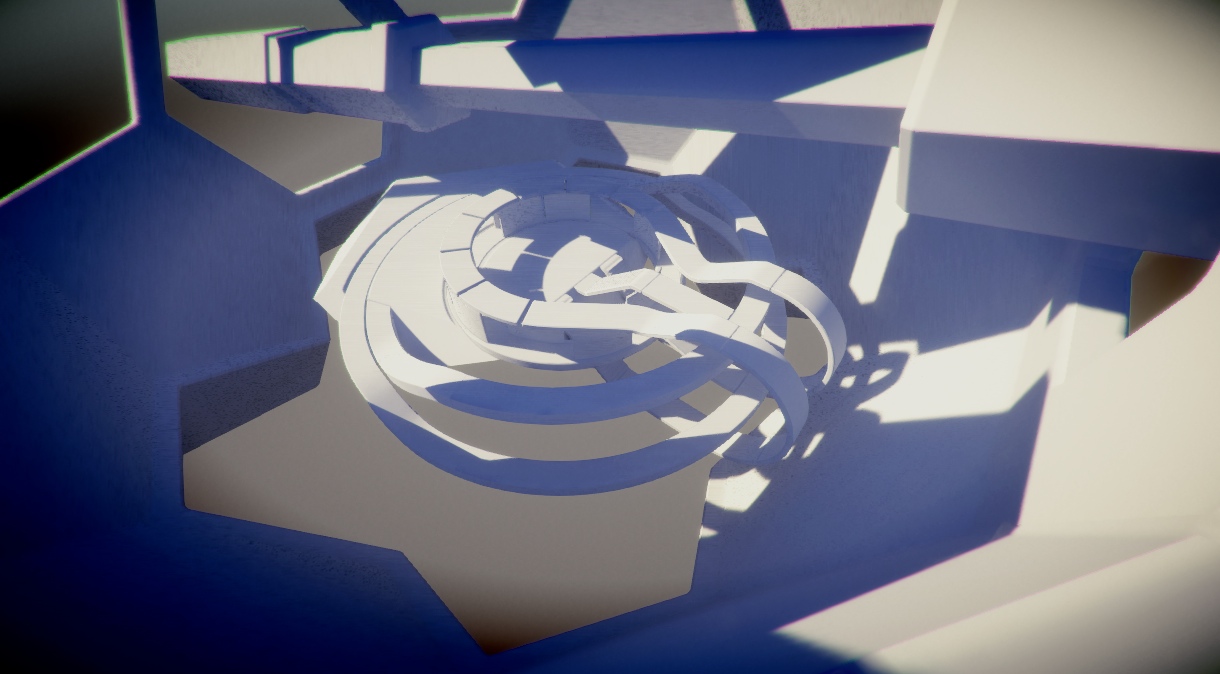
And to go even further lets add a variable to change how sharp the contrast change is:
Extreme example very sharp with a high ContSharp value:

Though typically you will use this to make it less sharp than before by setting the ContSharp to 0.5f so we get a nice smooth change in contrast into the corners:

Versus no vignette:

One last comparison for good measure, top new, middle old vignette, bottom no vignette
Anti Aliasing MSAA, FSAA, FXAA, SMAA TXAA etc
You can apply Anti Aliasing as a post effect. For instance if you use Deferred rendering or HDR the normal MSAA will not work. So you must turn that off here:
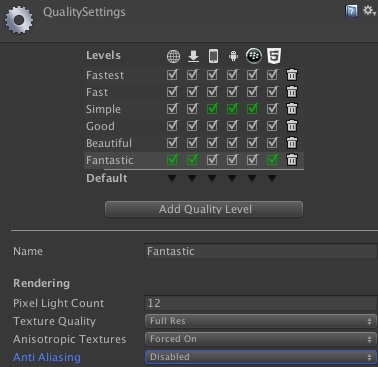
I think this should be the last Post Effect you apply in terms of ordering.

This helps a lot but it doesn't help AA the reflections or bright highlights in shaders / normals and such.
TXAA Temporal Anti Aliasing is all the rage at the moment and is present in UE4, not in Unity though
Link: www.geforce.com --- technology
For stills I often have 4 Anti Aliasing post effects applied, which is crazy and still doesn't give a smooth result in some places, main problem being bright highlights in shaders and such.
Request for TXAA here:
Link: feedback.unity3d.com --- include-temporal-anti-aliasing-in-unity-txaa
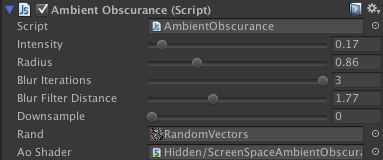
SSAO, SSAOc, SSBO Screen Space Ambient Occlusion / Obscurance
This helps add some shadowing into creases, it seems to interfere with the SSRR though painting blotchy noise all over, so don't use both.
This should be placed after Tone Mapping and before and colour correction.
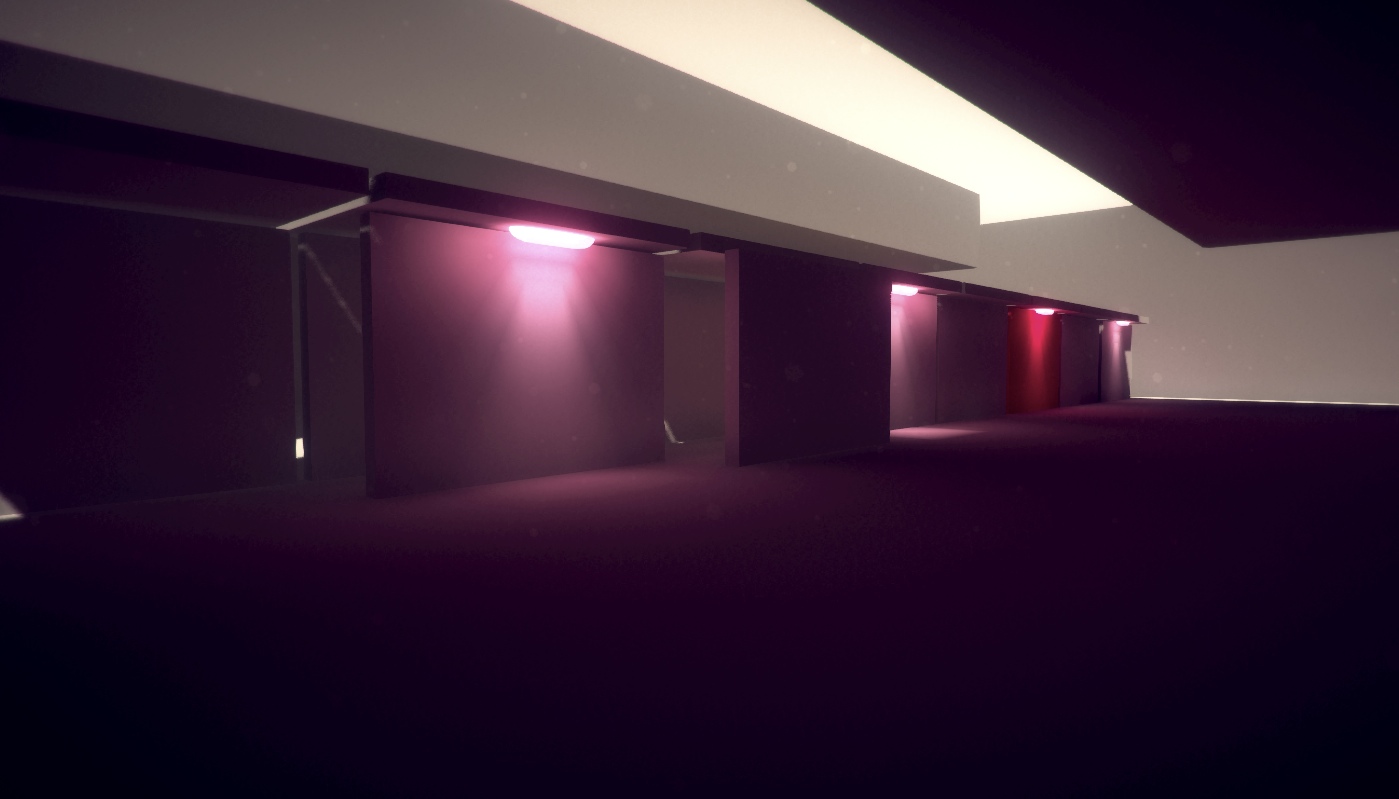
Screen Space Reflections ho!
I am Using Candela SSRR to add those nice reflections
Link: www.assetstore.unity3d.com --- 15851
it cannot reflect things NOT in view though so things behind you and so on. Also this is a performance hog
:-)
Though you can turn down the step count and such.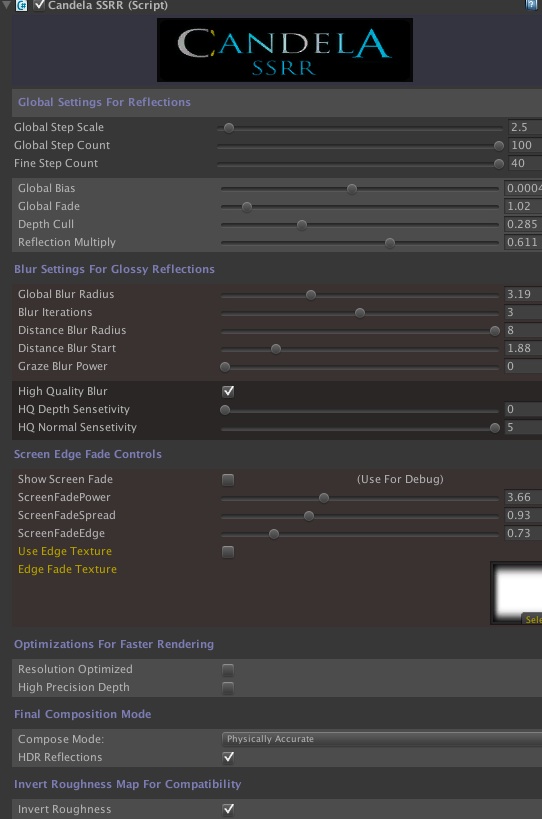
Toned down with less steps so should be faster:

Adding Particles in the Air
I tried adding some floating dust particles in the air that you can walk thru but it failed to composite properly with the screen space reflections. It does work if I put it on a separate camera and compose those 2 together though, but setting the layer masks was broken in the beta so I removed it
It was done with Shuriken. I think I need to write a custom shader to handle having the dust only lit up in direct light volumes so if a ray of sun shines in thru a window, dust particles will light upas they float thru that volume. But unsure if this is easy or not!
Unity are looking into adding this also.
Another nice thing to have is seeing all these post effects while you are working in the Editor. ( Unity are looking into this also )
Normally the scene view cannot have post effects but you can get some scripts that hack this on, though I could'nt get any working in Unity 5
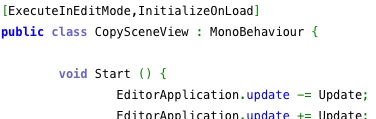
So instead I write a script to copy the scene views hidden camera position to the games camera.
CopySceneView Unity Script
Link: pastebin.com --- jh2e39ad
It is not perfect and can be laggy to update or not update at all till you move something in the scene view.
Setting up Realtime GI
Select any direct lights in your scene ( you get one by default now which will act as a sun and be visible in the sky )
And set the Lightmapping to Realtime.
Make sure you have everything at the right scale, 1 unit in Unity is equiv to 1 meter.
And absolutely do not use Create Light ( in scene render settings ), I have no idea what that is meant for, broken in beta? They are removing this apparently
And make sure all your lights are set to Dynamic GI not Realtime, and that they all have Shadows turned on
Also set all your objects to 'Static' here top right:
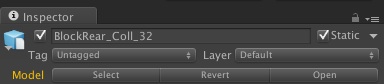
Which says this object is never going to move, so it will then happily bake the lighting for it.
For dynamic none static moving objects you will have to rely on light probes to light them from the GI. With that you create a grid of probes all over your level where dynamic objects may ever go. You can create a row of light probes then select all and duplicate over and over to quickly fill a large volume.
One nice things is it keeps a cache of all the GI data, so if you change something and it starts recalculating, you can hit undo or put the object back to how it was manually and it will put the GI back also. The size of the GI cache can be set from preferences here:
Also by default it will be stored in your Project folder, but you can set a central location instead.
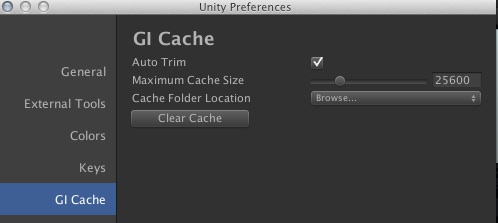
It can much thru gigs of disk space though ( they will be compressing it later on in the beta ). The cache is used if you open up another scene or another project. If the cache is gone it will have to recalculate. The baked GI is kept in the project itself though as EXR lightmaps.
If you want baked lighting and your light won't move then set it to Static GI
FYI 'Static GI and Realtime' means Baked GI and old style lighting NOT realtime GI

FYI you can mix static baked light and dynamic lighting
You can change the bounce intensity per light:

Set your tone mapping exposure to 2-4 with Optimized HejiDawson or Photographic
Then Color Correct the Contrast / Gamma using Amplify Color or Curves or some other tool
Sky Light Intenisty of 0.5 is good too for a largely outdoor scene, I find 1 a bit too strong but this can vary depending on your scene and look you want
Remember you have to be in linear colour space or brightness will be completely different ( set this in player settings ), and that some post effects will interfere so need to be placed after tone mapping.
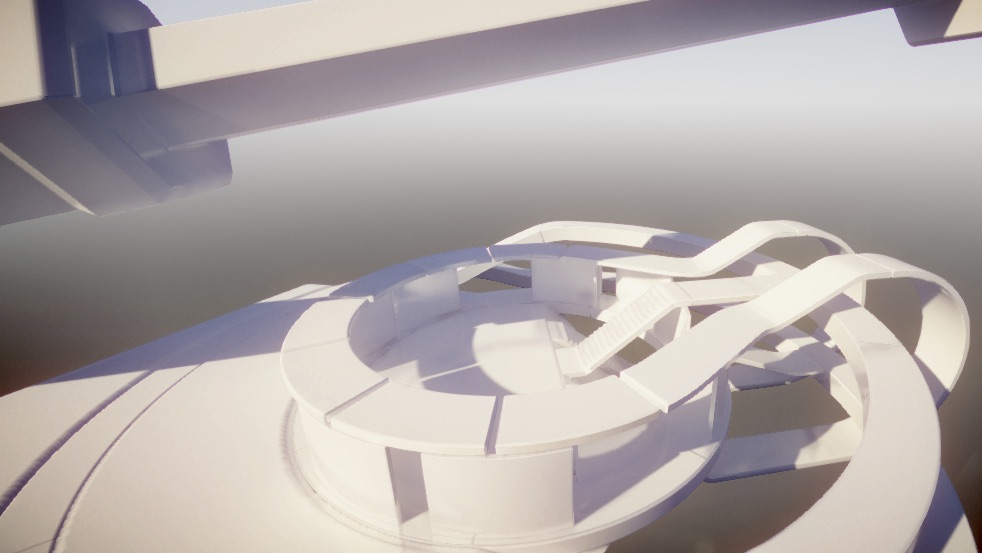
That will get your something like this, which is equiv to pure white in the bright mid day sun I feel.
I find the sky a bit too saturated in colour so you can make your own sky easily to tone it down:, better to reduce the saturation in the sky than to reduce the Sky Light Intensity, as you will be removing 'ambient' light basically leaving just a Sun.
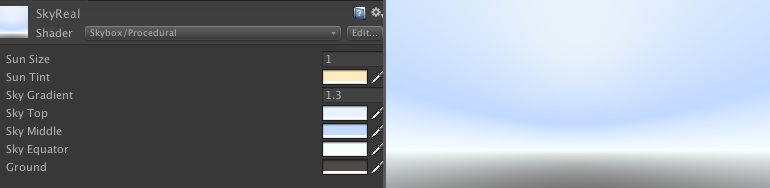
Or go all out and get a more realistic procedural Sky with colour change based on time of day an such:
uSKY:
And some interesting work on atmospheric scattering, fog volumes and auto exposure etc etc
Link: www.youtube.com
Fog Volumes Here:
Link: www.assetstore.unity3d.com --- 14557
And another form of Fog Volumes here:
Advanced Surface Shaders:
Link: www.assetstore.unity3d.com --- 1093
Link: www.youtube.com
Foggy Lights here:
Link: www.assetstore.unity3d.com --- 16607

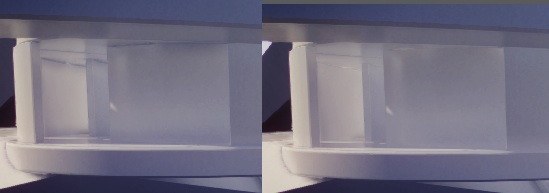
AO Component set to 0 left, and 1 to the right ( you can change this and it won't rebake )
AO can totally screw with your lighting ATM, you will get dark areas where it makes little sense for them. You may be better to use SSAO instead but the SSAo that comes with Unity is a bit crap too
For amusement here are Vrays Render Settings ( not even all of them ):

And here are Unity's, a bit slimmer, ignore the values I am using they are not particularly good ones
:-)
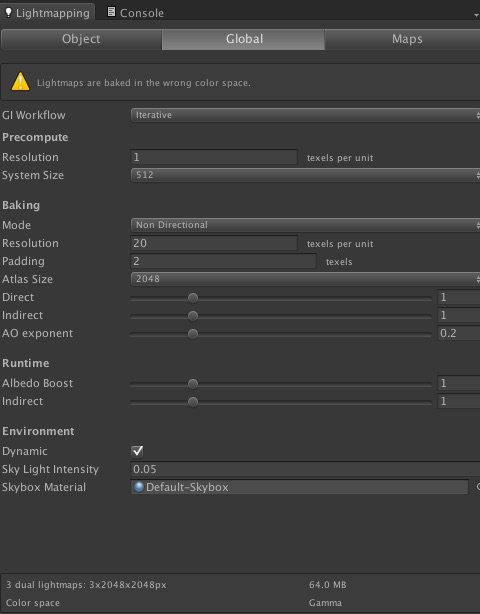
Under Precompute
I don't fully understand System Size yet
Unity explained this to me:
"A system is a grouping of objects. It mostly affects how many objects fit within one system, so how many systems you get in the end. Typically the resulting resolution does not depend on this parameter. The only case when it does is when one object would not fit in an atlas texture of the selected size -- then it will be clamped to system size. That's most likely the case in your scene."
I have found if you set the Precompute Res high then a high system size will cause streams of errors and prevent it from working. So I am currently sticking the precompute res high 5-30 and settings system size low to 32. This should be ok I think if your objects are all relatively small.
Precompute is basically the realtime GI, but the precompute data is used in the static bake also afterwards, so the quality of the precompute impacts the baked tremendously. They will be separating the quality settings for realtime and baked in future.
Baking: Mode does nothing yet ( not added in the current beta ) but will be for encoding light direction in the light maps so objects surfaces are lit correctly by the bounced light and have correct specular reflections when using normal maps and such.
Set the resolution of this depends on your scene and size of objects and such.
you can set the scale in the lightmap per object, at max it cannot be any higher res than the Atlas Size, so here it is warning us that has reached the limit for the Atlas Size, if you need it higher res then increase the atlas size or break the model up into smaller pieces.
Note when you increase atlas size you should decrease the resolution by the same multiple, so if you jumped 2x in Atlas Size put the Resolution down by half for the equiv quality.

Techniques for lighting your scene
For realtime you have no choice right now, it is Sky and Direct Light only, well and objects with emissive materials on. ( Point lights and such are coming soon though )
You can mix the baked GI with the realtime though.
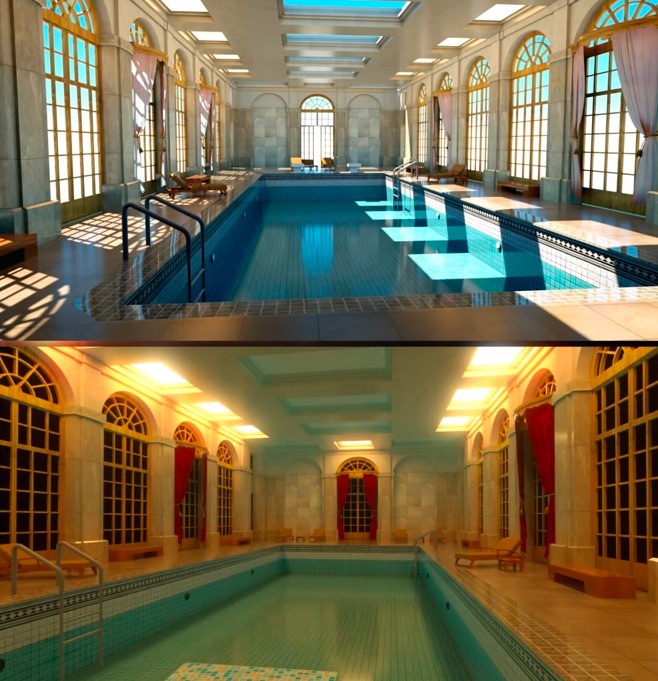
In Koola's work he used indirect light by using an emissive object outside windows and such. I have tried this in Unity but the quality doesn't go high enough to make it practical.
I tried lighting a whole scene with a really really really bright sphere in the sky, the realtime GI seemed to work ( albeit dodgy quality ) but the baked GI oddly did'nt work at all like it ignores emissive values above a certain value.
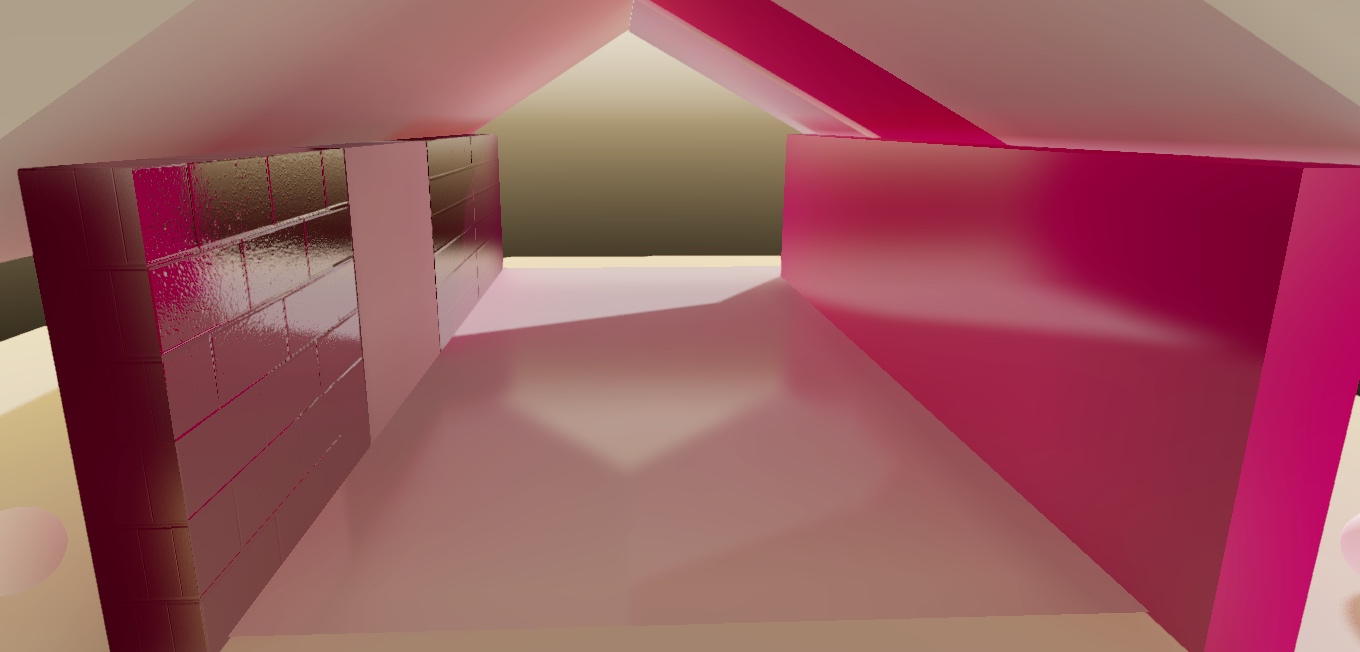
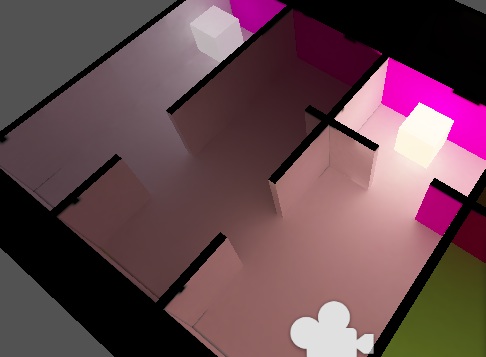
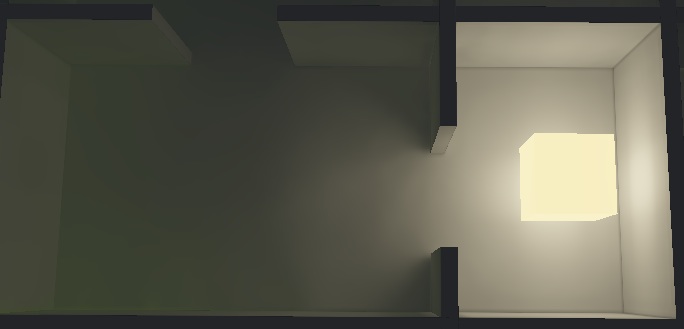
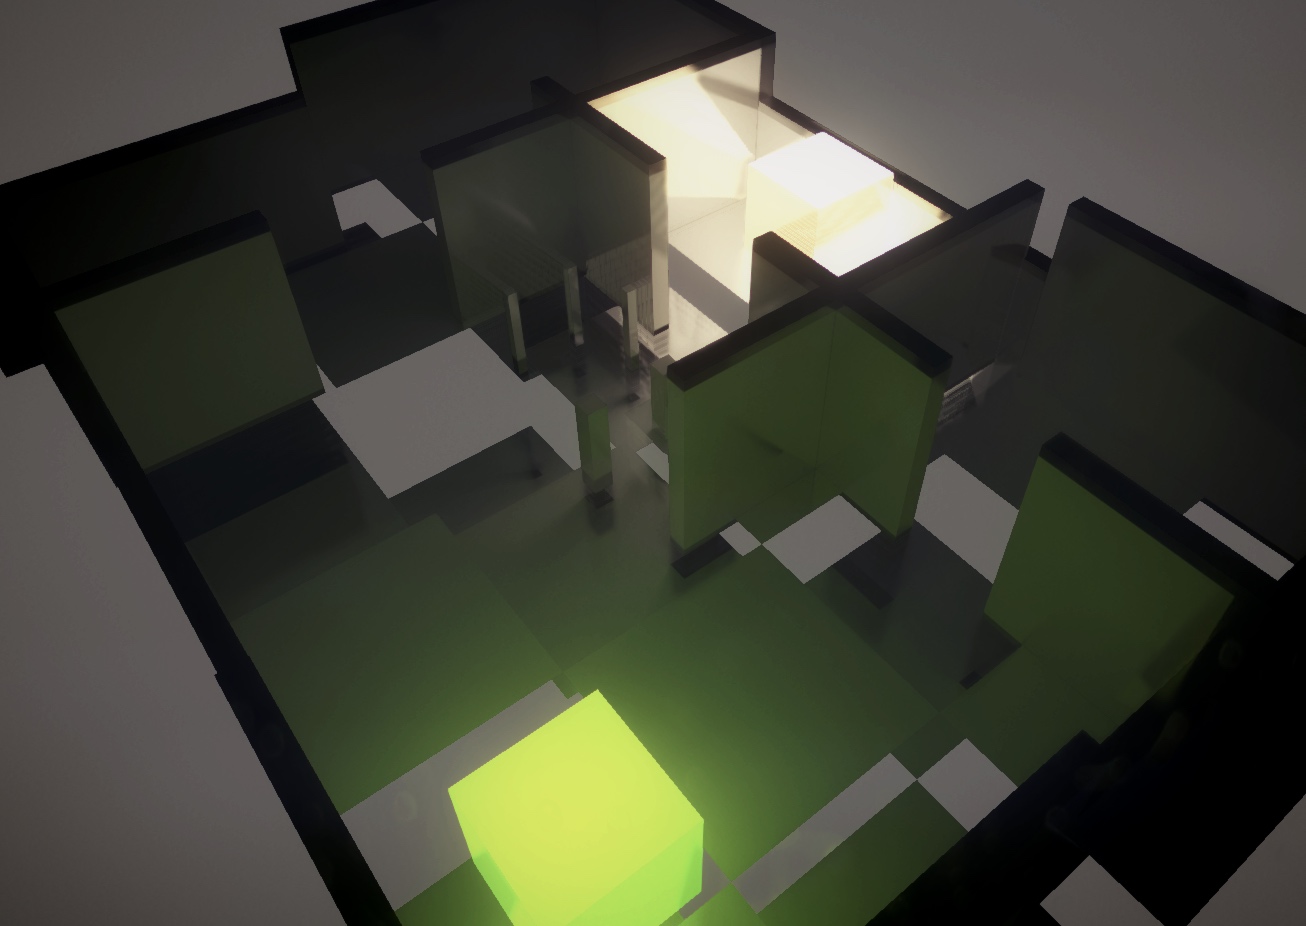
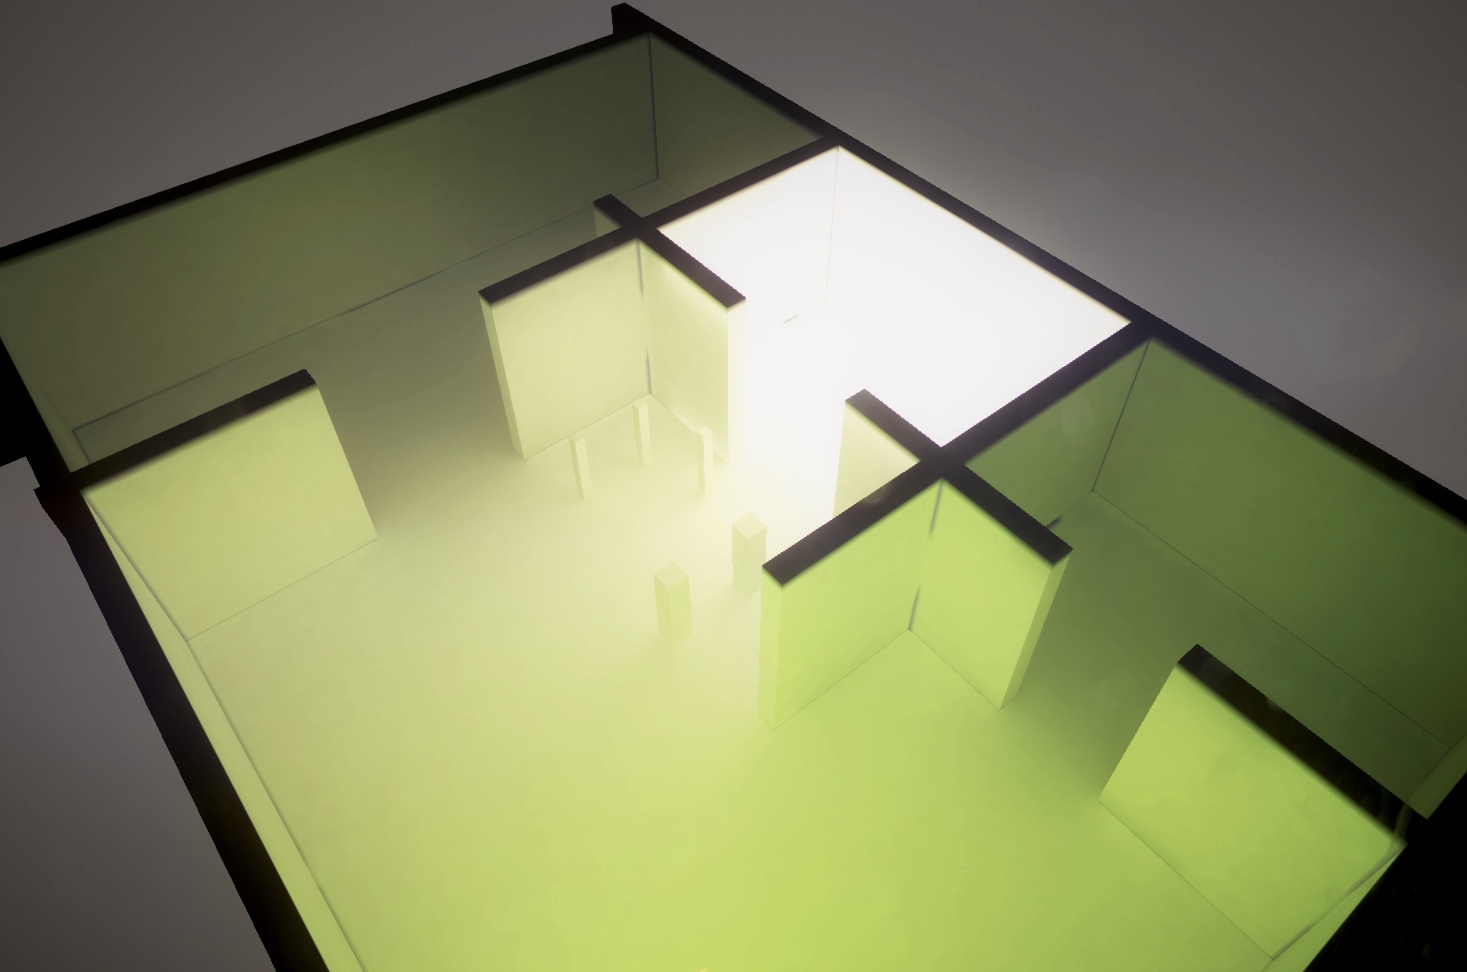
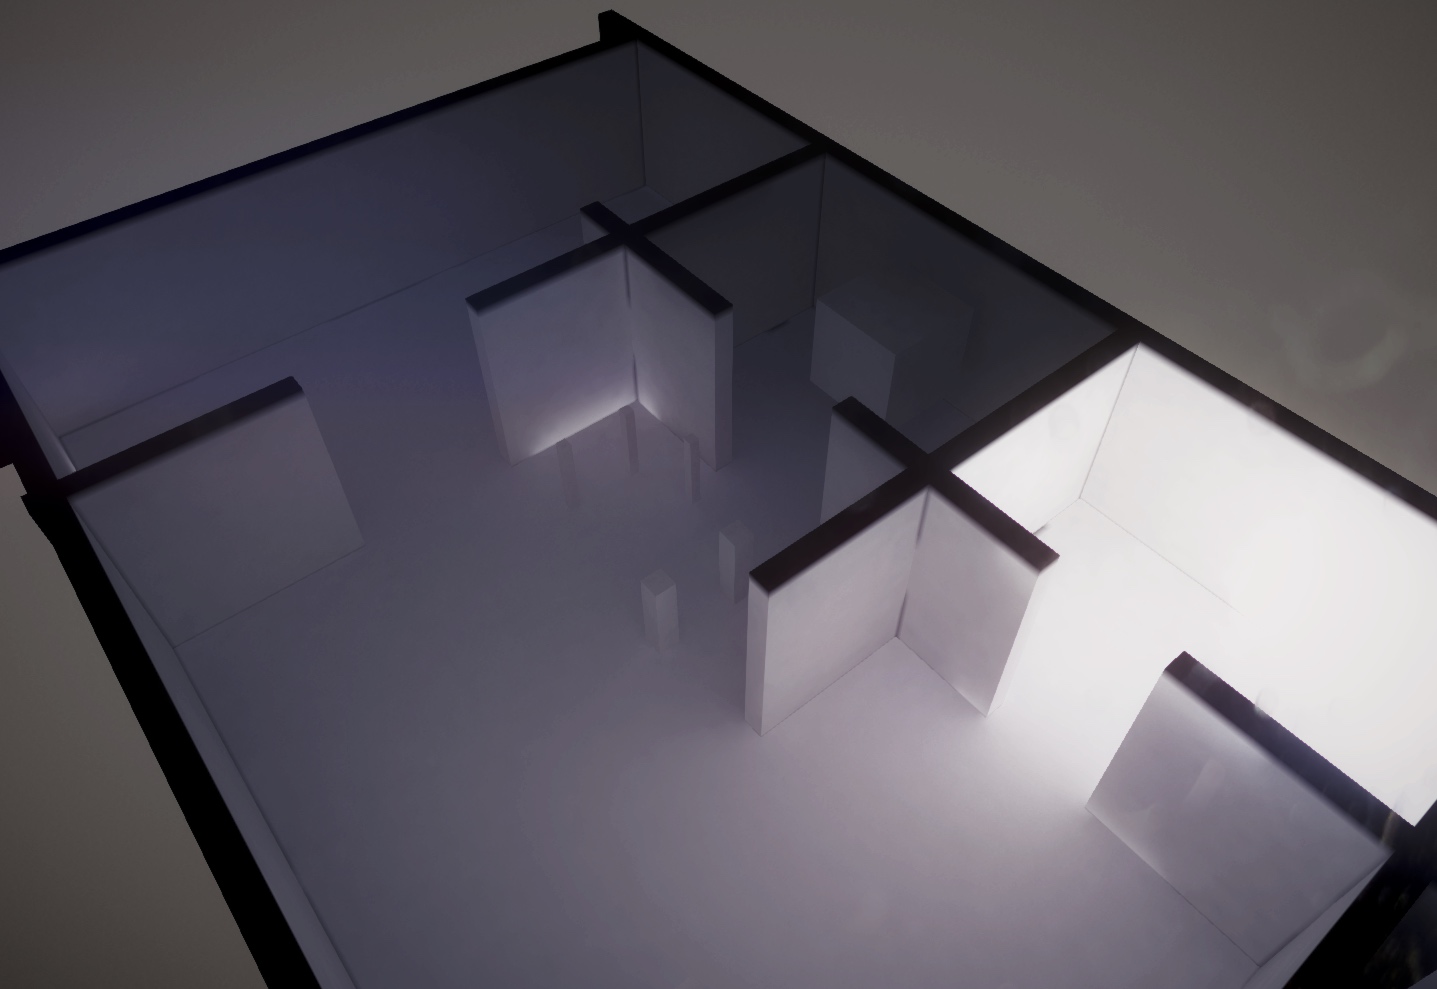
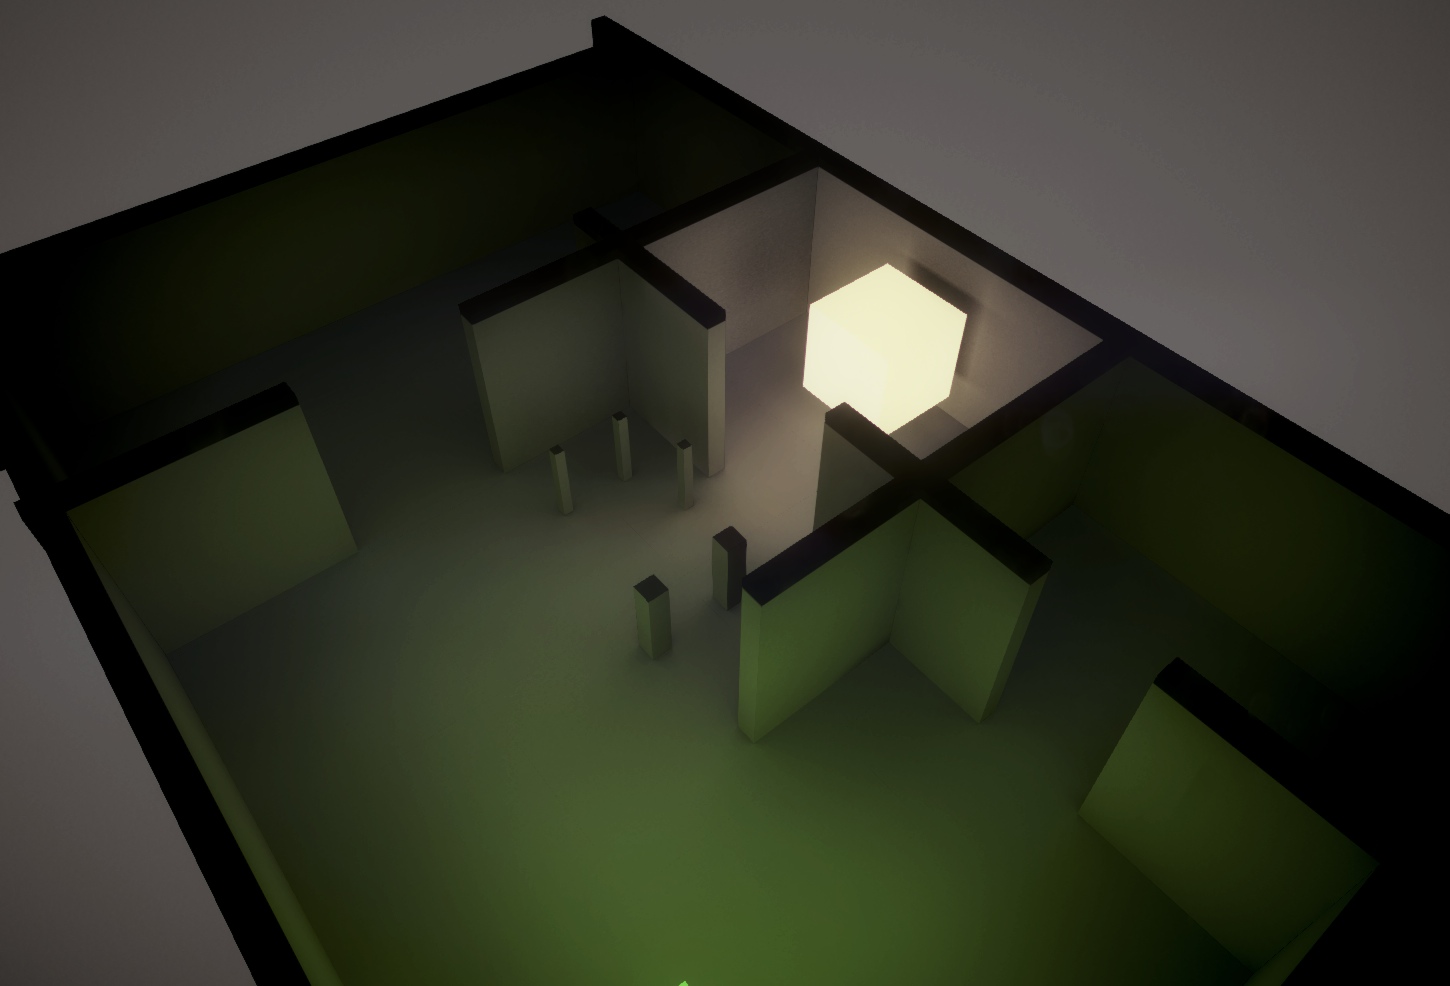
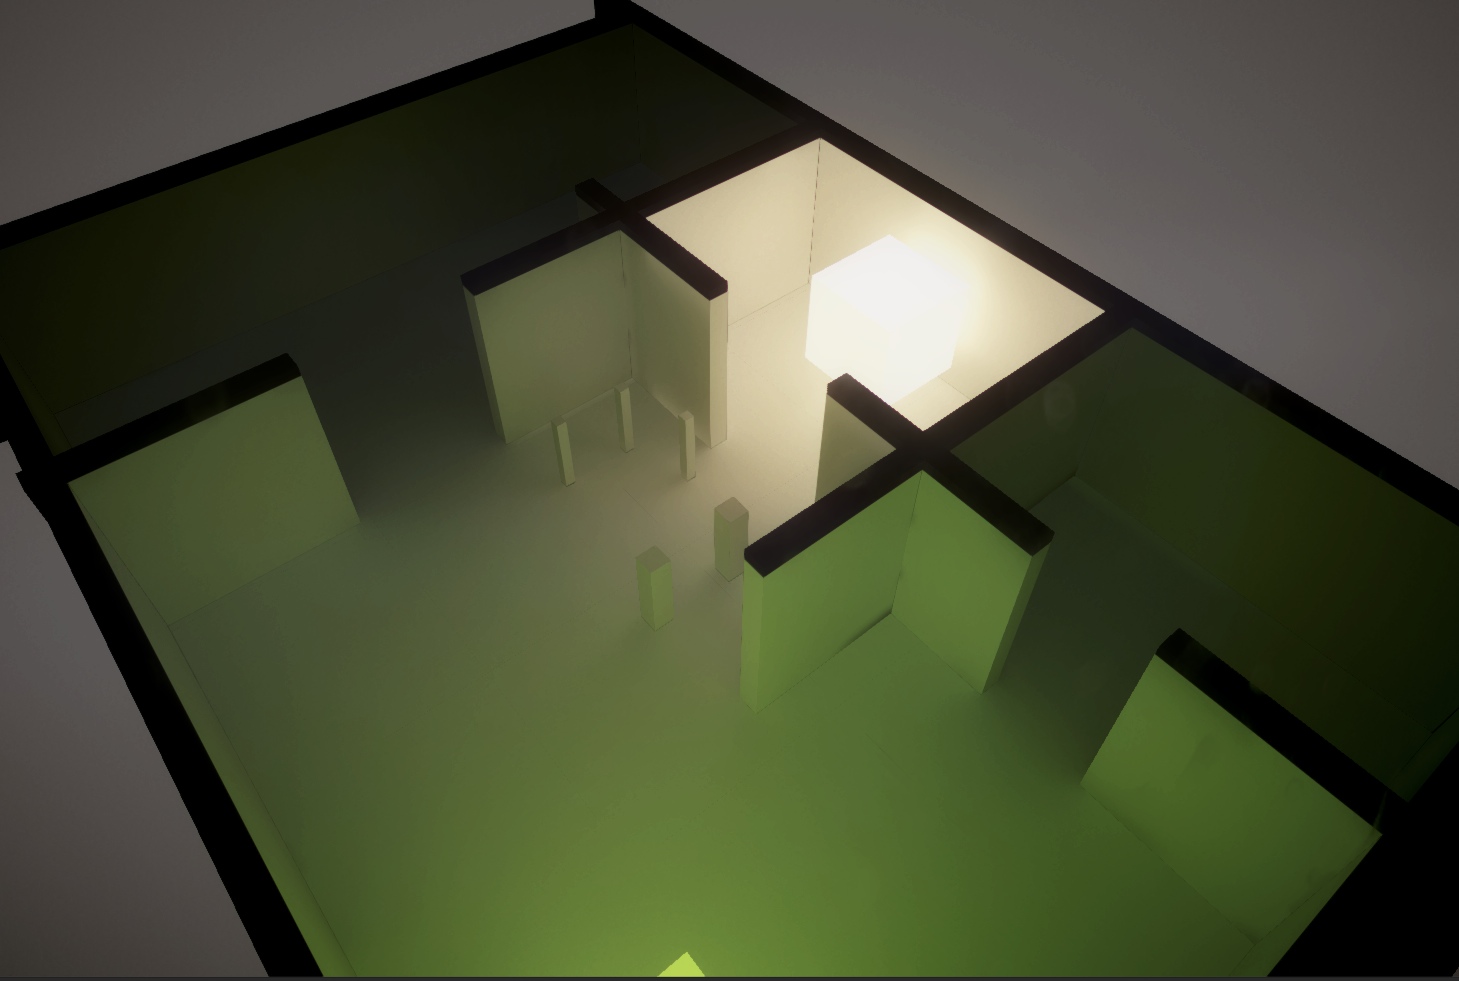
Here is a scene with only a Cube lighting it in realtime GI:
Default settings not very impressive, I have found to improve emission from objects you need to set the cluster size on that object to small values, here it is at smallest, better but clearly has limitations:
Making the Cube a grid of smaller cubes doesn't make it better either. And for some reason gets brighter! This points to some serious lack of adhering to the principles of energy conservation
:-P
It gets even worse when I re-increase the cluster size making it even brighter than below. So it seems the size of your object / polycount and quality settings will actually change how much light it emits... that is so wrong, who wrote this GI code!
I am aware the surface area is greater in this case, but even still.
Also you should be able to set the Lightmap Scale on these to 0 ( as they obviously do not need to receive any lighting as they emit it ) but that is broken in beta ( Unity is aware of it )
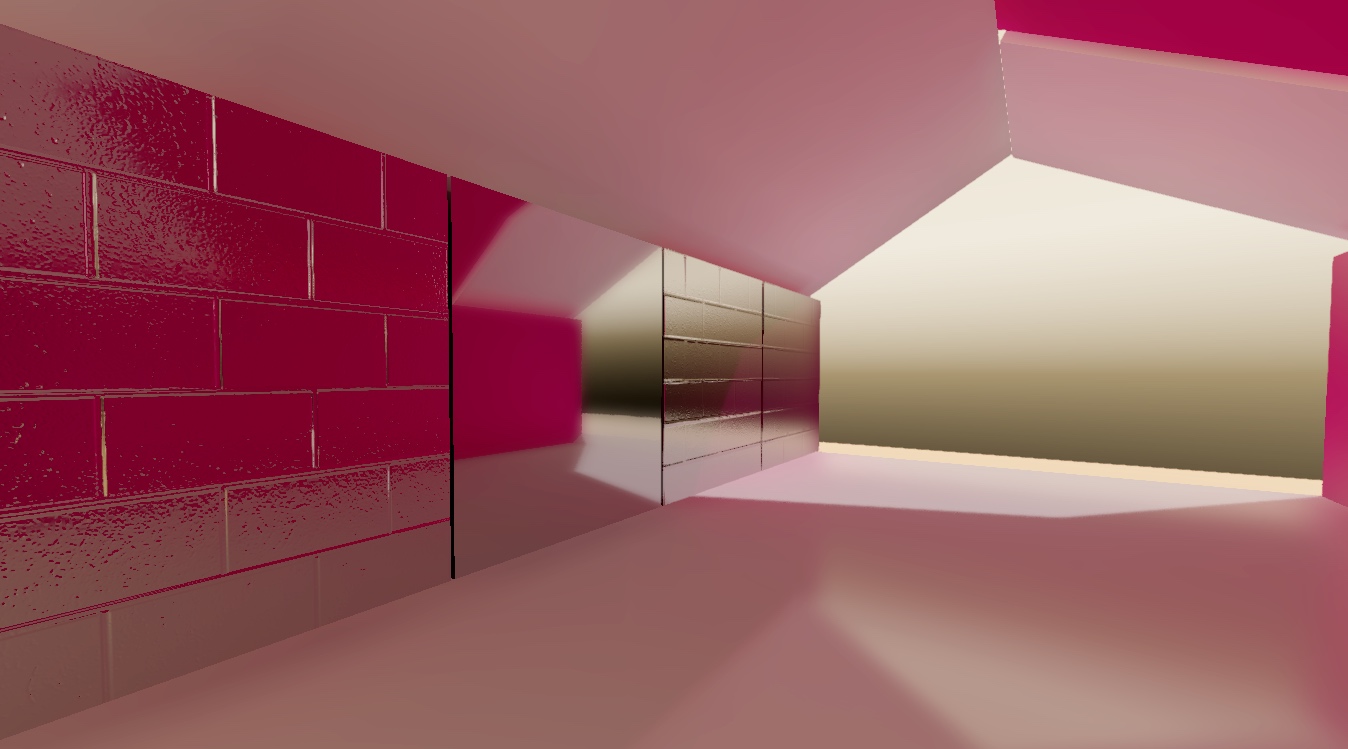
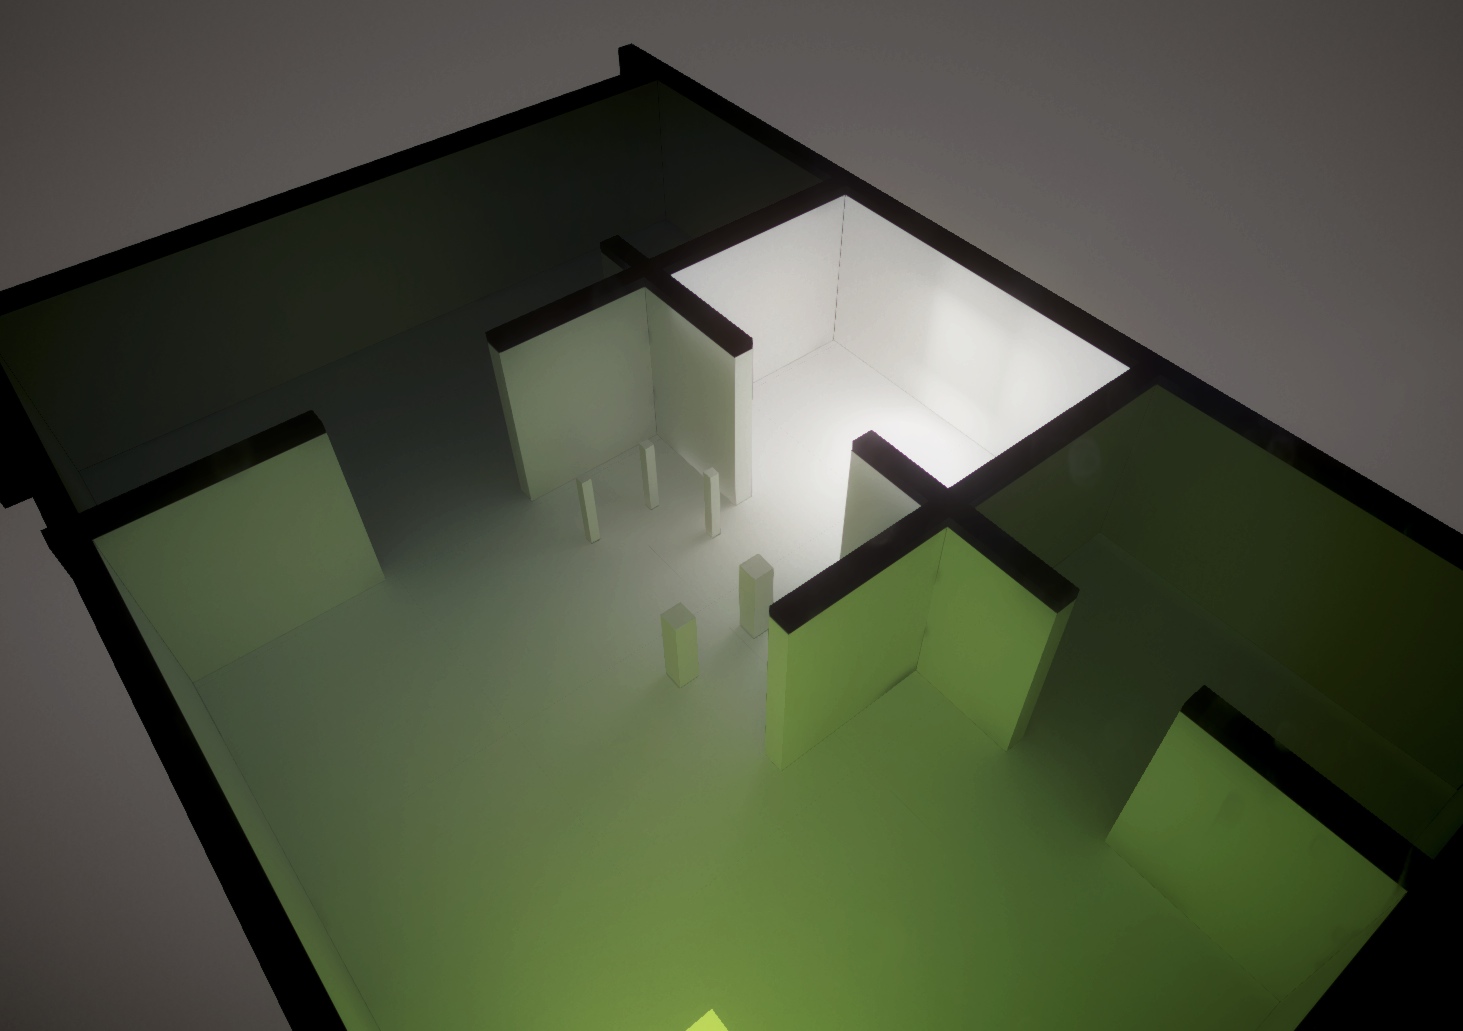
Now as this is a small enclosed scene it is safe to increase the realtime preprocess resolution from 1 unit per meter at default, this clearly sharps it up at a value of 3.
problem is this value is for the whole scene, so no way to set it different for a small indoors area from a large outdoors area. Which is odd given you can change the baked light map resolution per object.
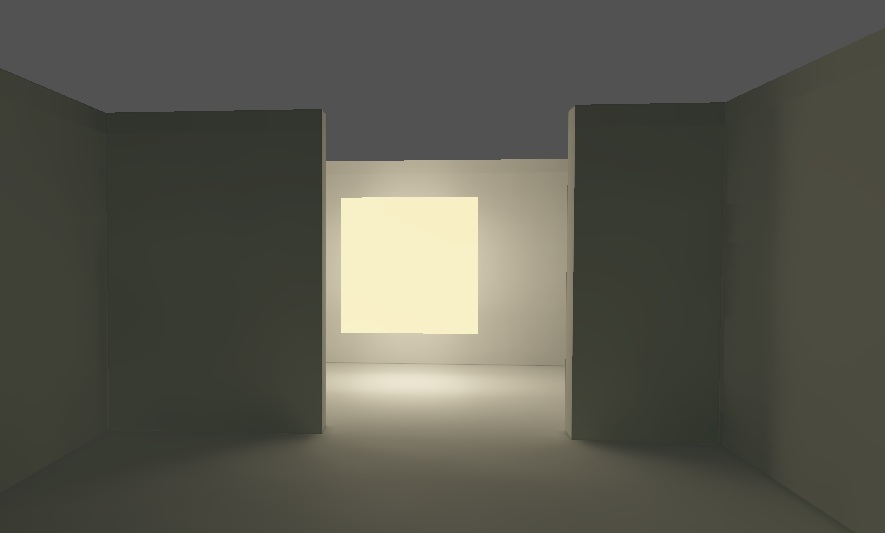
And value of 10 in resolution and it starts to resemble the baked lighting but in realtime. ( but takes longer to precompute first )
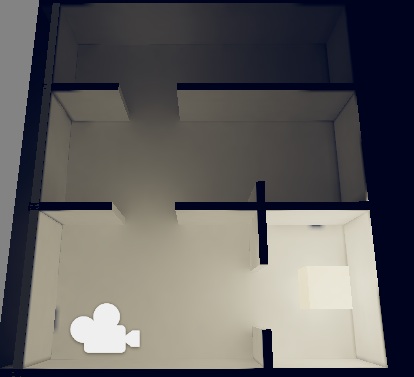
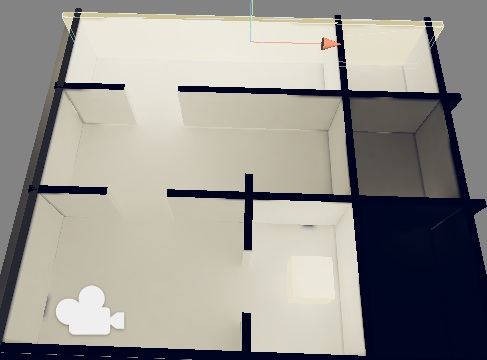
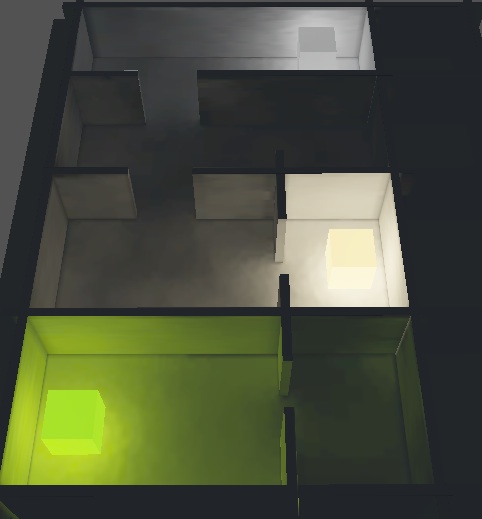
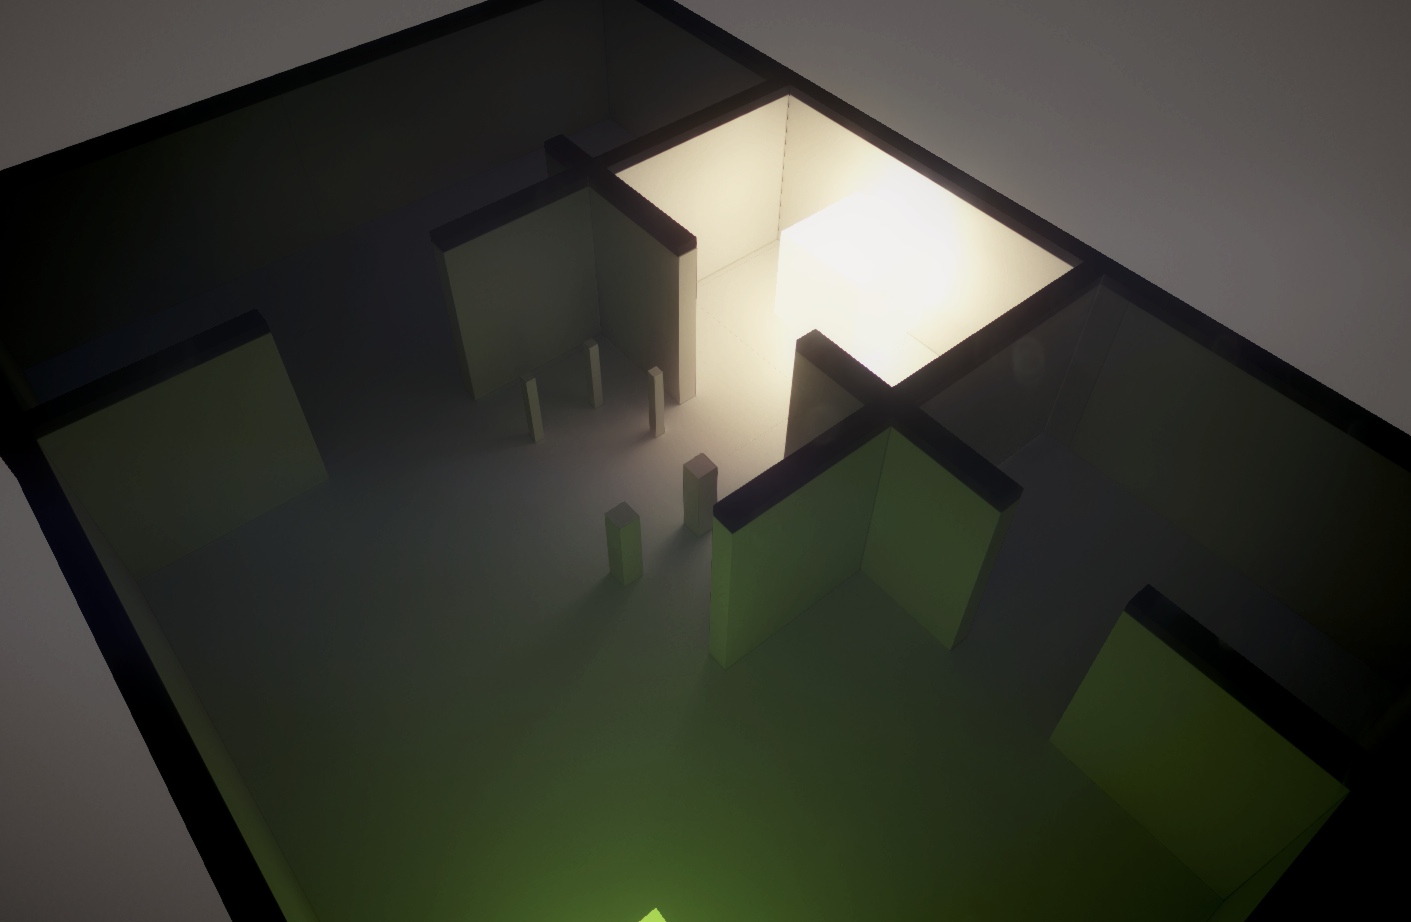
And shown from above, no light leaking which is great for realtime.
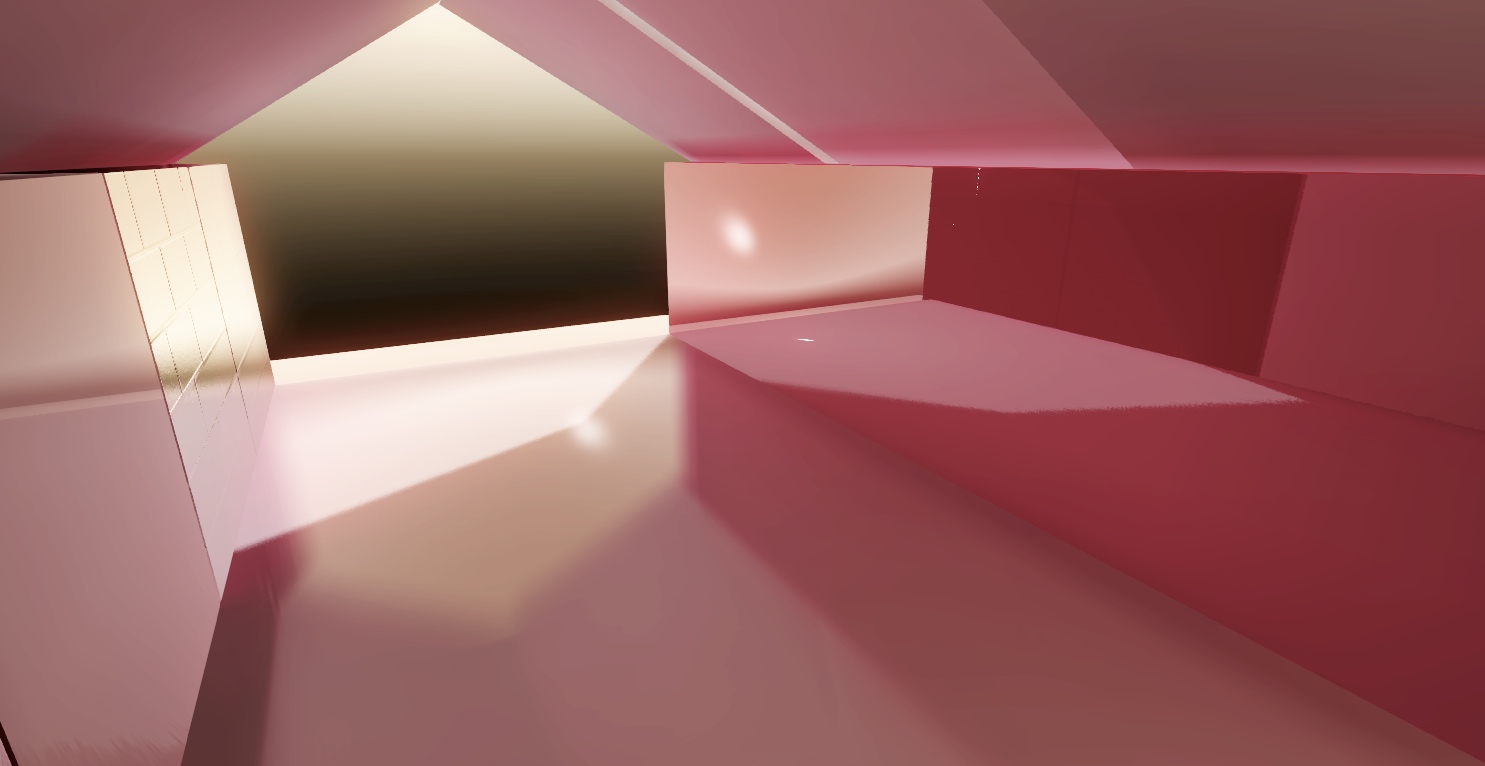
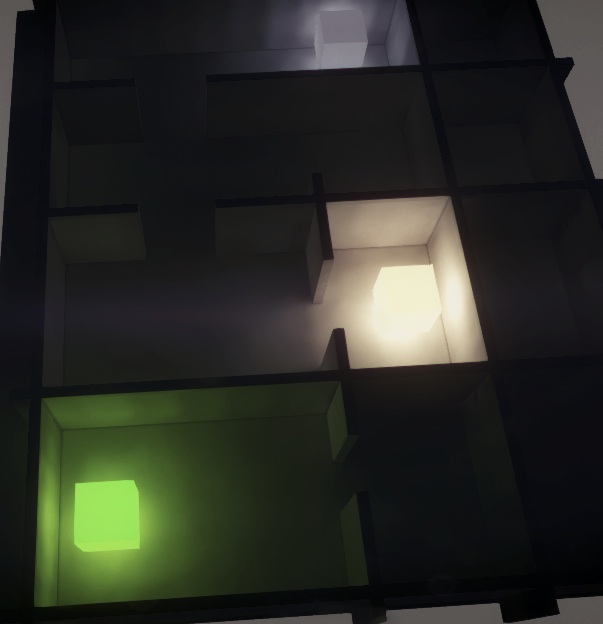
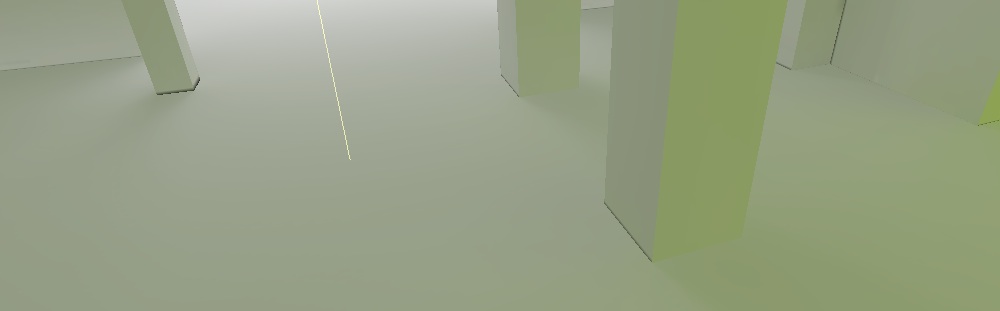
This does literally mean I can change any wall or surface in that to be emissive and it will update in realtime ( I made the entire back wall emissive . That is pretty nifty. It would be fairly trivial to set up large lights in each room with light switches that you can turn on and off while playing the game. Though the light doesn't update immediately it is solved over a few seconds and updates smoothly, the higher quality the slower it takes to update. It also means ( if this was working in the beta yet ) you could walk around with a flashlight and it would light up that scene, if you shone your spotlight on a red wall it would bounce red light around the whole scene. Some light leaking in the mid right box
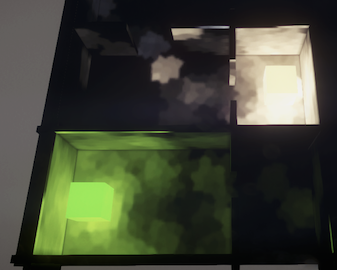
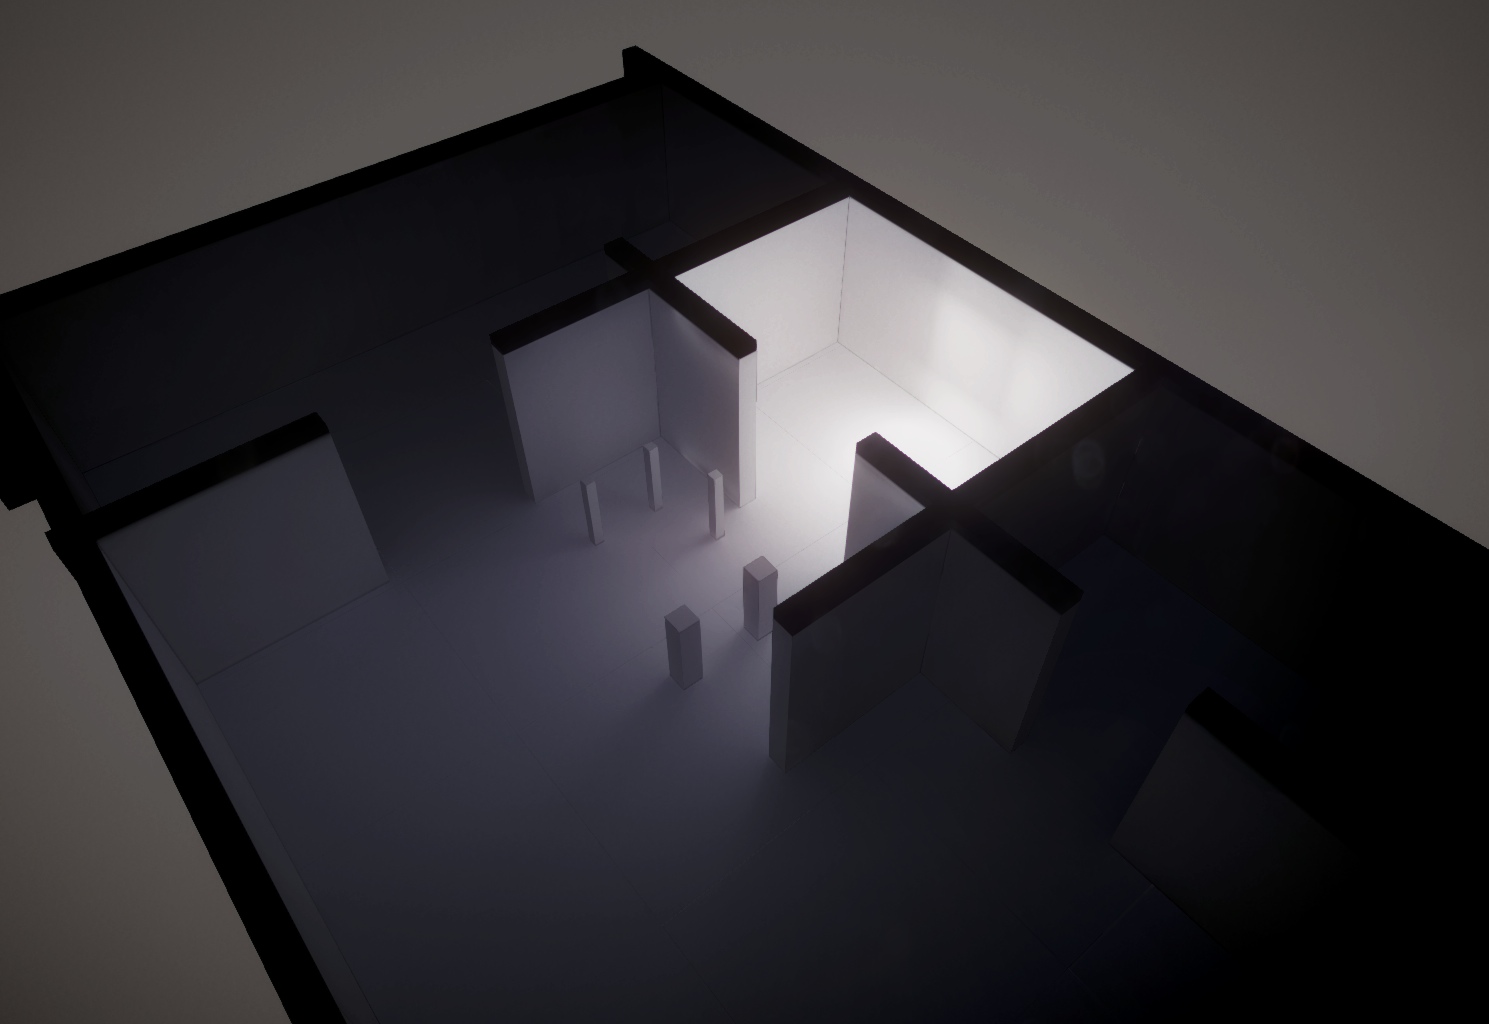
Also note if you have a skybox it will leak light like crazy. So turn that off, with sky on below:, those rooms should be black not blue! There are no settings to configure the quality of the skybox either.
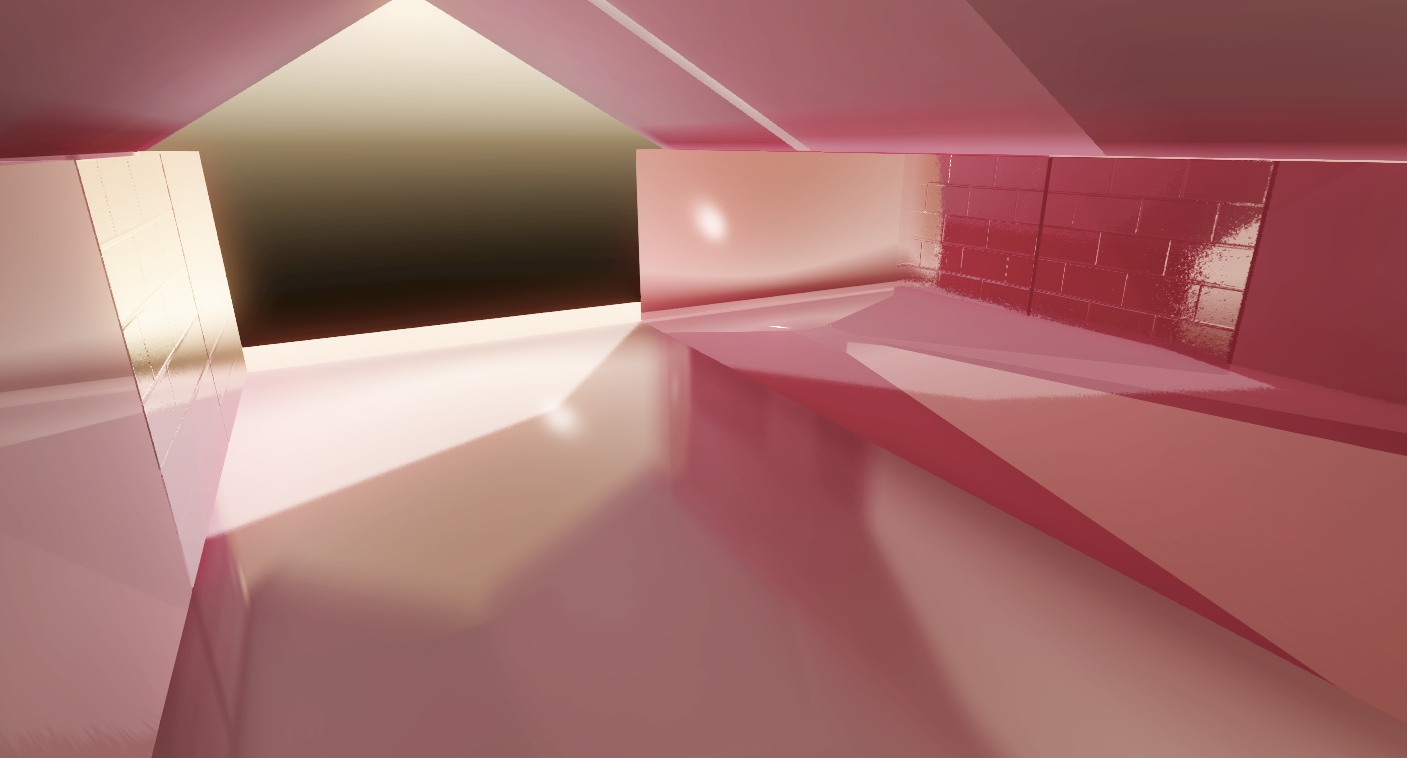
Ok lets go nuts and set It's resolution to 20... Updating is a lot slower now and takes my CPU, so if you change a wall suddenly your FPS drops till it has finished propagating the light ( which now takes about 10 seconds if you make a change though the beta Editor makes everything slow for me so probably much faster in real use ) But this is set stupidly high at 20.
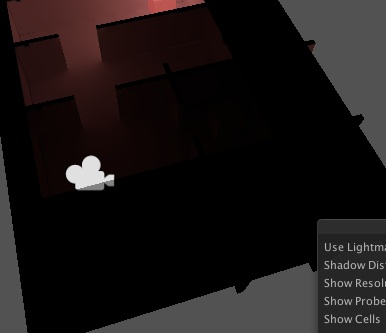
Curiously if you set the emission to 0 the light doesn't completely turn off
but then I find It's from light leaking from the above light when that is off:
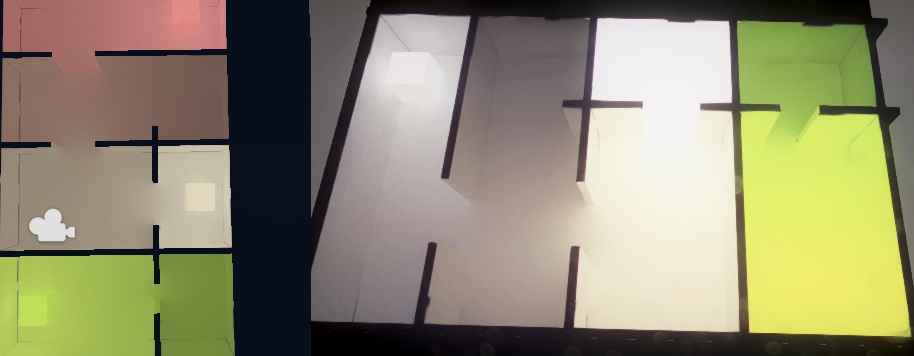
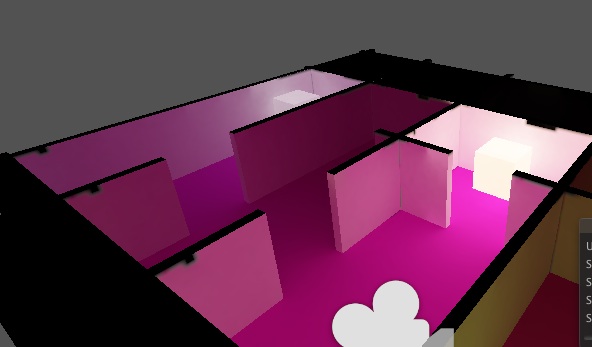
Changing the wall to be pink but lights white:
And now with White walls but Pink floor:
Remember all these changes I'm doing are NOT requiring a rebake.
So now to switch over to Static baked lighting.... and it completely screws it up, terrible glitches everywhere even though I am just using the default Unity cube for all the walls. WTF
EDIT, I changed the scene from cubes to planes and then it worked fine, so odd
So for kicks I tried the old Unity 4 Beast powered GI baking that they are removing in Unity 5..... and it works better and has more detailed baking settings, and seems faster.... go figure
It is itself quite dated and not brilliant either though, with some hard limitations.
Beast again below, casting a decent shadow
Changed it to use ONLY PathTracing which is kinda a silly thing to do as it is brute force, but hey I'm silly, worked better than expected.
Sadly PathTracing isn't multi threaded for some reason ( no good reason ) so it runs about 8 times slower than it should *shakes fist*
FYI doing this by editing the Beast XML settings file, which I can't find anyone really explaining it properly or giving any examples
:-P
This would look better if it would use bigger than one 1024x texture for the whole map
Increasing the Resolution ( to get bigger texture map than 1x1024x ) even with lowest quality makes it take forever for some reason, some kind of bug, yes below took forever to render. So seems I am stuck at 1x1024x texture size. Ah it is tied to the minSampleRate and maxSampleRate, I had set min really high forcing it to take ages over nothing.
Problem is the floor is one model and the max texture size for one model is 1024x and as it has 6 sides and I did'nt Uv properly all sides are equal in the UV meaning 1/6 of a 1024x texture can be used for the floor. So I have broken all the walls and floors up into smaller models. Though I still haven't UV mapped it properly
Ok I give up on Path Tracing due to it not being multithreaded, lets turn final gather settings up... oops turned em up a bit too high, it took 16 hours to render :-S but looks really good
:-P

The glitches in the wall below are from limits in screen space reflections in Candela
And this is how it is broken up to allow higher res textures due to the 1024 limit in Beast:
So to compare directly now
Beast from Unity 4 Baked over 17 hours below:
Bearing in mind this scene is broken up into multiple smaller pieces which is a hassle for normal use and was done to get past Beasts 1024x limit, Enlighten allows 4096x light map per objects which would probably be several gigabytes in size at MAX for this scene so I won't do that
:-P
It basically in Enlighten you can have light maps 4x the size of Beast, or objects 4x as big with the same quality lightmap thus not having to break the mesh apart into pieces.
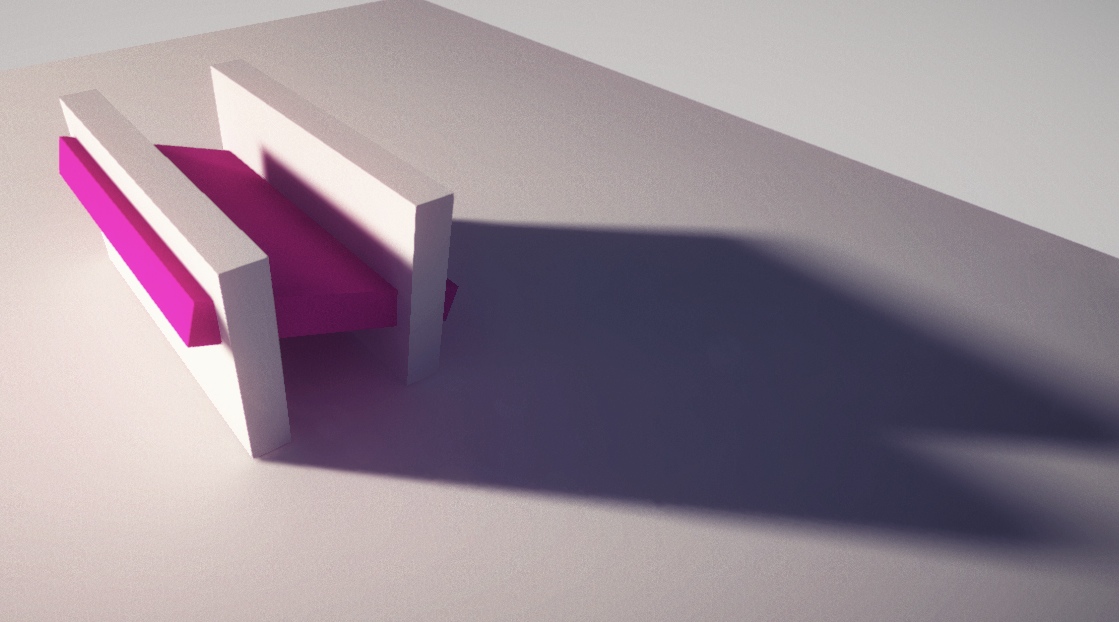
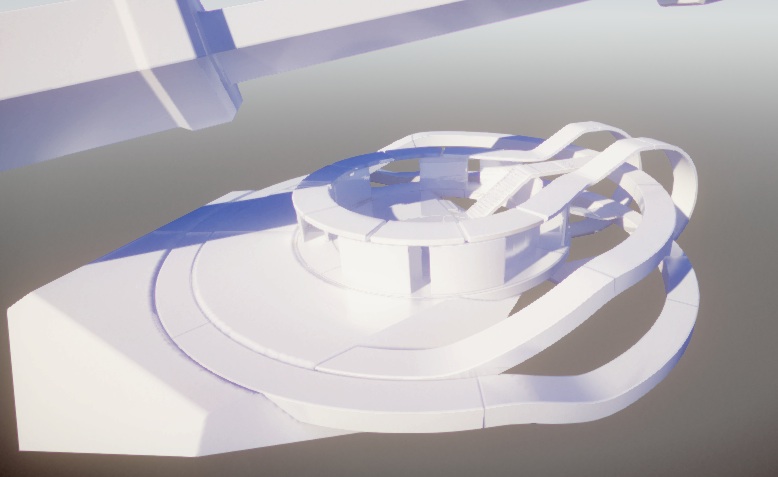
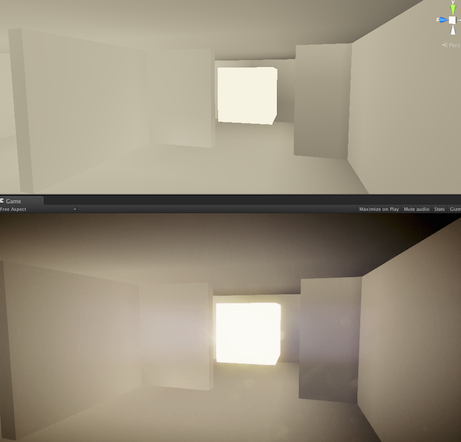
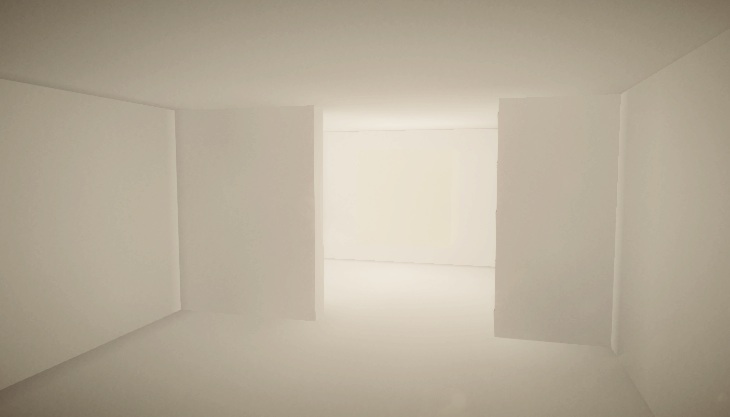
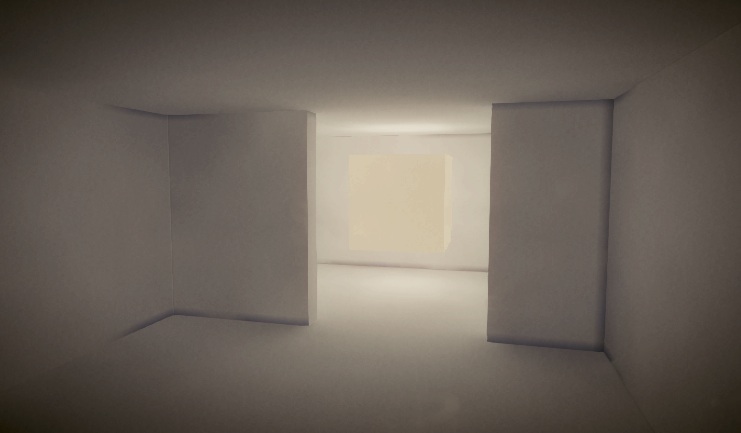
Unity Realtime GI at default resolution of 1 texel per meter and System Size of 512

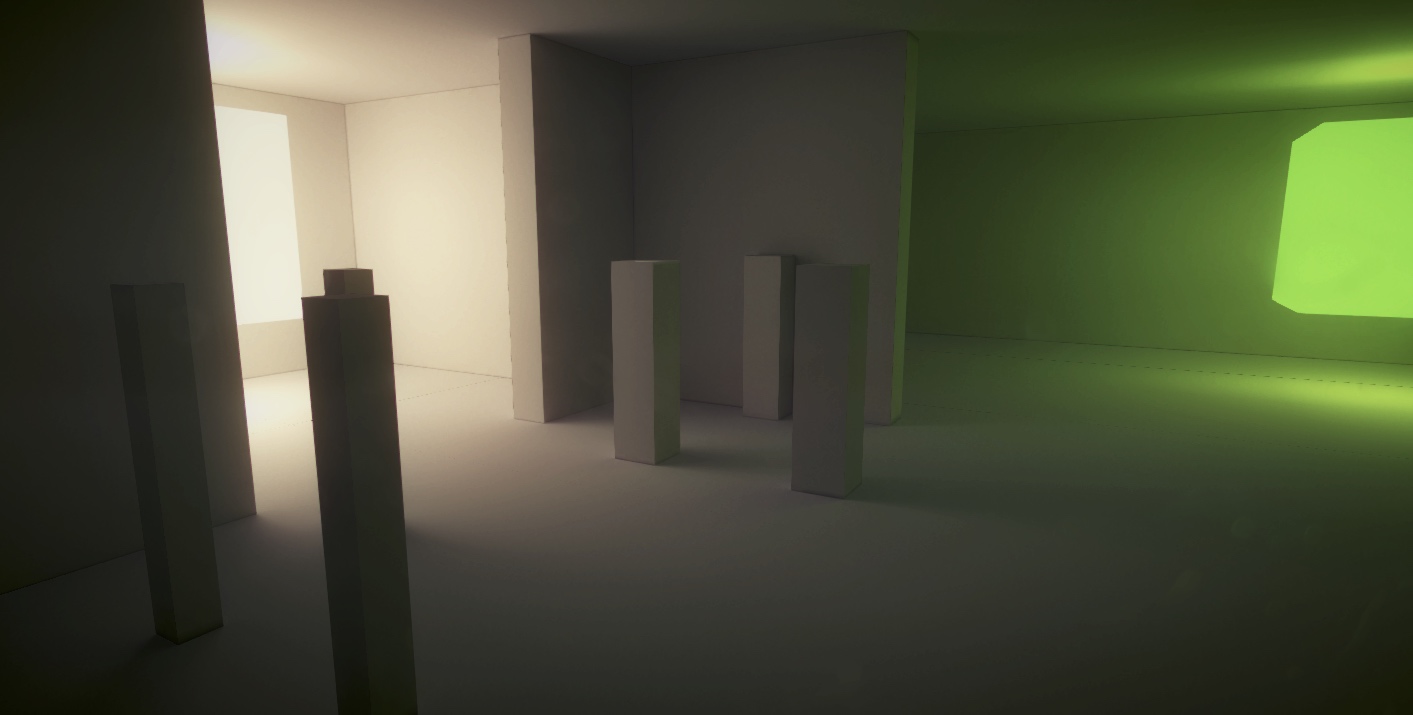
Unity Realtime at extreme resolution of 20 texels, would be slow to update in real game play at this res ( remember this is realtime so any surface can change material, lights turned on and off without rebaking )
So I can disable that light and make say a wall a light without rebaking
Curiously the first time I change any materials it takes a a long time using all 8 cores of my machine to realtime update the GI destroying the frame rate ( at this high res I have set )
But the next time I change a material it is faster and uses hardly any CPU.

Some light leakage, again no rebaking needed here though
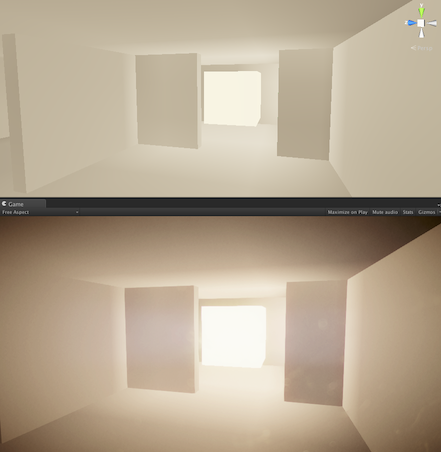
Ok now moving to baking with Enligthen, resolution set to the same 20 text els as the realtime was. Lighting is a lot darker closer to what beast looked like actually. Clearly 20 texels doesn't get you very far in baked lighting it looks worse than the realtime
:-P
. So texels between realtime and baked are not equivalent measure of quality. This may be because I set the cluster sizes on all these objects as small as they will go, and I have a feeling the baked lighting is ignoring those settings. Atlas size here is 1024x FYI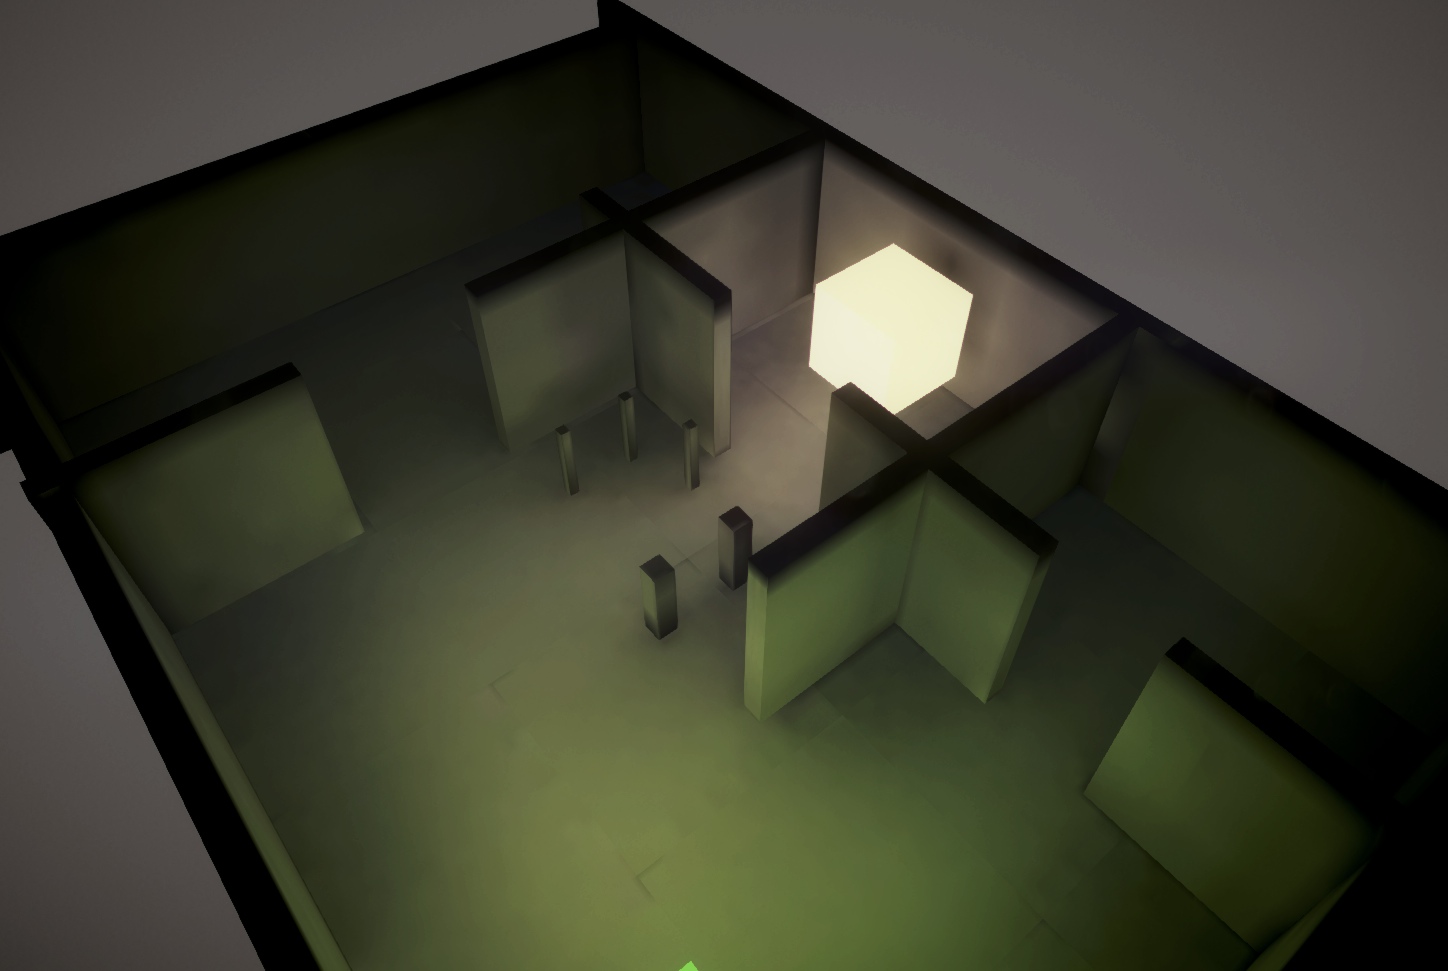
So now lets set the resolution from 20 to 200, Ok that only took a few minutes to render and looks pretty close to what Beast did in 17 hours, maybe I was wrong about Enligthen after all and just did'nt set the res high enough.

Ok now to try from 200 to 800, took about 20 minutes or so to render
This resulted in 43 dual lightmaps 229mb when compressed, this is the same size and quantity that Beast generated so the quality should be equiv now. It clearly rendered 100's of times faster but doesn't look as good.
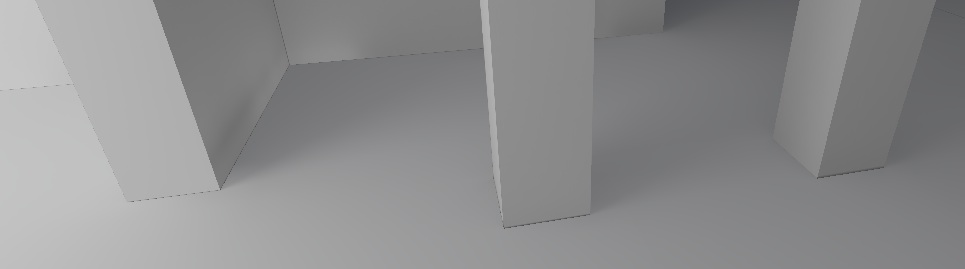
Now why is it shadowed behind the White cube, why are the tall thin cubes not casting long clear shadows like they do in beast? is it bouncing too much light from the surrounding walls thus hiding the shadow, is that more accurate and it was the lack of boucned light in beast that made it look clearer?
Why are the tops of those cubes so dark compared to Beast.
Only way to test what is correct is to use Vray I guess an compare.. Except you cannot export a scene from Unity
>_<
Disabled the AO exponent as it looks like it is just muddying the edges of objects ( which is It's job after all )
Arha that is why it was crap on all counts, stupid AO!
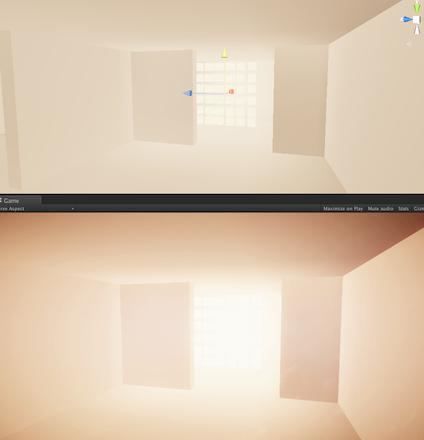
Replaced the cube with 6 area lights shaped as a cube. Resolution set from 800 to 80 here, and rendered in a minute. The low resolution is evident with the black edges, those should go at high res. ( The green cube out of shot is still an emissive cube though )

Resolution set to 800 with Area Lights in cube shape still, took a long time to render for some reason, thought it would be faster with areas? It is casting better shadows on those long thin cubes now more like Beast did. But getting bleeding and glitches around the edges.
Glitches are more noticeable up close, maybe some setting for this, need to play some more
Turned the green cube off to get a better look at the shadows, and changed the atlas size to 4096 from 1024, so now the textures fit into 6 4096x and take up 32mb instead of 43 dual lightmaps 229mb
The seems are troubling now, but when you look closer they vanish, so this I thought would be due to mip maps which are low resolution variants you see at distance, however manually removing the mip maps in import settings, and it still has the same seams.
Looking at the light maps and they appear too tightly packed so will bleed a little into each other, my padding was set to 5 texels, so I suspect it will be fine if that was increased
Ah found out why it shrank so much, the lightmaps may be 4096 but the saved files are being imported at 1024
:-P
bug!though could not visibly see any difference when importing at 4096, so it either ignoring my import settings or I have it higher res than is needed.. ah it is indeed ignoring my import settings, guess that's why I can't disable the mip maps either
Also the light leaking is bothersome, for this you can adjust the Back face Tolerance... well I tried changing that on just the planes and it made no difference either at 0 or 1or the default 0.068 hmmmm, ok lets change it on the closed objects the walls which are cubes...
Back Face Tolerance The percentage of a ray origin's rays that must hit front faces to be considered usable. The precompute computes visibility from ray origins to clusters, but attempts to reject ray origins that are inside geometry. If the percentage of rays shot from a ray origin is less than back face tolerance, the ray origin is marked invalid and not used for radiosity computation. For example, if back face tolerance is 0.0, the ray origin is rejected only if it sees nothing but backfaces. If 1.0, the ray origin is rejected if it has even one ray that hits a backface. This setting can help control light leaking from authoring, but should be considered in the context of your mesh authoring workflow. Preventing the rejection of ray origins by setting a value of 0.0 will ensure Enlighten does not incorrectly reject ray origins due to open-backed or single-sided geometry. However, if the majority of your meshes are closed, so visible backfaces are rare, a positive value can reduce light leaking or darkeni
I am using single sided planes for the floor and ceiling now so that is probably why it is leaking.
Can select a preview in the scene view to see the resolution being used:
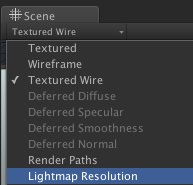
These are all the different modes, which update while it is baking so you can see what it going on before it is finished.
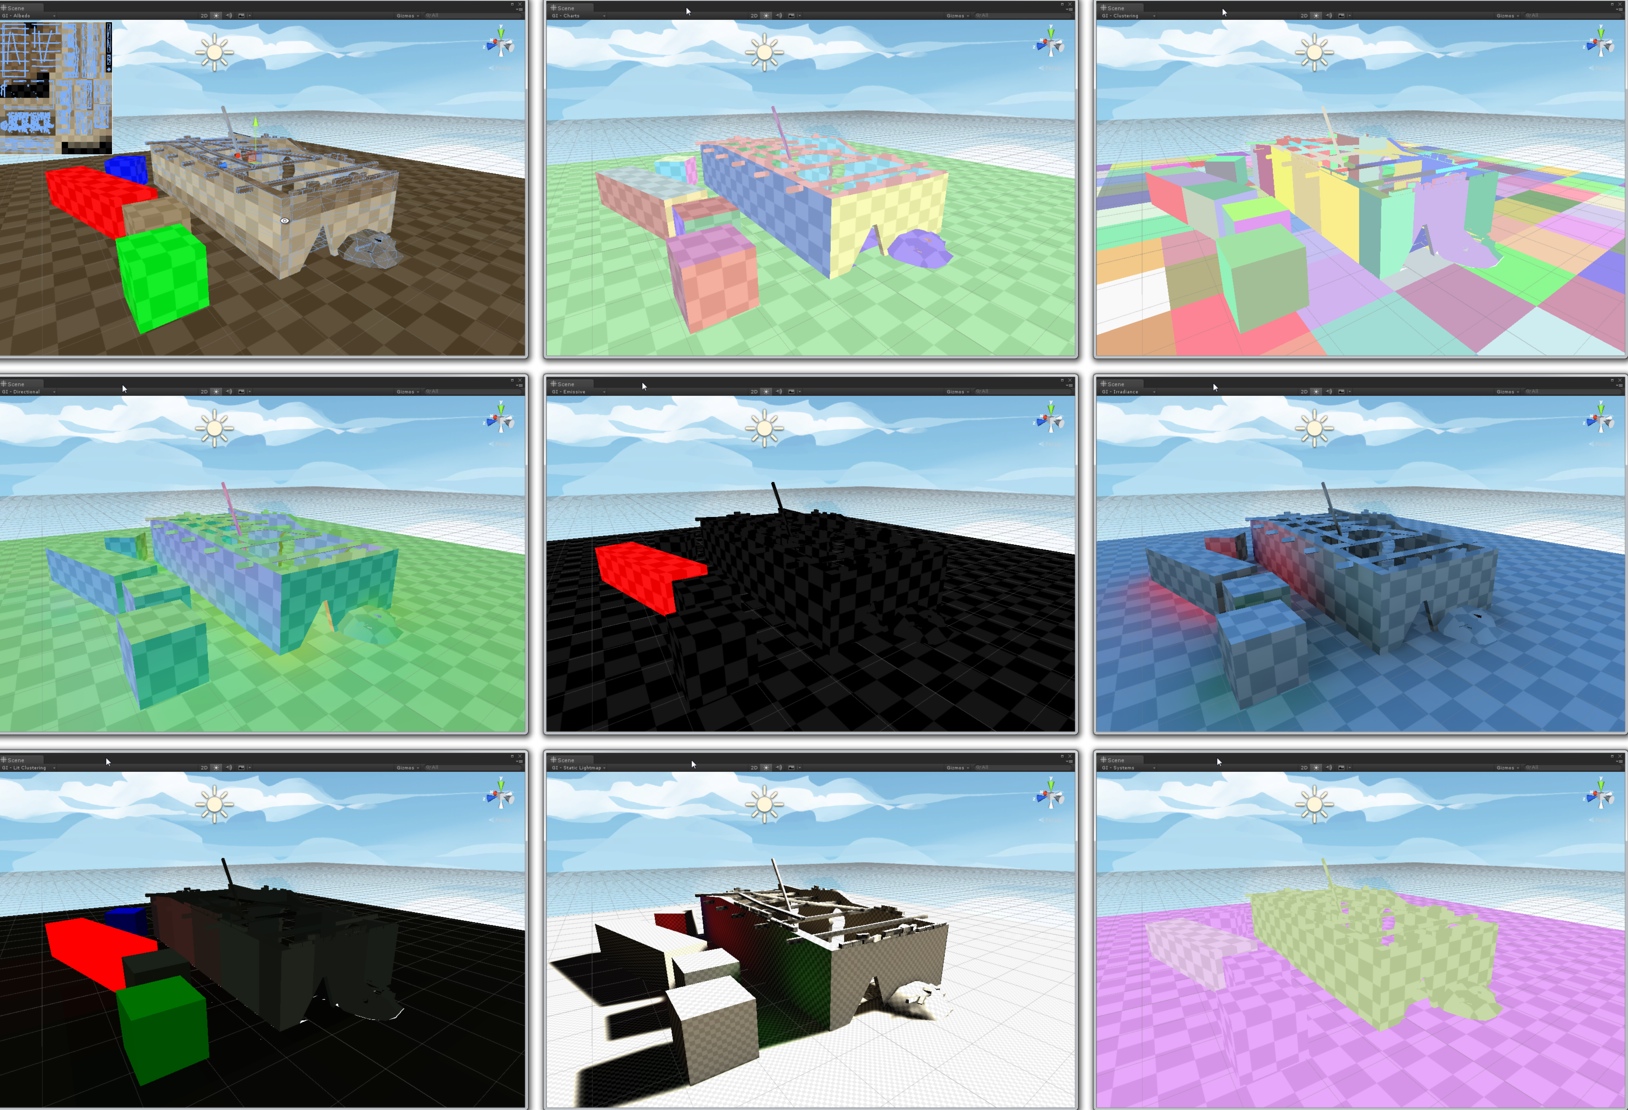
Note when you are in one of these GI preview modes if you select a model you can preview where it is in the lightmap
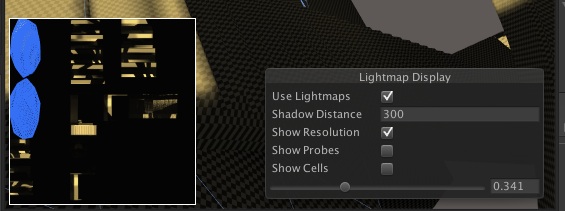
This is really the only setting you play with to improve your static GI baking. It is completely separate from the Precompute / Realtime.
You can also select individual objects and scale the size they are mapped in the light maps, bigger == better quality. But they will only get as big as the max texture size ( Atlas Size )
If you have a huge Atlas size but the light map quality is low everything will get pushed into one big texture, but they will just float down into a corner leaving most of it empty and unused
:-)
You can see the resulting light map in this settings window at the bottom.
In the other tab you can see them also and change compression, you can also right click on a lightmap to see who is using it
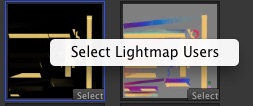
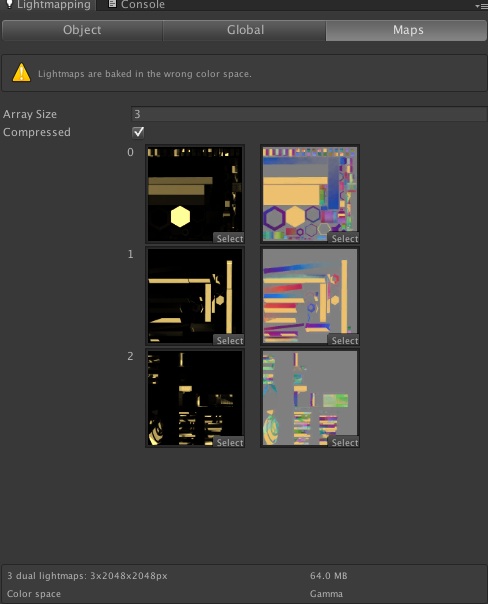
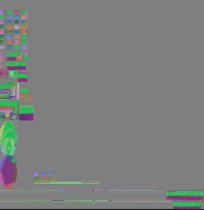
If the scene wide UV map ends up looking like the above, it might be because you have very elongated uv shapes. Or your atlas size is too high. Never have long thin sections of UV, say you have a really wide but narrow cylinder. Break the UV into separate pieces, but this creates seams in the lighting!!!! so better break the model up into separate pieces and pretend it was some kind of building limitation. Generally life will be easier if you model smallish pieces and build levels out of lots of those like prefabs. Instead of modelling a whole room, make it out of lots of interlocking pieces for example.
Also you can have different UV's for light maps from textures, Unity will use UV2 for lightmaps, if the channel is present. Otherwise it will use primary UV's and you can have it auto generate those for you but it crashes for me in beta
:-P
Huge meshes will hit a voxel size limit of some sort. It rather unhelpfully tells you an object is too big but not WHICH object. It won't break, but I think it may keep redoing the GI at different sizes till it works thus slowing everything down. So best break it up into smaller pieces or change the cluster size on that object.

You can specify some GI options per object here:

If you edit that Lightmap Parameters it is saved as a separate file in your project and looks like so:
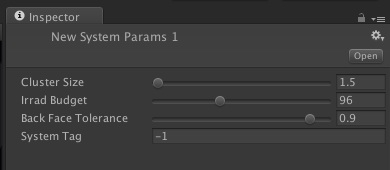
I have not played with this much yet, so this could all be very magical *shrugs*
Too large clusters will result in light/shadow bleeding and too small clusters slow down the precompute.
You can visualise this in the scene with 'GI - Clustering' and 'GI - Lit Clustering'
Below you can see this wall piece has a smaller cluster size of 1.5 which seems to have fixed a glitch in the GI I was having on it
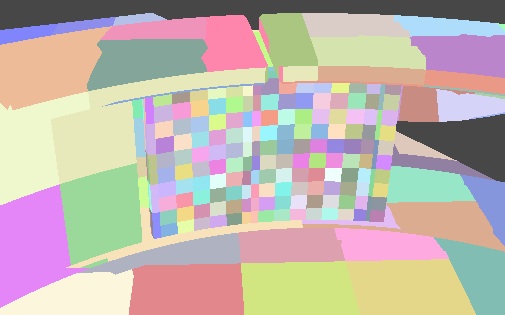
Below we see a realtime GI result that is great apart from a glaring black area. Error checklist:
1.Are your UV's in good shape:
Is contained within the [0,1]x[0,1] space
Has no overlapping faces.
Has low angle distortion, that is deviation of angles in UV's and in source geometry.
Has low area distortion, that is, relative scale of triangles is mostly preserved, unless you really want some areas to have bigger Lightmap Resolution.
Has enough margin between individual patches.
2. try using smaller clusters for objects in that area:
Those look smaller enough to me, making them smaller may help still
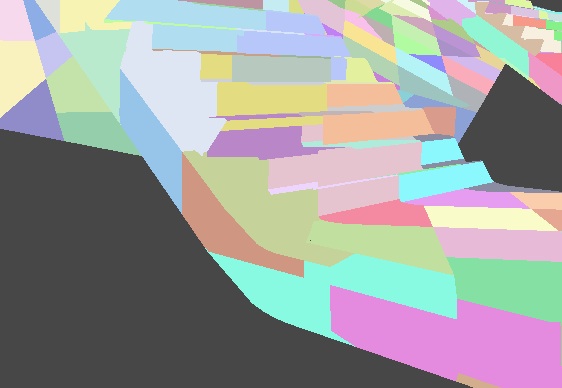
3. Are those objects overlapping
Often you can get away with overlaps, especially if they are significantly overlapping. But a slight overlap can cause problems. Try increasing the overlap, or remove the overlap entirely.
4. Resolution
below is the Baked GI Resolution, looks high enough to me
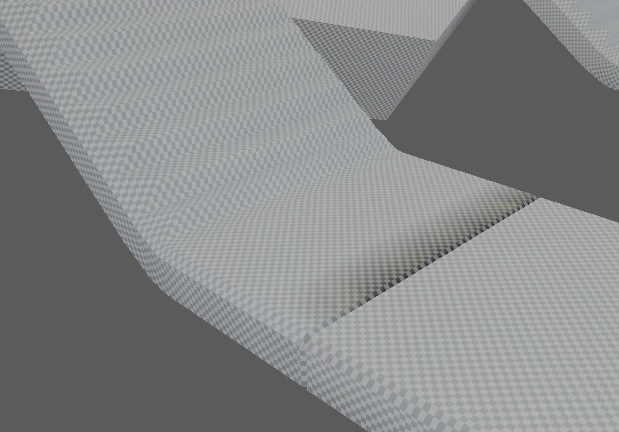
The baked GI is having the same glitch as the realtime lighting, so that hints it is a UV or overlap problem.
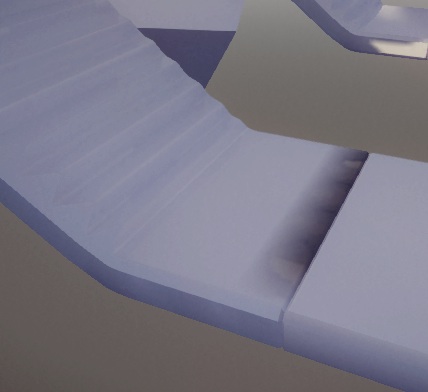
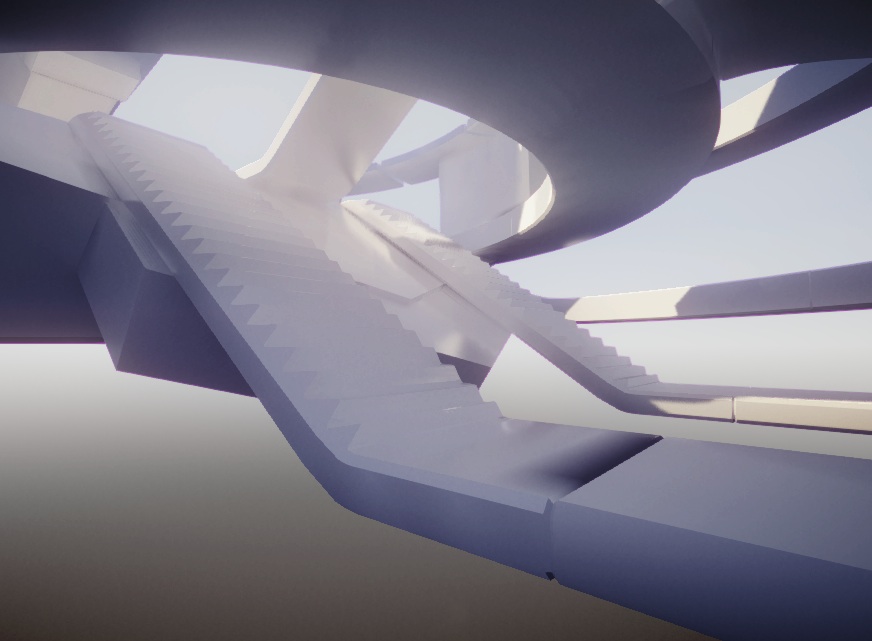
Help can come in the form of UV tools outside of Unity such as:
UVPacker
Link: www.uv-packer.com
Zbrush Decimator / Decimation Master
Link: pixologic.com --- decimation
Or screw it and use just use Vray
:-P
Workflow Exploration; 3dsmax to Unity3d
Link: www.quitenice.co --- workflow-exploration-3dsmax-to-unity3d
And this is where I am so far! Hope that helped, inspired or intrigued in some way
:-)
You should also switch to Deferred, if using PBS Shaders / the new built in Standard shader, but I cannot as it breaks my Screen Space Reflections from Candela at the moment.
And this is what Unity writes about known problems: with the GI right now:
Issues with existing features:
Some combinations of shaders and rendering paths are not functional (see Prerequisites).
Bleeding albedo/emissive.
Library/GiCache is never purged, so might need to be cleared manually.
Scale In Lightmap equal 0 not fully respected (the instance should not get lightmaps, just influence the surroundings).
Emission from the Universal shader is only baked.
Skybox needs to use the RenderFX/Skybox shader and the textures used need to have Read/Write Enabled.
Emissive is clamped at 1.0f.
Limitations
Not yet implemented features:
Terrain support.
Baked probes.
Baked environment lighting.
Baked area lights.
Baked transparency.
Baked cookies.
Dynamic cubemaps.
Skinned Mesh Renderers support.
Additive scene loading.
Cache Server for GI data sharing.
Dynamic visibility for point and spot lights (direct lighting for GI is not shadowed). This limitation does not affect baking.
Importing Models / Scenes
I use C4D but likely this applies to other formats. When importing a large scene especially with my workflow in cinema, I want to ignore a lot of objects that are backups, or base parts / bits of procedural content before I have UV'd and such. I cannot find anyway to mark these to be ignored from export / import. So I just carefully name such items with '-disable' in the name. Same for any objects I want to attach mesh colliders on I name '-coll' and so on. Then when importing into Unity I can do a quick search and set those items up, you could go one step further and write an asset importer script that does this for you.
First Person Controls
I personally just use uFPS
Link: www.assetstore.unity3d.com --- 2943
Getting fed up battling low resolution shadows even at max settings. So only solution is to break the largest pieces up into smaller ones even more.
I'm sure braking this up into even more models and polygons could only yield better results.. or more spectacular failures, place your bets...
Realtime GI below.. looks better, fancy that. It really does prefer lots of smaller models than huge ones interacting with smaller ones.

But then comes the slow retard of the group, the baked GI, and it eats dirt and spits out terrible errors as per usual:
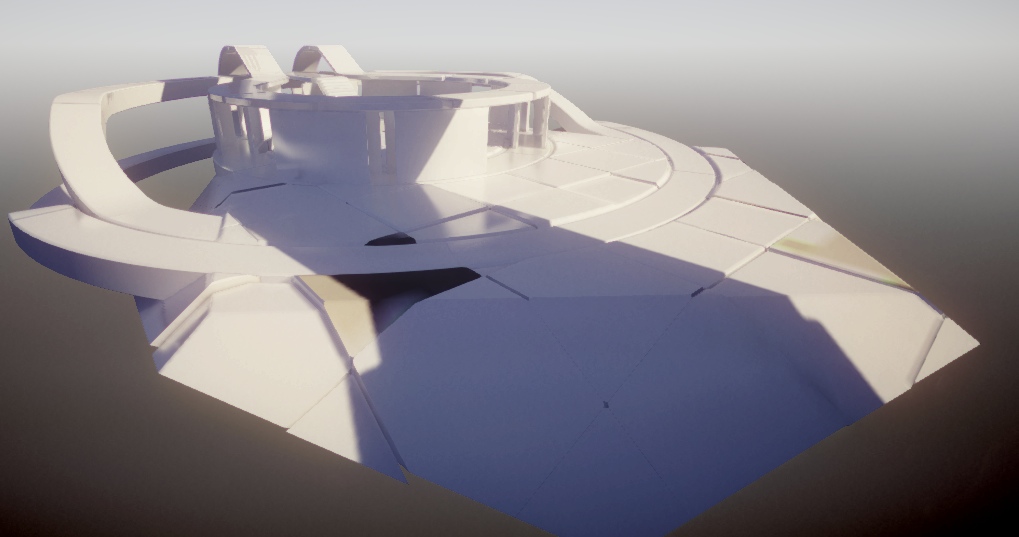
Apart from a couple of glaring problems it is pretty good overall ( 80mb lightmap with a lot of empty space in it )
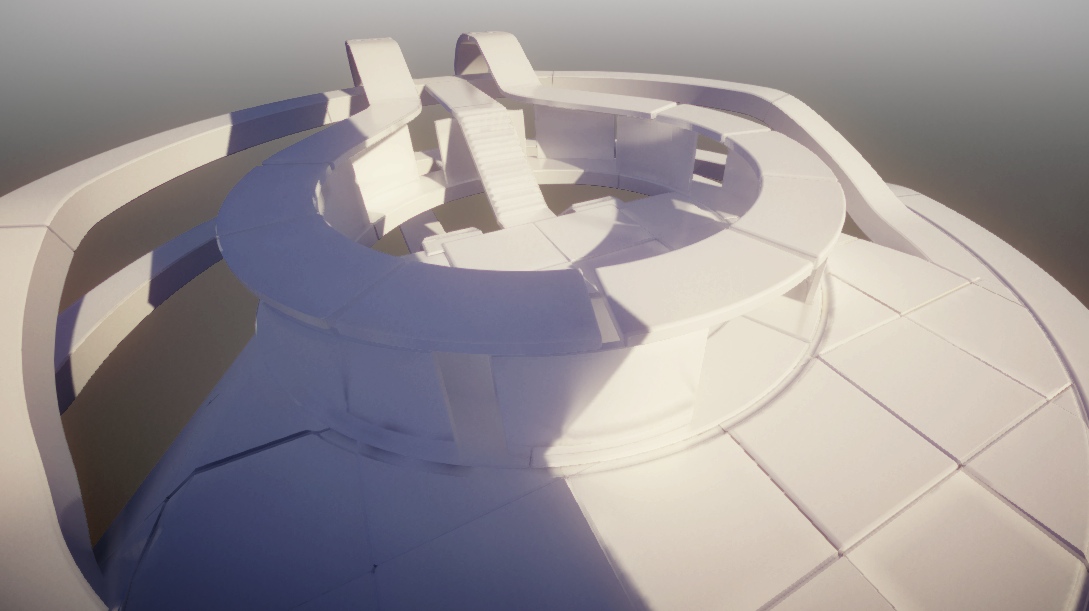
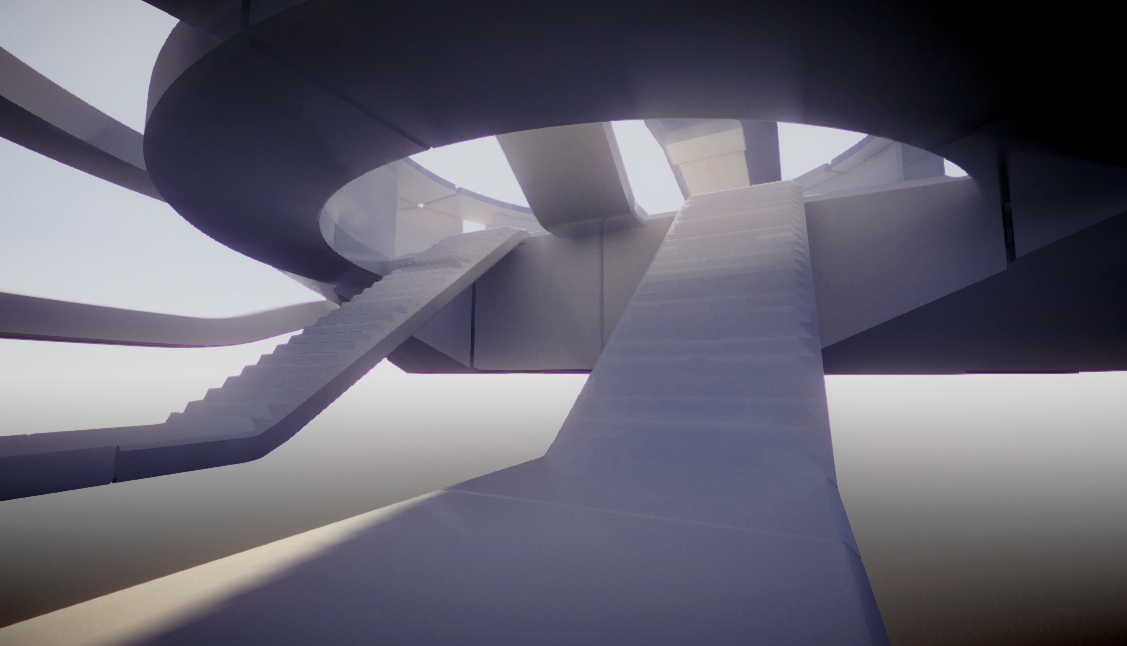
And now playing with some basic materials, these are all in realtime GI not baked
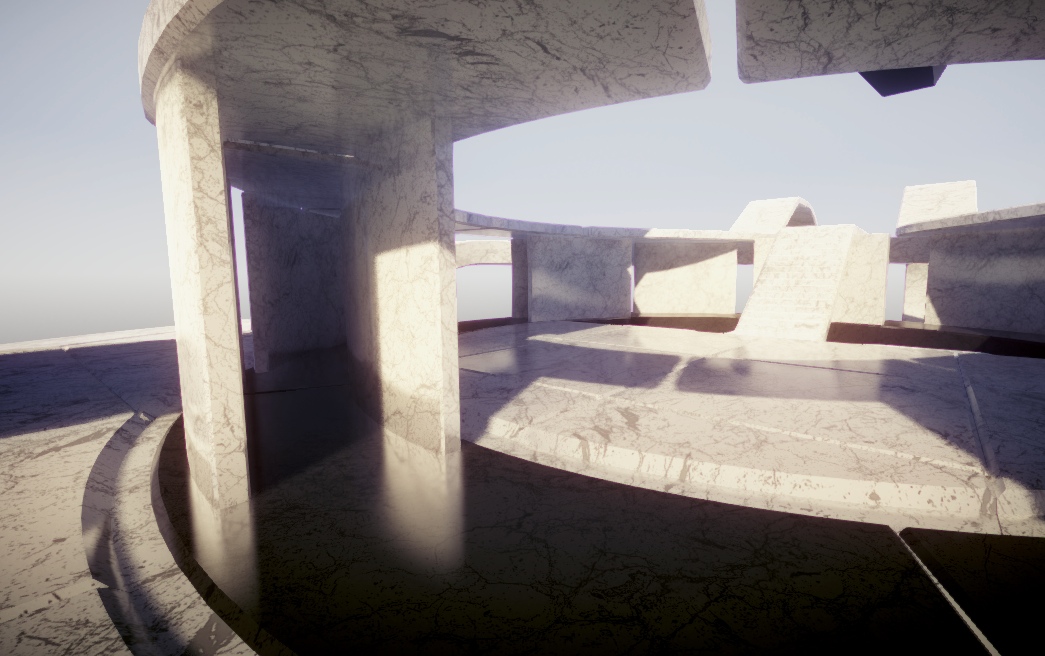
And if that wasn't enough theres some more WIP here:
Link: www.shadowood.uk --- Store
Some stuff I am playing with right now for game I am programming.
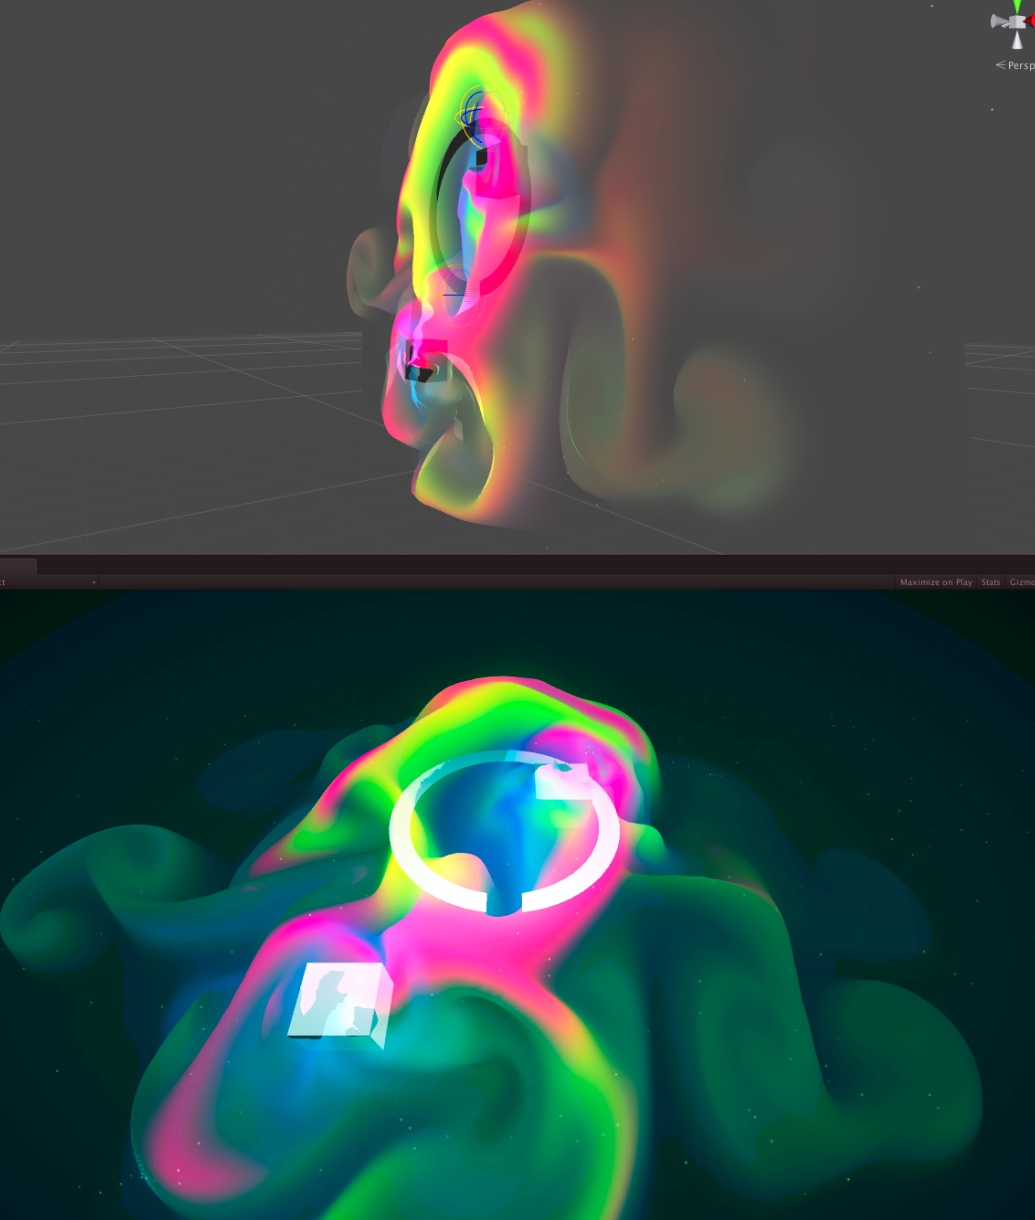
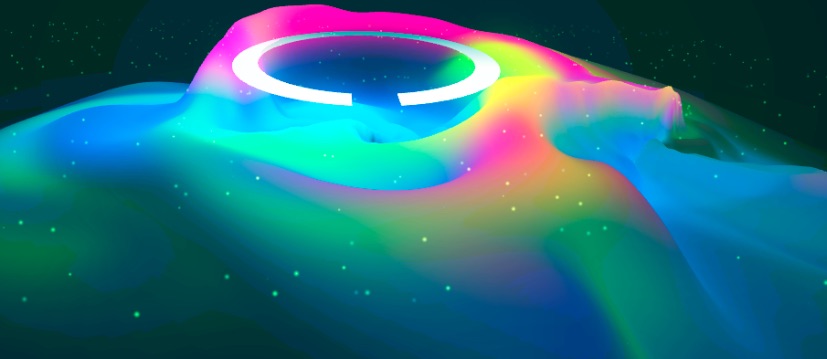
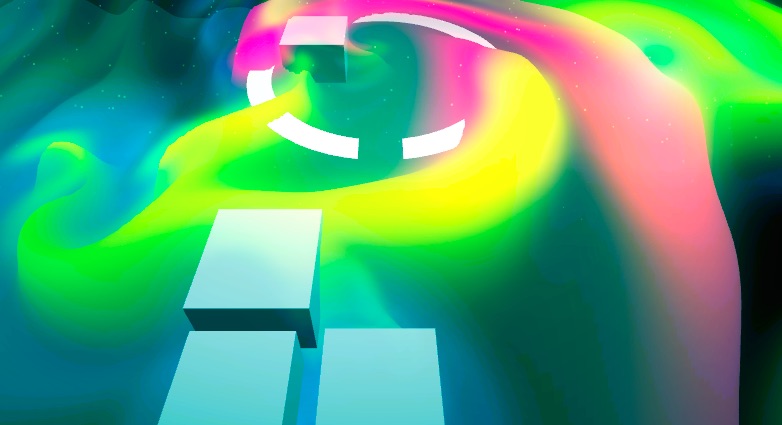
I recently saw some impressive Arch Vis videos here ( done in realtime )
Link: forums.unrealengine.com --- showthread
Link: www.ronenbekerman.com --- unreal-engine-4-and-archviz-by-koola

Those already look better than anything I got in Cinema 4D with Vray.. though mostly because it crashed all the tim, came with nothing correctly setup by default, and was insanely slow on my machine.
And yes this was achieved with UE4 ( Unreal Engine 4 ) Which is a very very impressive bit of kit if your machine can run it and you don't mind C++ A discussion on the pros and cons of that is a lengthy one, each to their own.
As a huge fan of Unity 3D, things like this inevitably annoys the hell out of me. As far as Unity has come over the years, Unity 4 cannot get even close to UE4 in terms of graphical amaze balls.
But Unity 5 I hear you cry! is coming soon!
And we have been promised all sorts of amazing newness like PBR ( Physically Based Rendering ) in Linear Gamma colour space with HDR Lighting. Even Realtime GI ( Global Illumination ) at long last, I have waited for this for half a decade after seeing the first Enlighten demo.
So can it compete now? kinda... almost.. so close
And getting close in of itself is a huge achievement from where Unity began.
Lets see how close I got
And this is all done in the beta version, things will change, things are being fixed and added still
FYI There is more on this here:
Link: www.shadowood.uk --- Y2014-Mo09-Unity5
Humble start
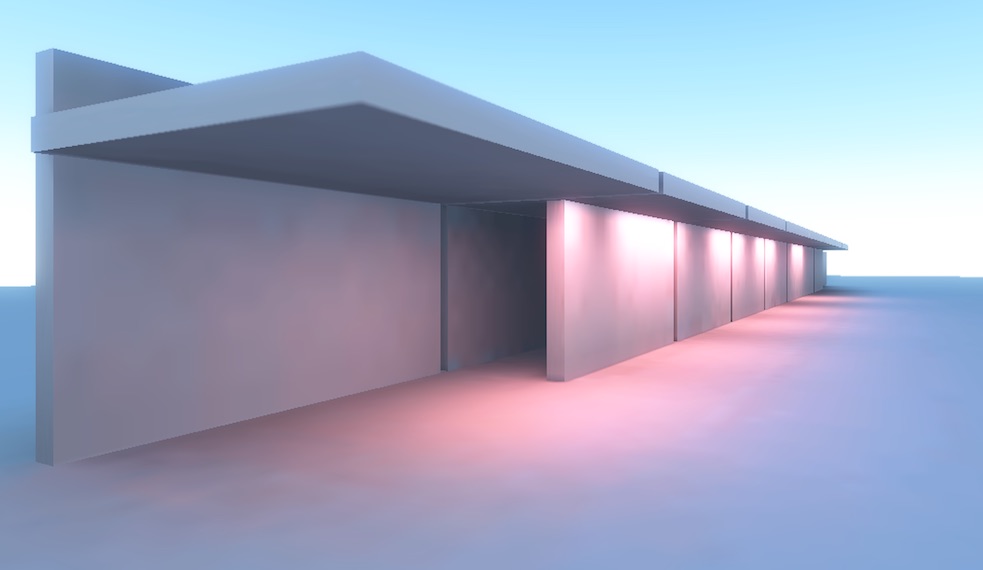
So far not impressed as light seems to leak in / bounce way too much. But this may be configuration woes, saying that as soon as you Bake the GI instead of using realtime it looks way better in terms of having truly dark areas where they should be. And already annoyed as you cannot use Area lights with the realtime GI ( yet ) but also Point lights cannot be USED! ( though this appears to be a limit that will be fixed by release )
You can cast nice Shadows with the baked GI, but that is not possible with the realtime
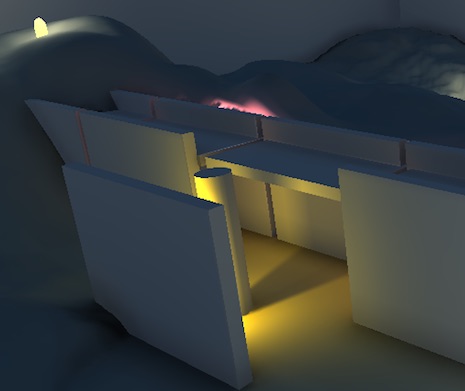
You can mix the realtime GI with baked though so all is good.. well that is if baked lighting ever behaved properly.
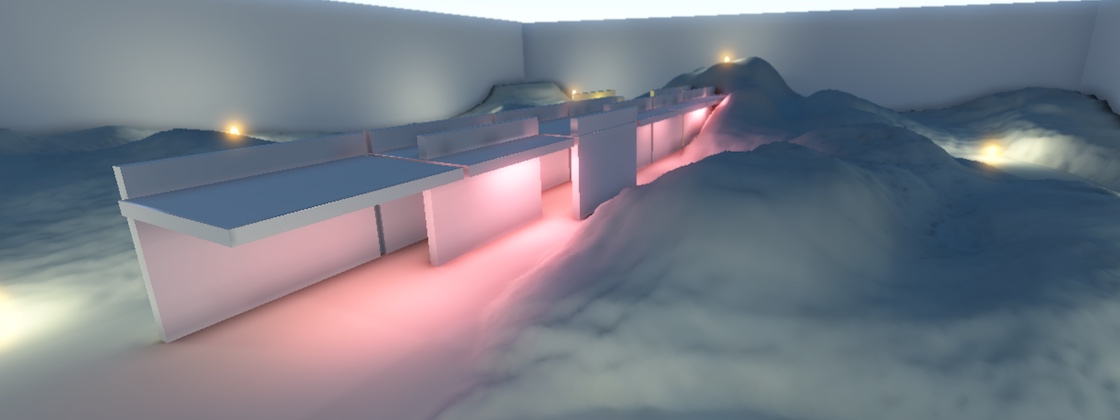
Problem is with the baked GI it HATES you, and it hates UV seams even more, which is bad given it is often impossible to not have UV seams.
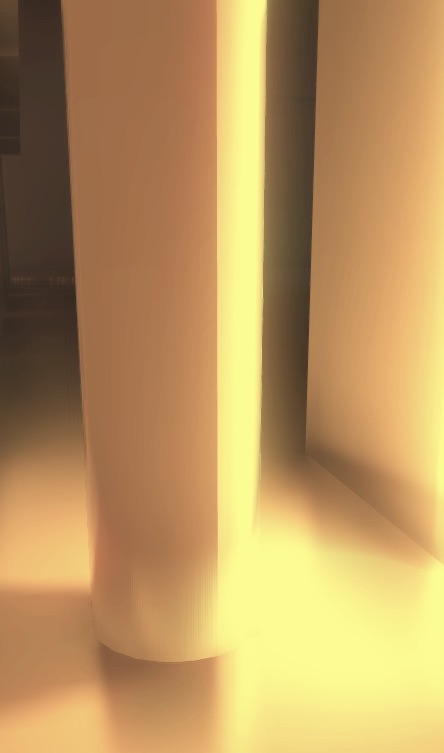
I find it hard to believe the new GI suffers just as bad with seams as the old Turtle Beast powered one. Surely this is a basic thing to solve with math and cleverness.
As if UV mapping isn't torturous enough, but now you have to UV map really really well. If your UV faces are not perfectly joined together it will result in terrible glitchy ugly baked lighting.
It is so bad and so crippling I MUST be doing something wrong.
OH GOD THE HUMANITY:
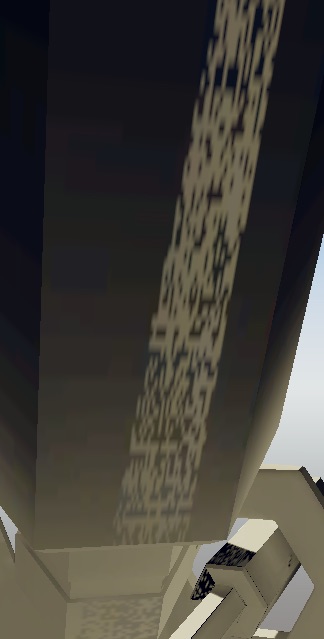
And where things overlap sometimes you can an impossible ( for me ) to solve problem:
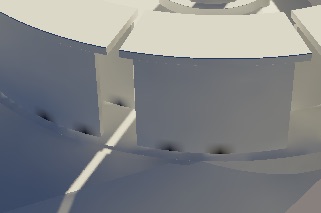
And whoever wrote the UV spacing code should be violently eviscerated:

Event the worlds most naive implementation could do a better job of space use. Key take away is to never have long thin sections of UV, say you have a really wide but narrow cylinder. Break the UV into separate pieces, but this creates seams in the lighting!!!! so better break the model up into separate pieces and pretend it was some kind of building limitation say they can't make pieces of walkway bigger than 8 meters
:-)

Oh screw you, how can it be that bad. No I do not have any weird overlapping polygons, or bad UV's
This is what happens with lots of long thin UV's this is the built in Uv mappers idea of how to do the job:

Worst part is that UV map is out of your hands, as it is a combination of every object in the scene and you cannot manually edit that.
Trying to make surfaces reflective with cube maps / reflection probes is a joke. They are only suitable for very very vague reflections on large areas like walls and floors. I tried having multiple probes but it just makes things worse and Unity doesn't interpolate / blend between probes so if an object moves around the scene the reflection just jumps from one probe to another suddenly.
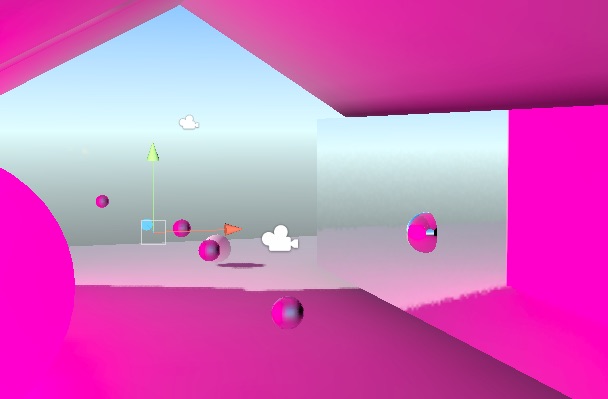
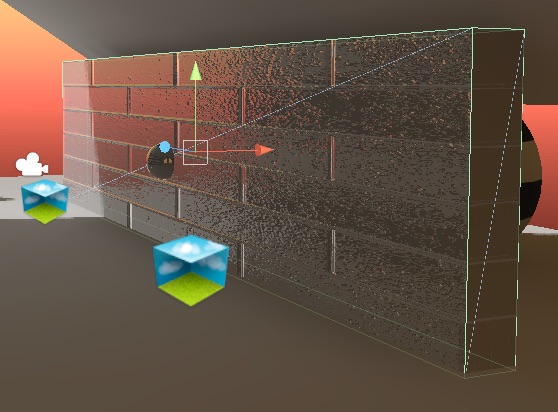
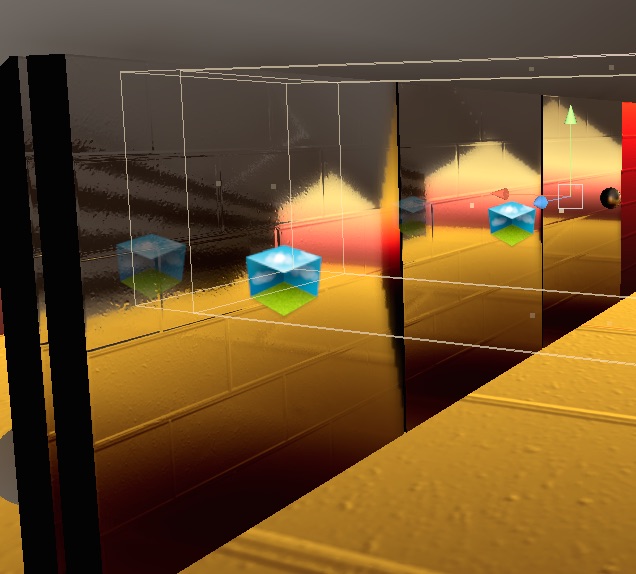
2 blow are UE4's example scene for reflections. Mind is blown
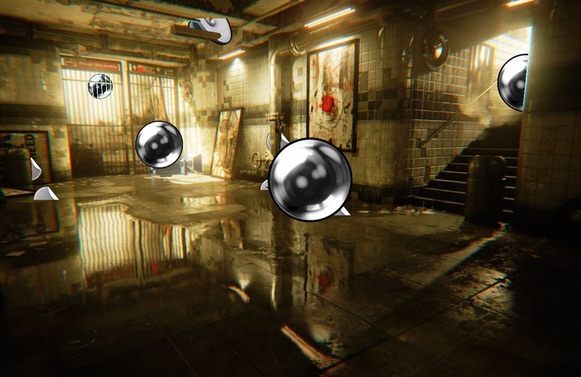
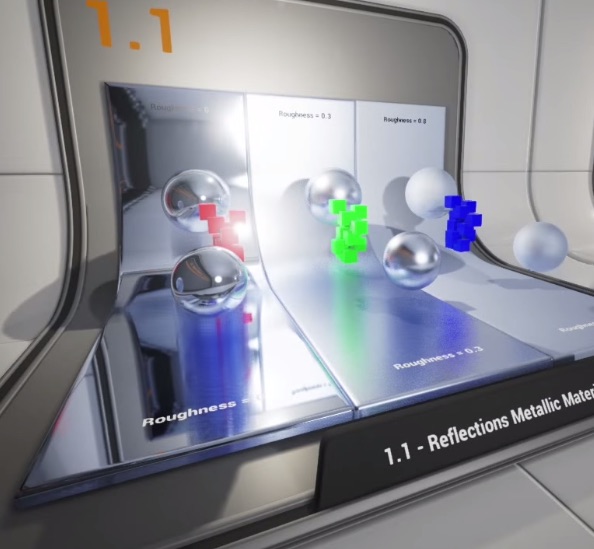
Then I discover Candela for Unity, Screen Space Reflections woo ( graphics card screams in the background )

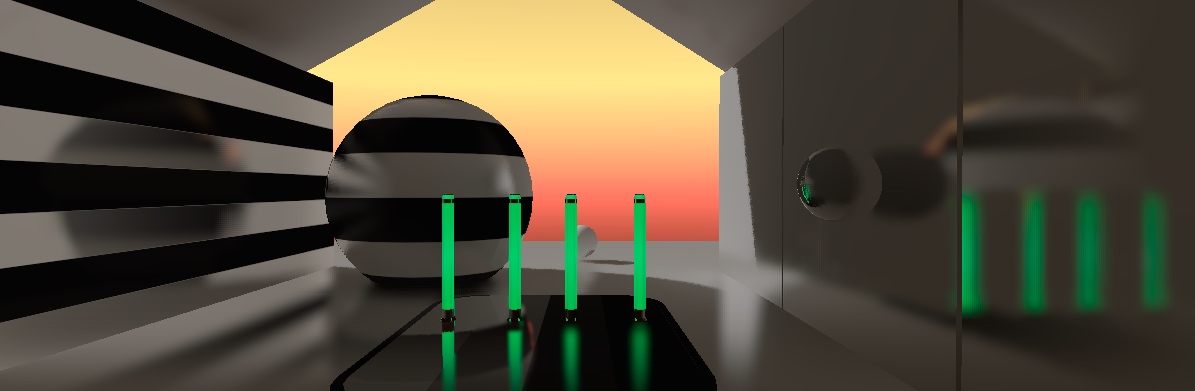
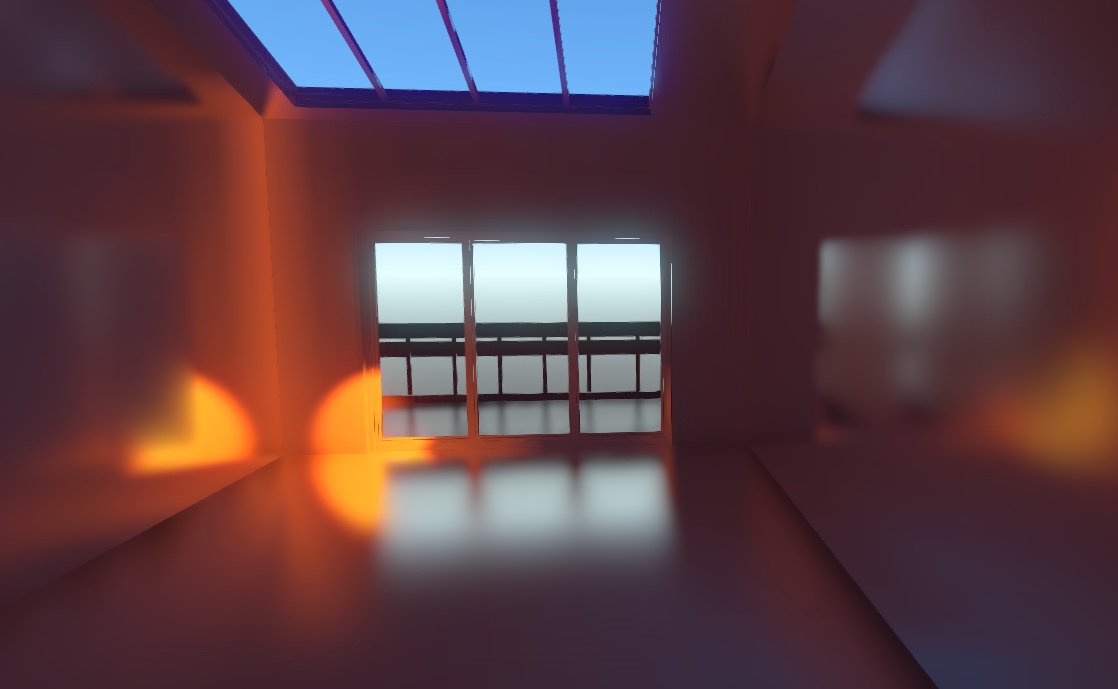
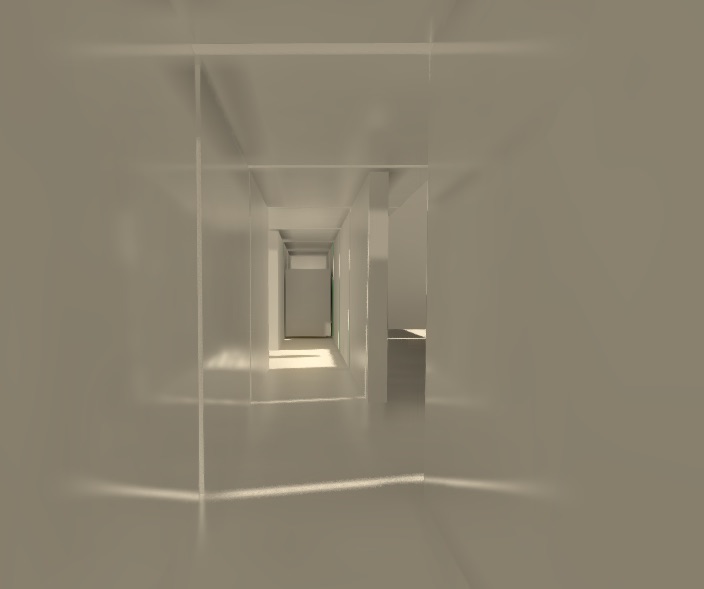
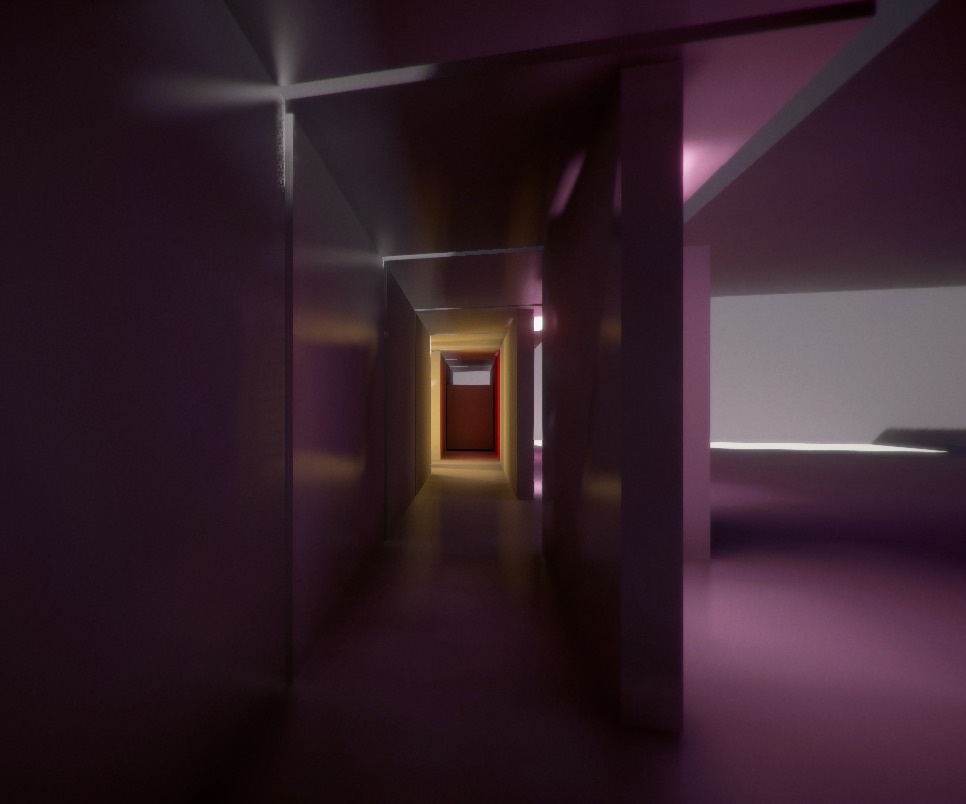
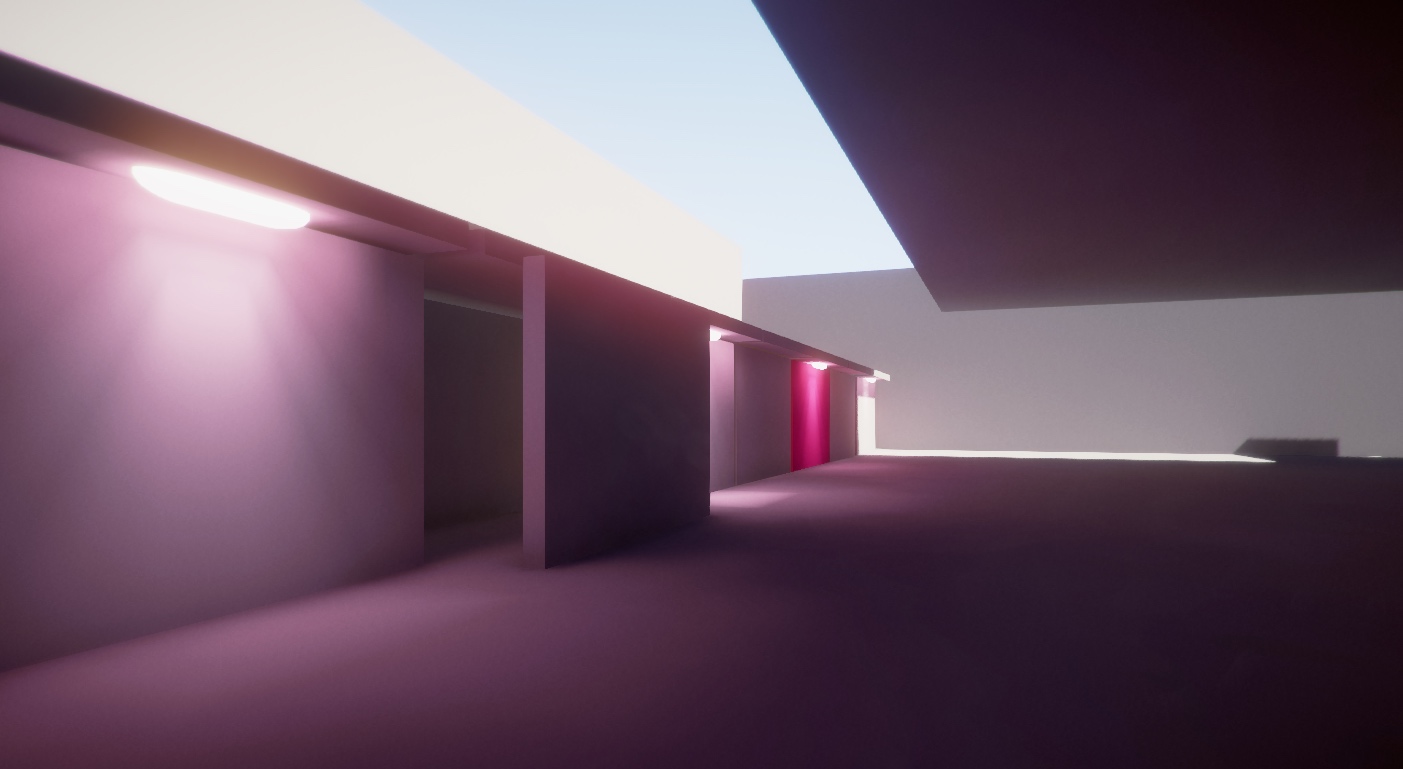
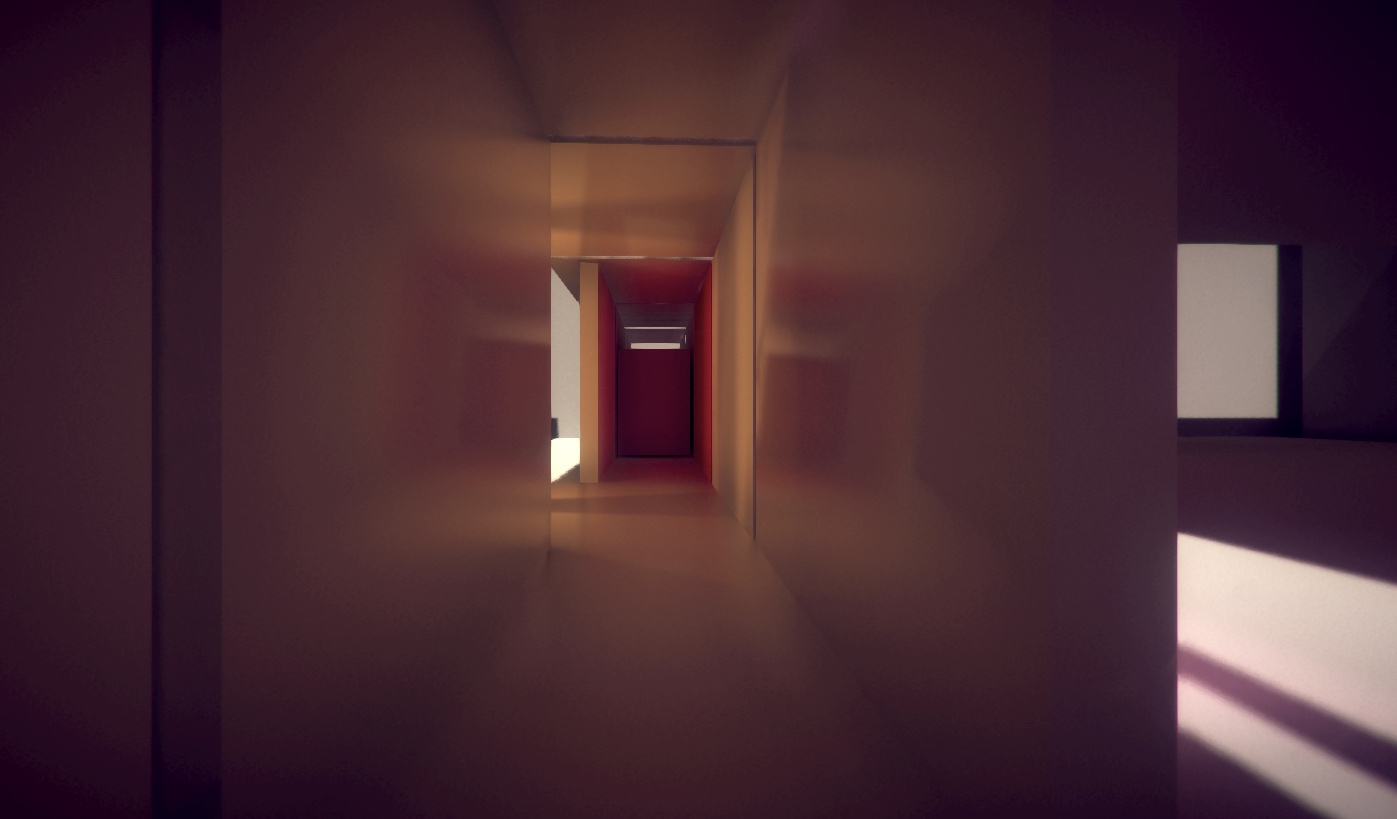

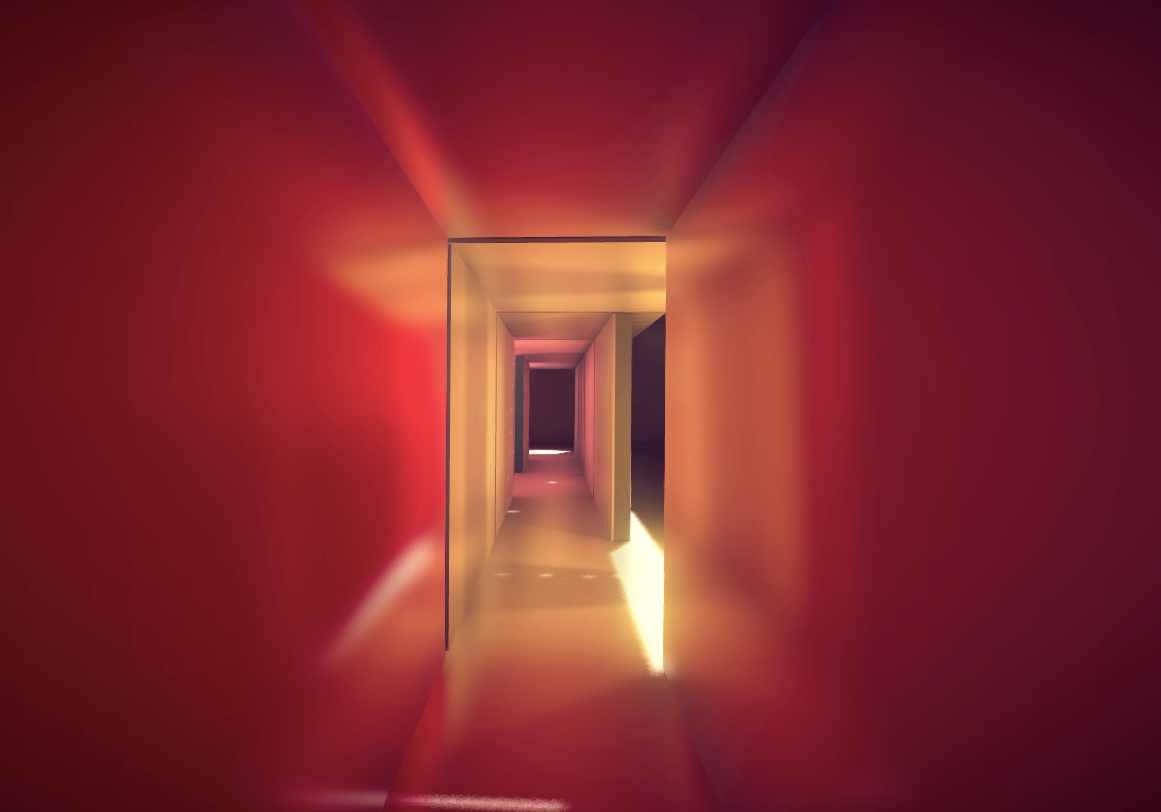
Next up some nice bloom and lens dirt, made famous by battlefield, which does it famously bad below:

My attempt using Sonic Ethers Bloom in Unity, keeping it subtle
Also note my attempt at replicated an IES type light effect using multiple realtime ( no GI or bounce ) point lights with a light cookie
Note Cookies and 3D Cube cookies fail to bake ( they used to work in beast ) but I heard they are adding that to Unity at some point
So I have an area light for the GI and then several realtime only lights with cookies on over the top.

I tried adding some floating dust particles in the air that you can walk thru but it failed to composite properly with the screen space reflections. It does work if I put it on a separate camera and compose those 2 together though, but setting the layer masks was broken in the beta so I removed it:
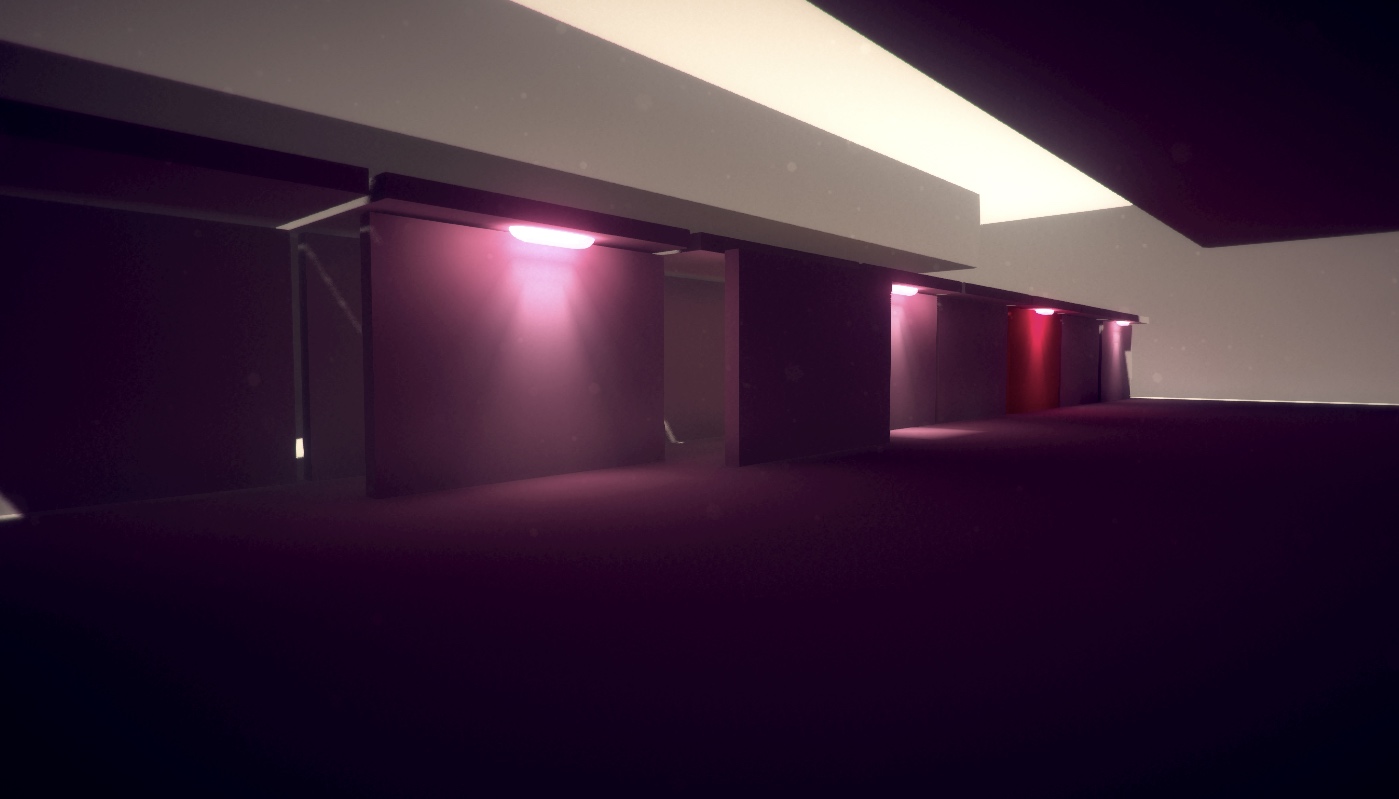
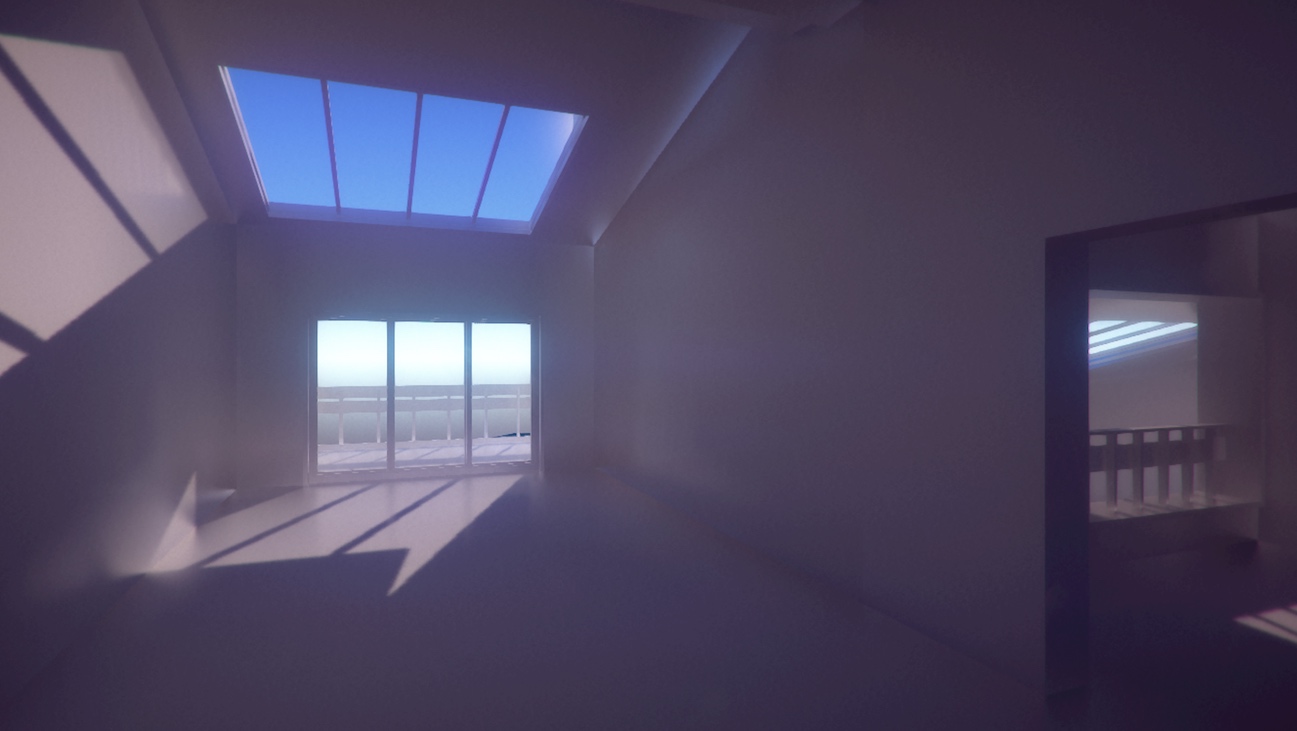
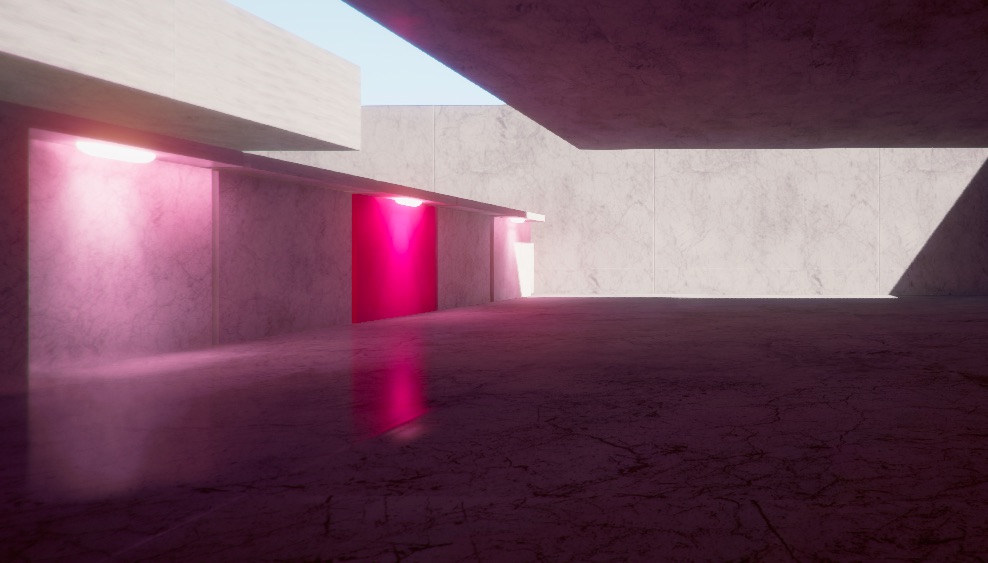
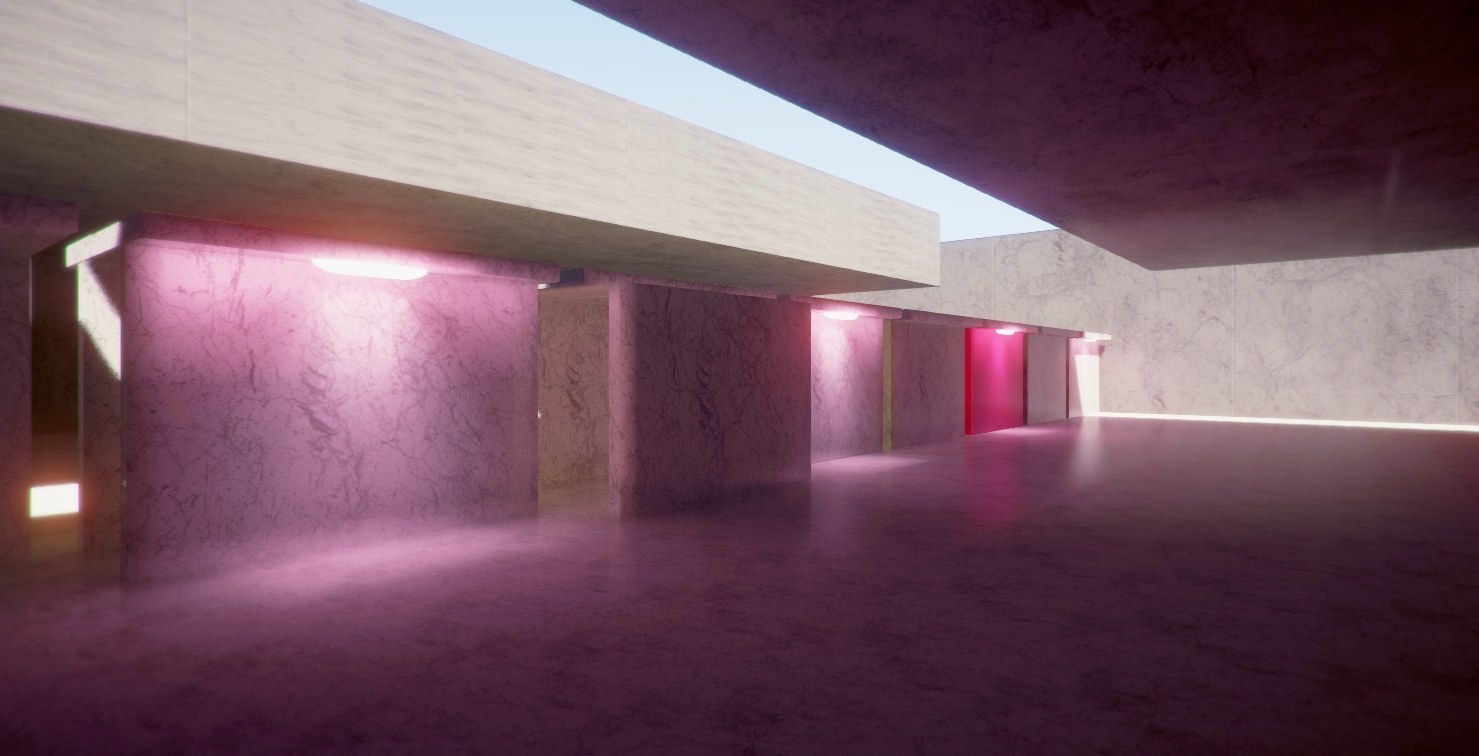

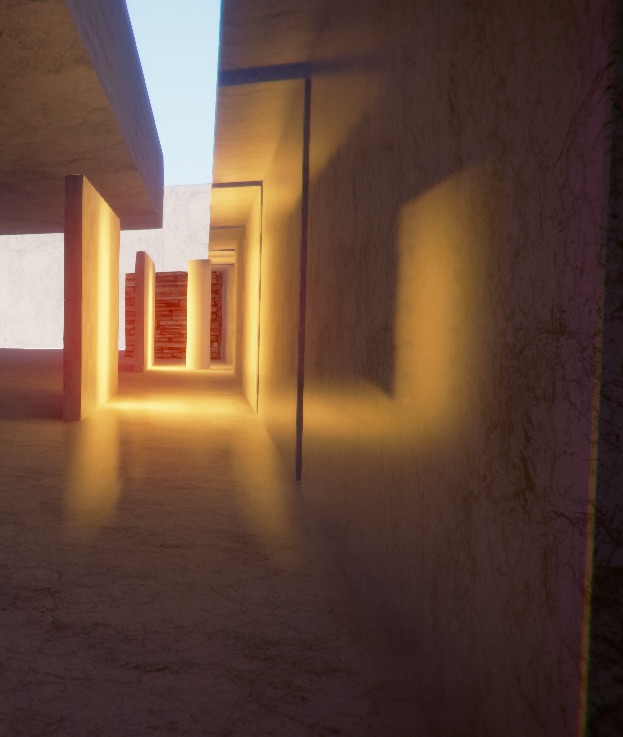
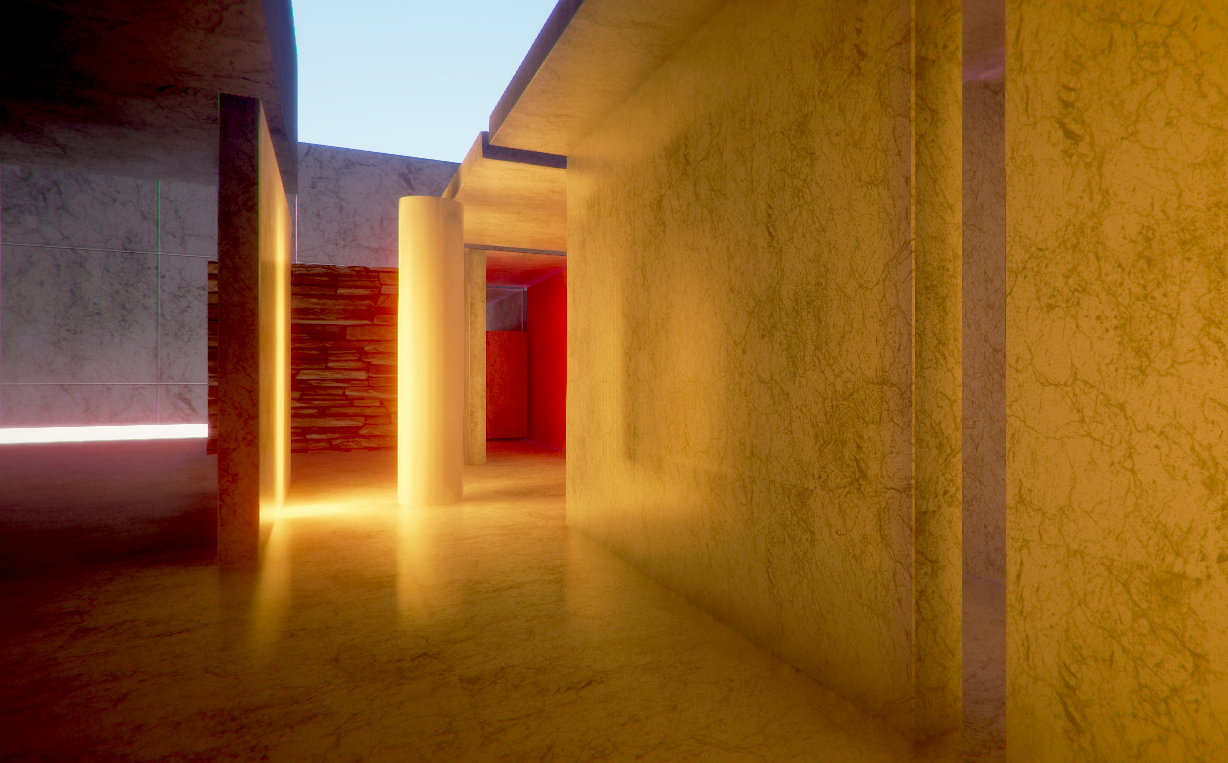

Even the floor is nice to look at now, if you can ignore the fact that the Light Probes seem to be ignored for the normal map / diffuse lighting so you can only see the tiles bump when the sun light moves over it
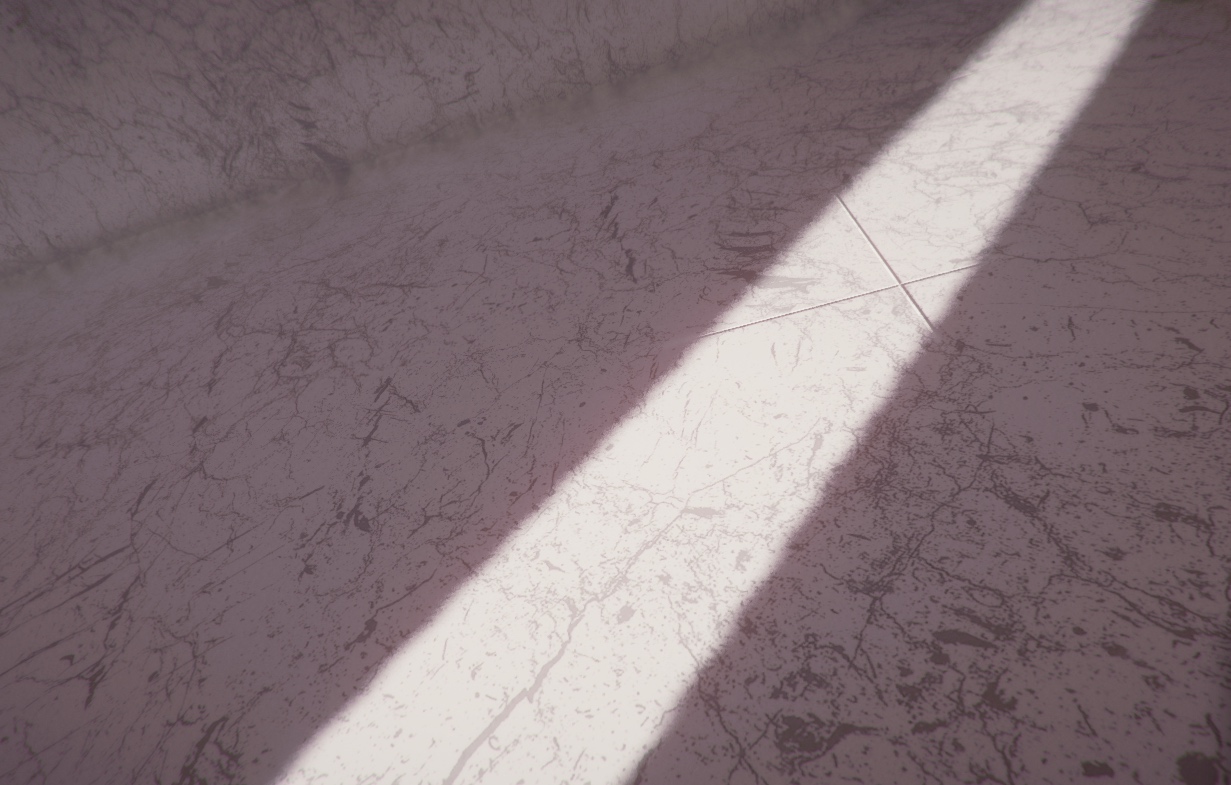
Getting serious now with the addition of the plastic chair!
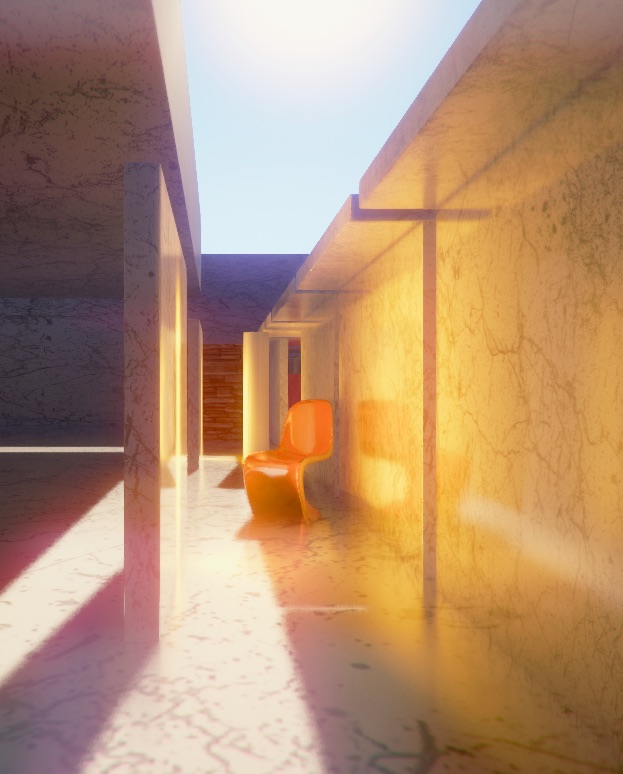
Even more serious now with artistic angle and liberal depth of field
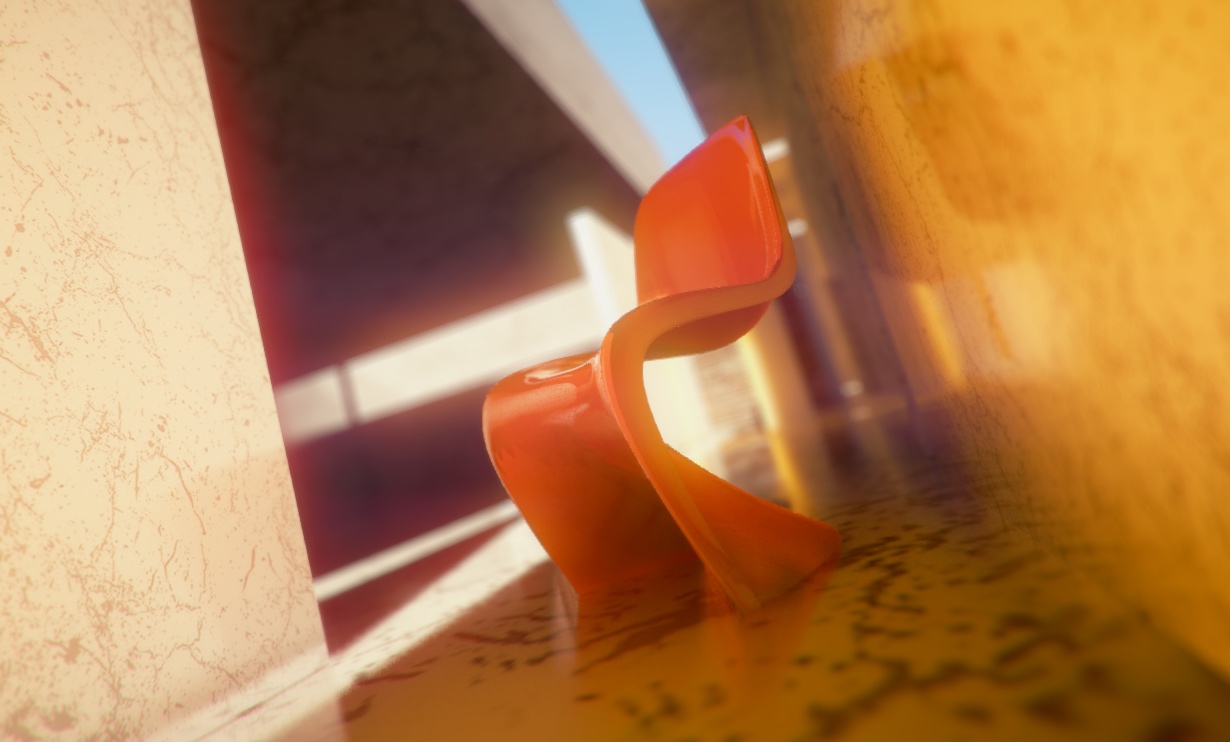
And now to make a more complex scene than just cubes
:-)
But I get a bit carried away as I do
Rendered in Cinema 4D
.jpg)
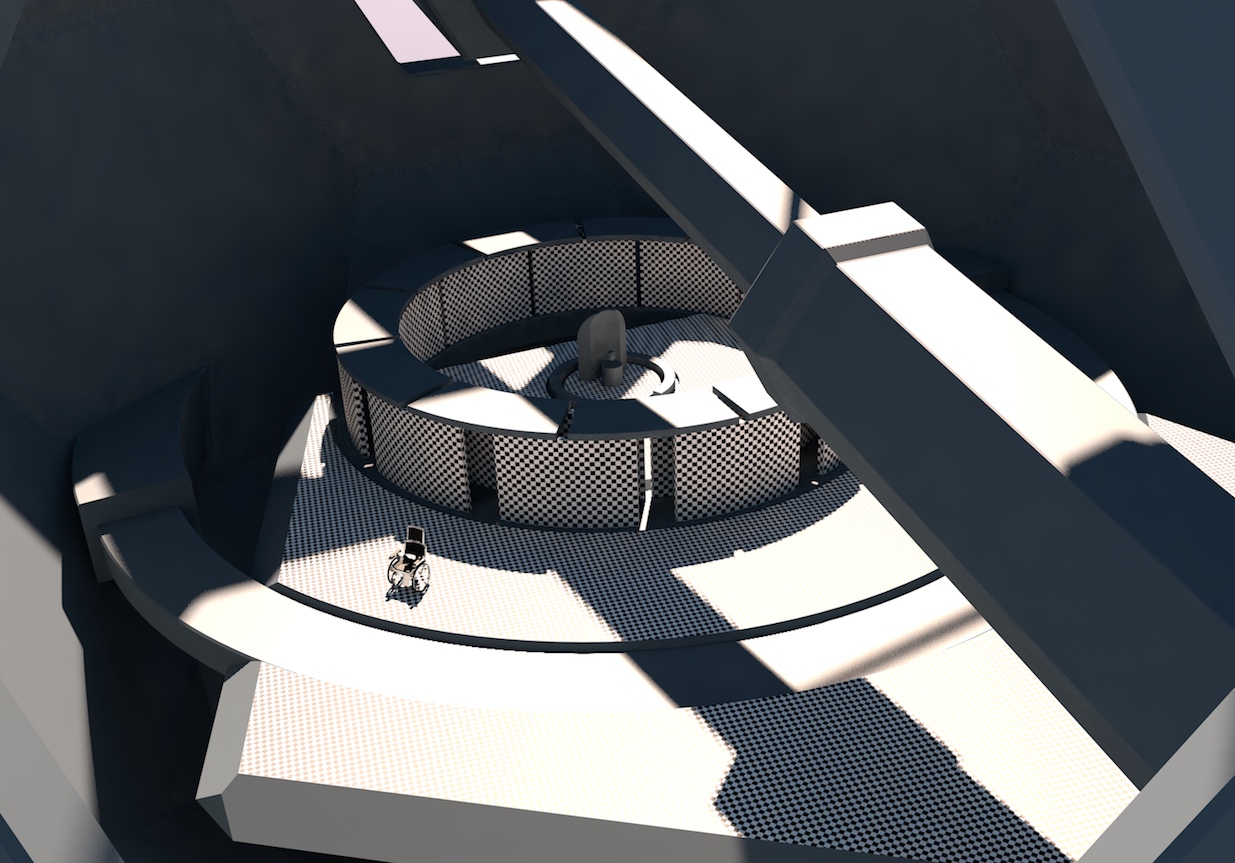
Got carried away trying to make some modern art and failing:
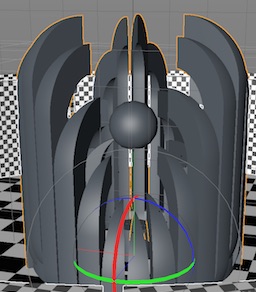
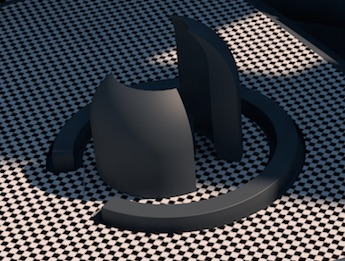
And now over to Unity, ugly at first but give it a moment
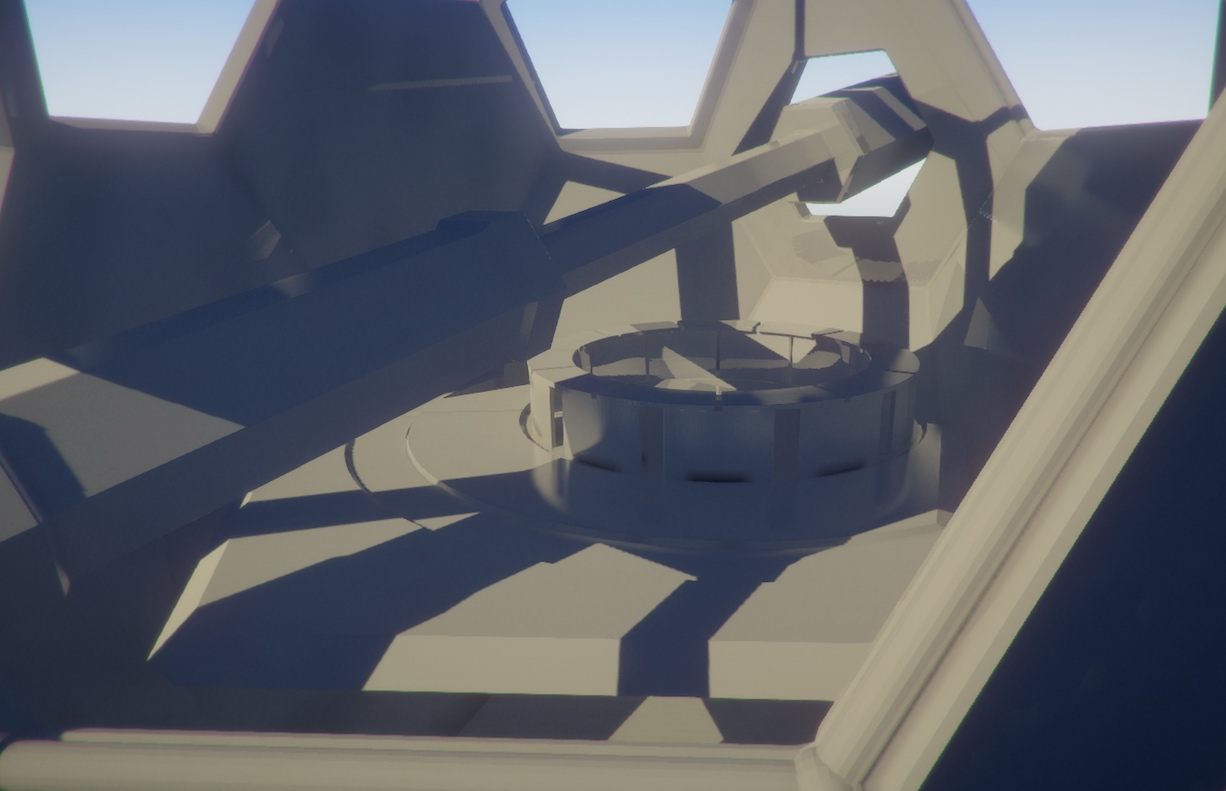
Adding some walk ways and coolness
.jpg)
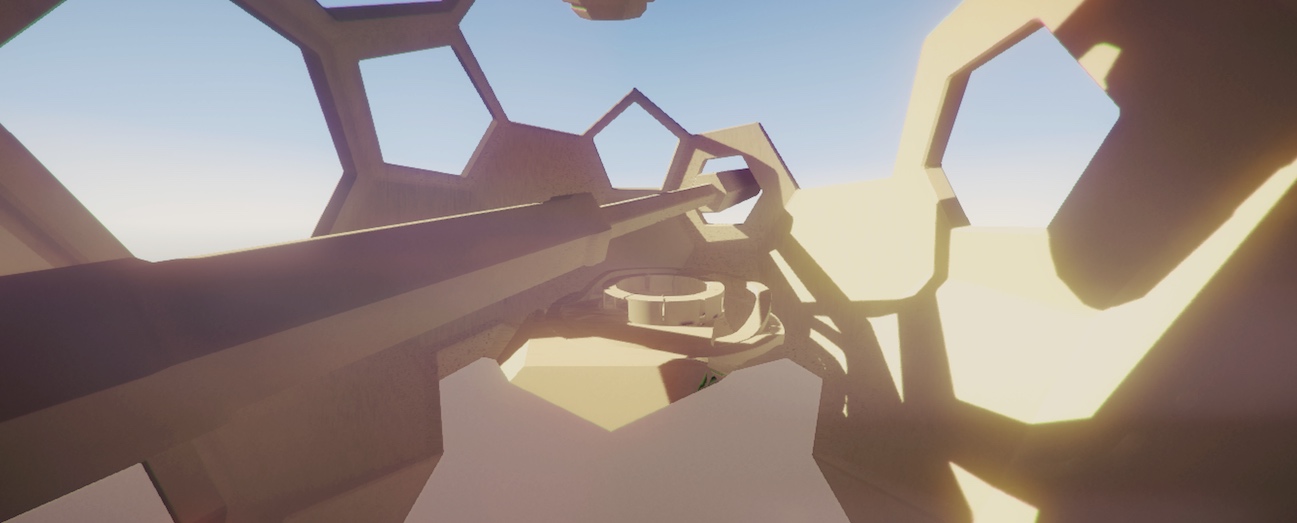
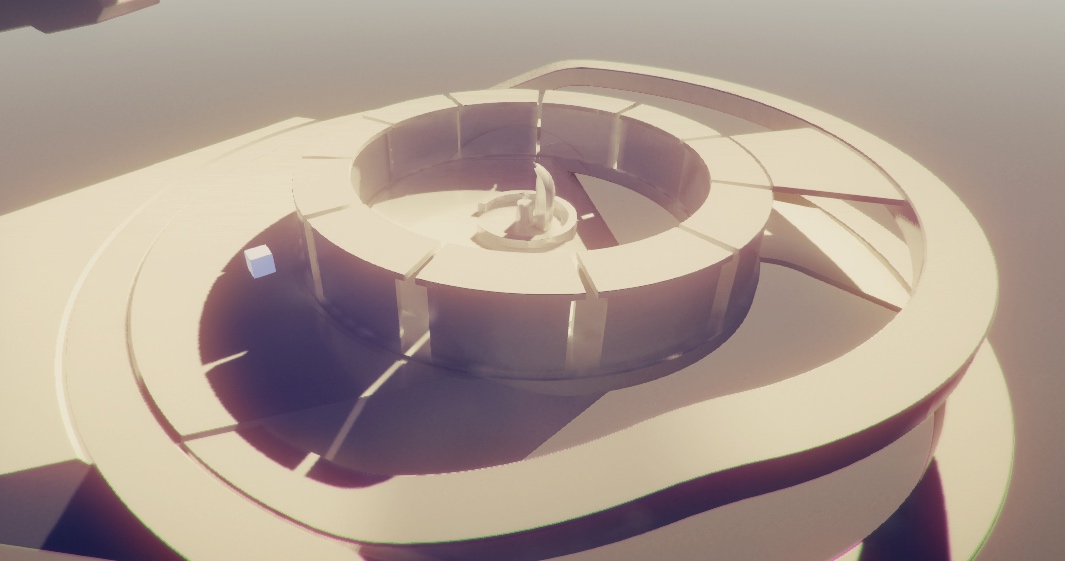
Getting better, also added bonus you get treated to random abstract art by the post effects:
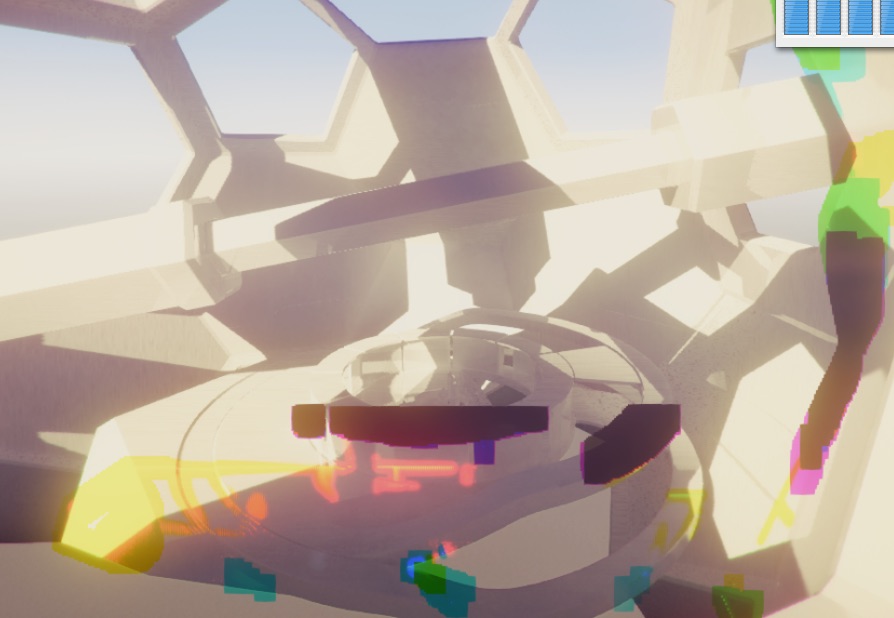
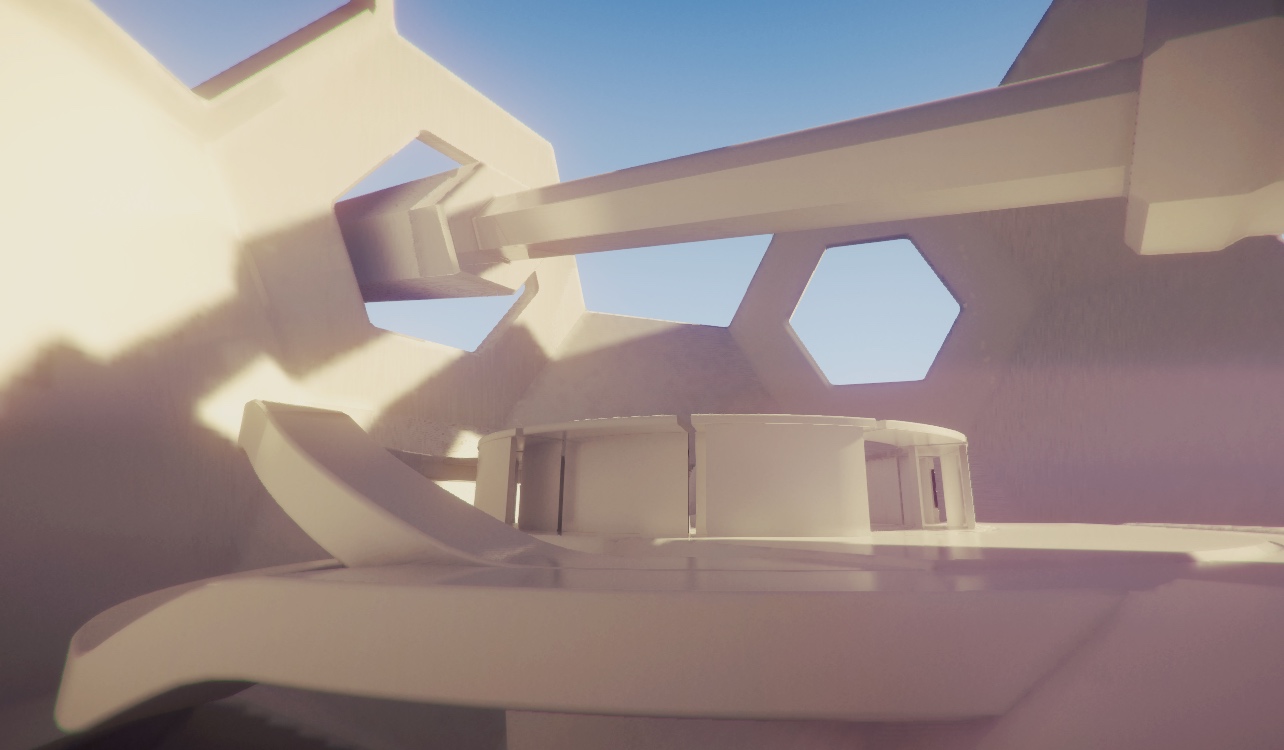
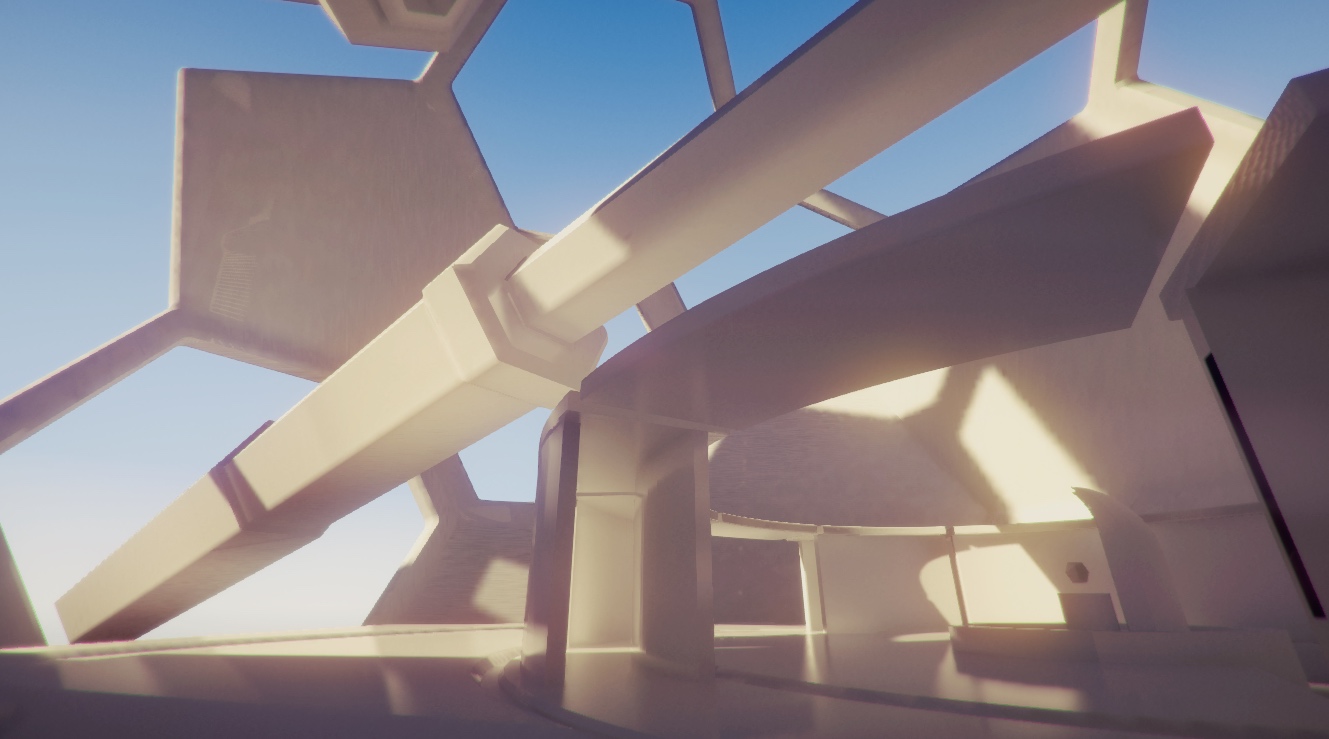

And from underneath, if you see this, it is the last thing you will see as I have no code to reset your player position:
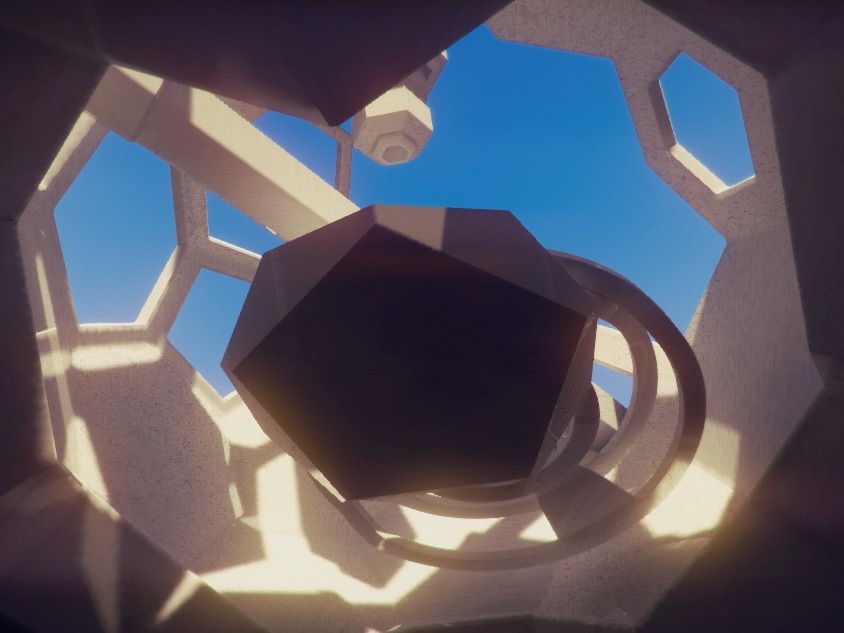
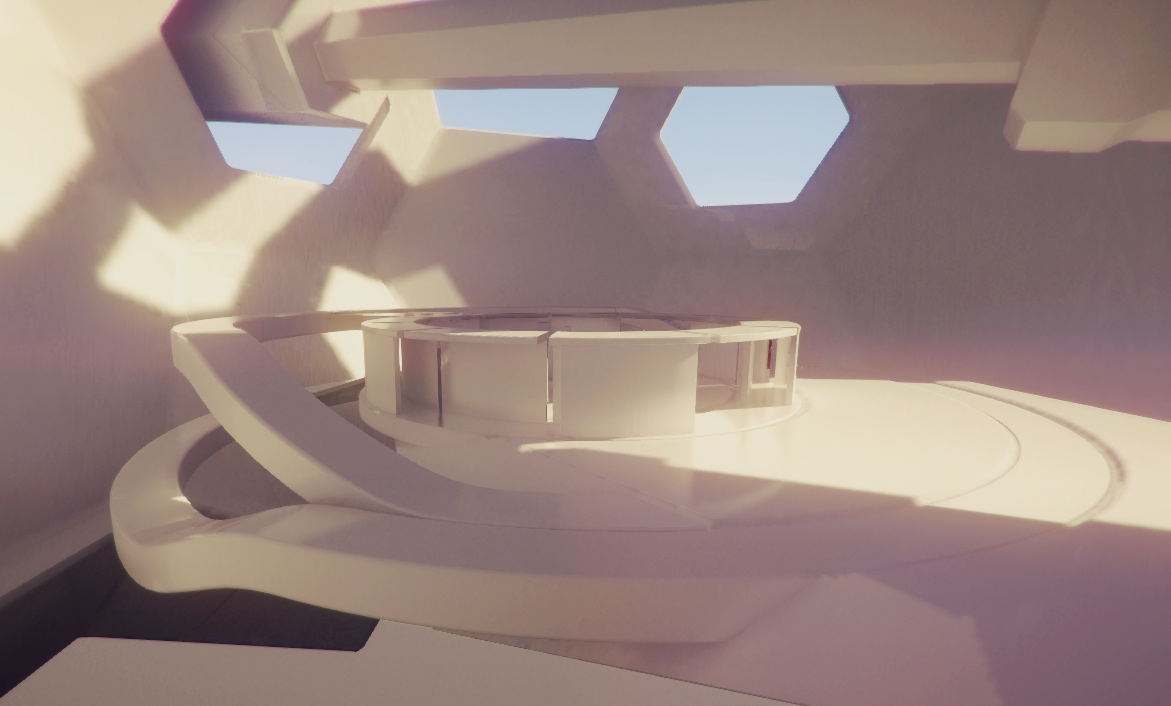
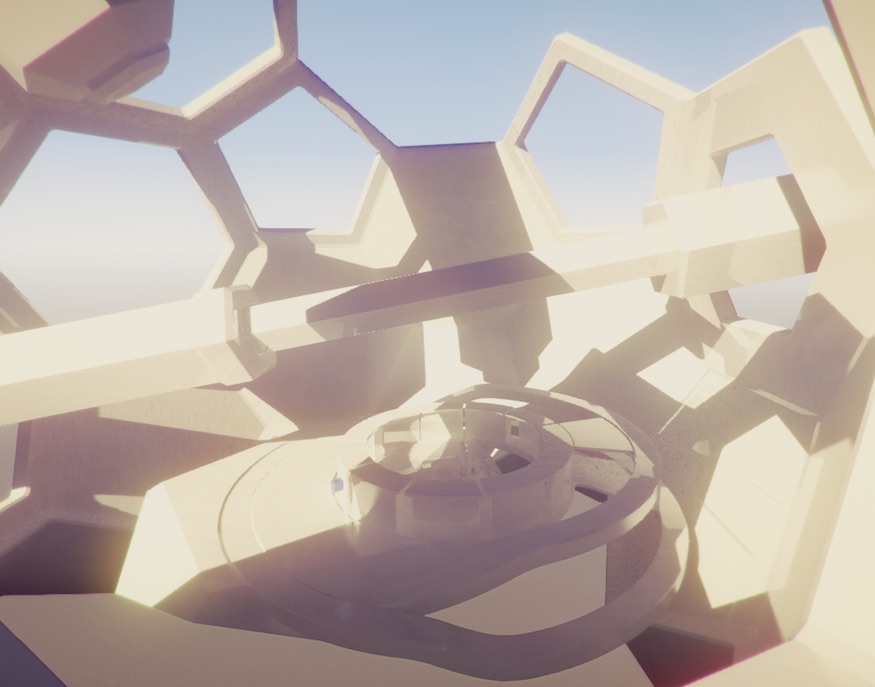
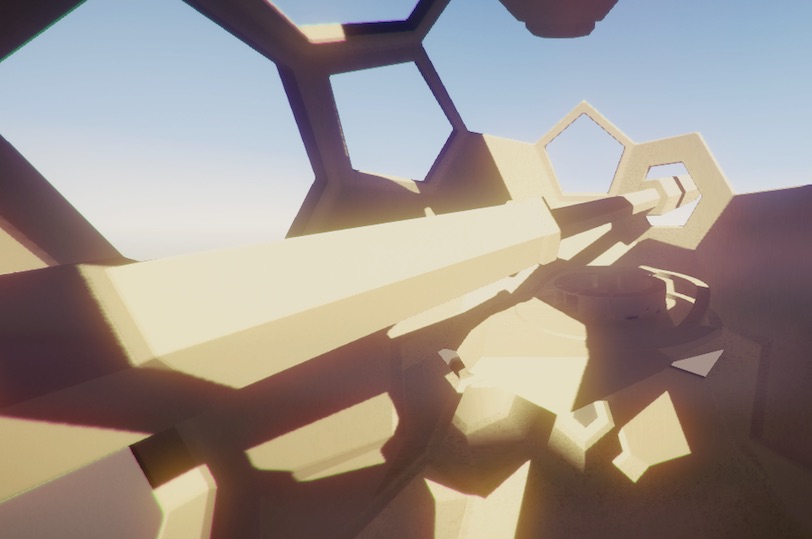
Decided to make this place his home:
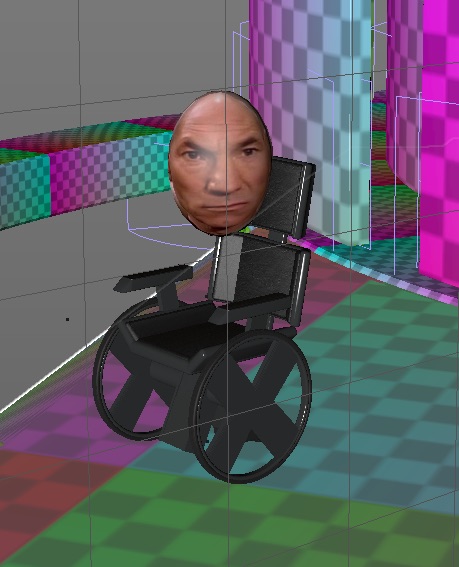
Turns out using deformers to bend basic primitives is a sweet way to do things
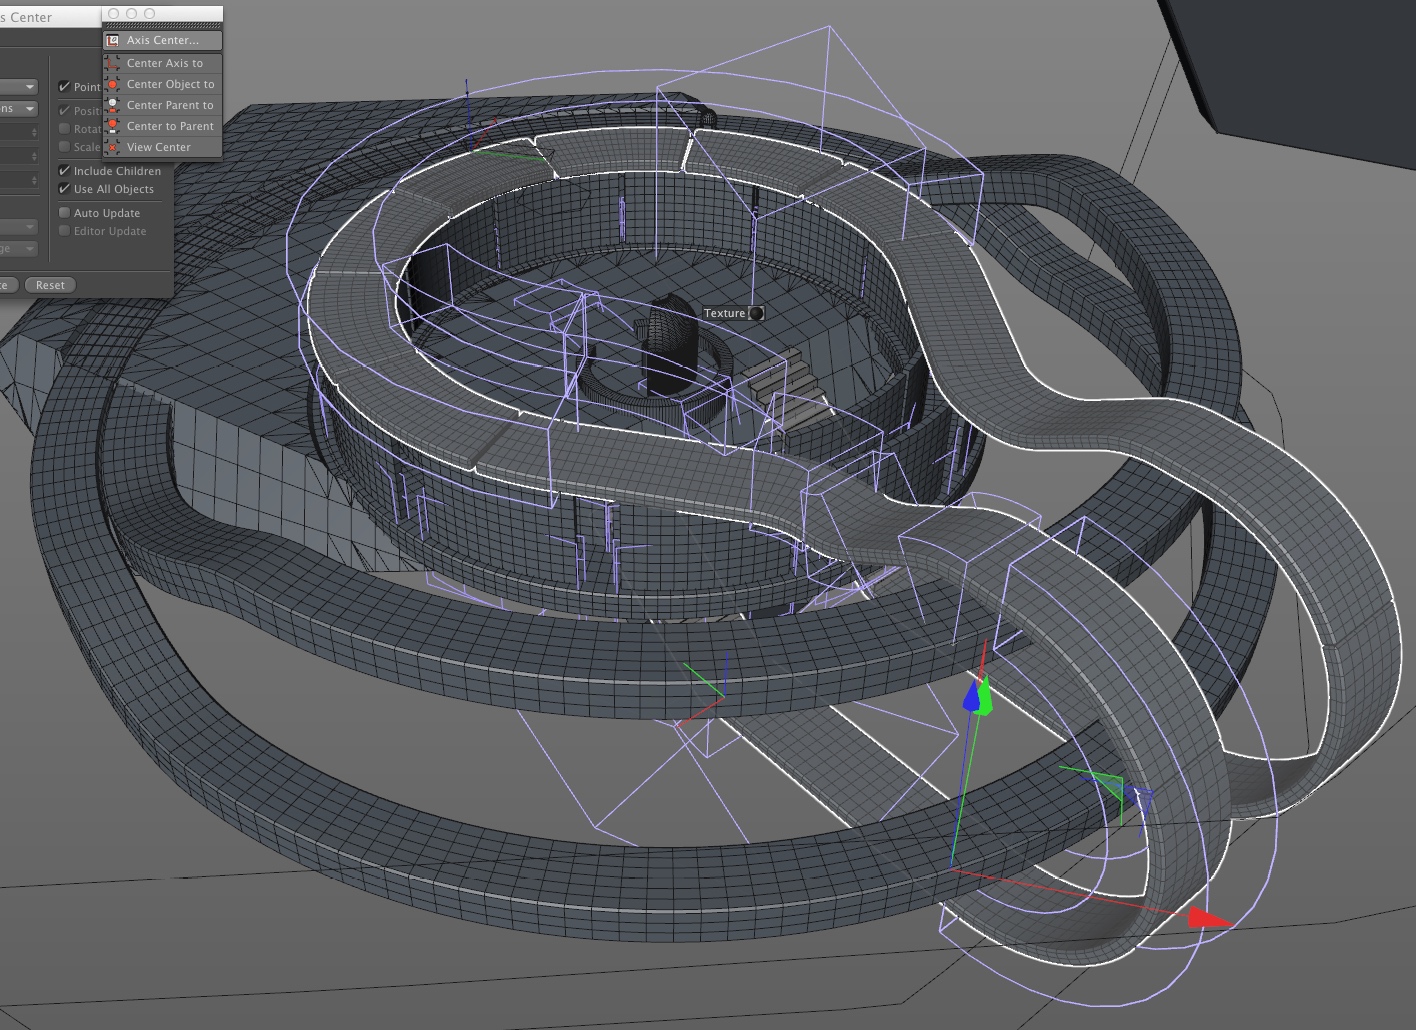
Procedural-ish Steps
So I can add more steps if needed without having to remodel anything
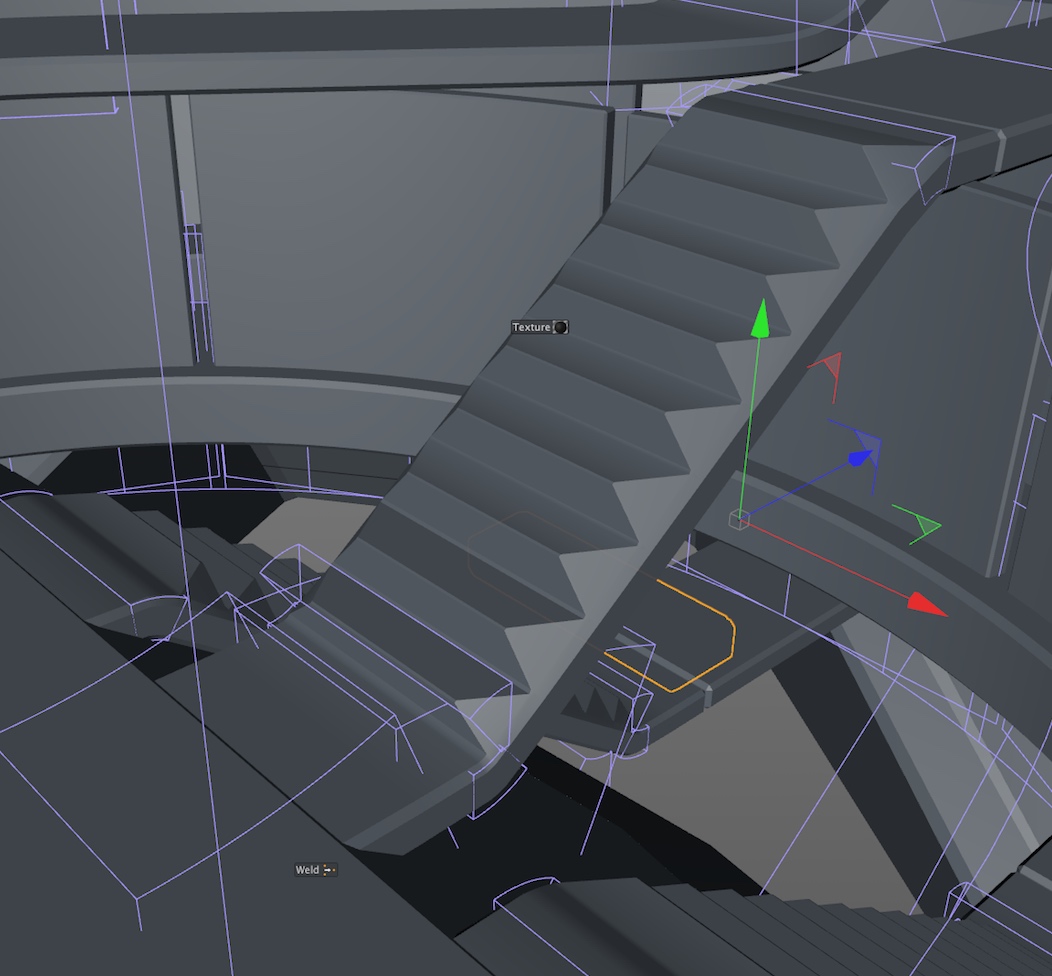
.jpg)
And at Low GI
.jpg)
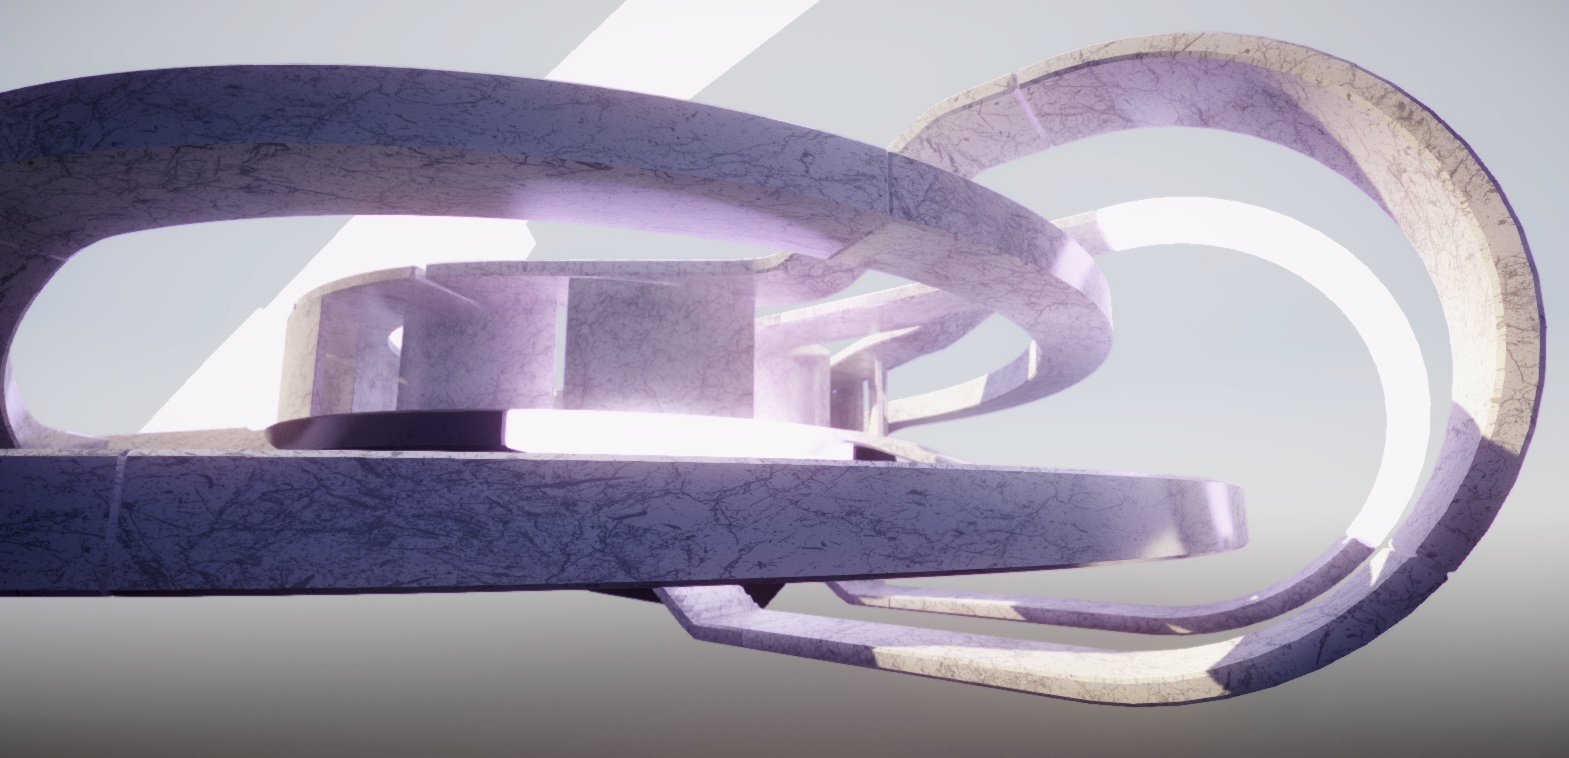
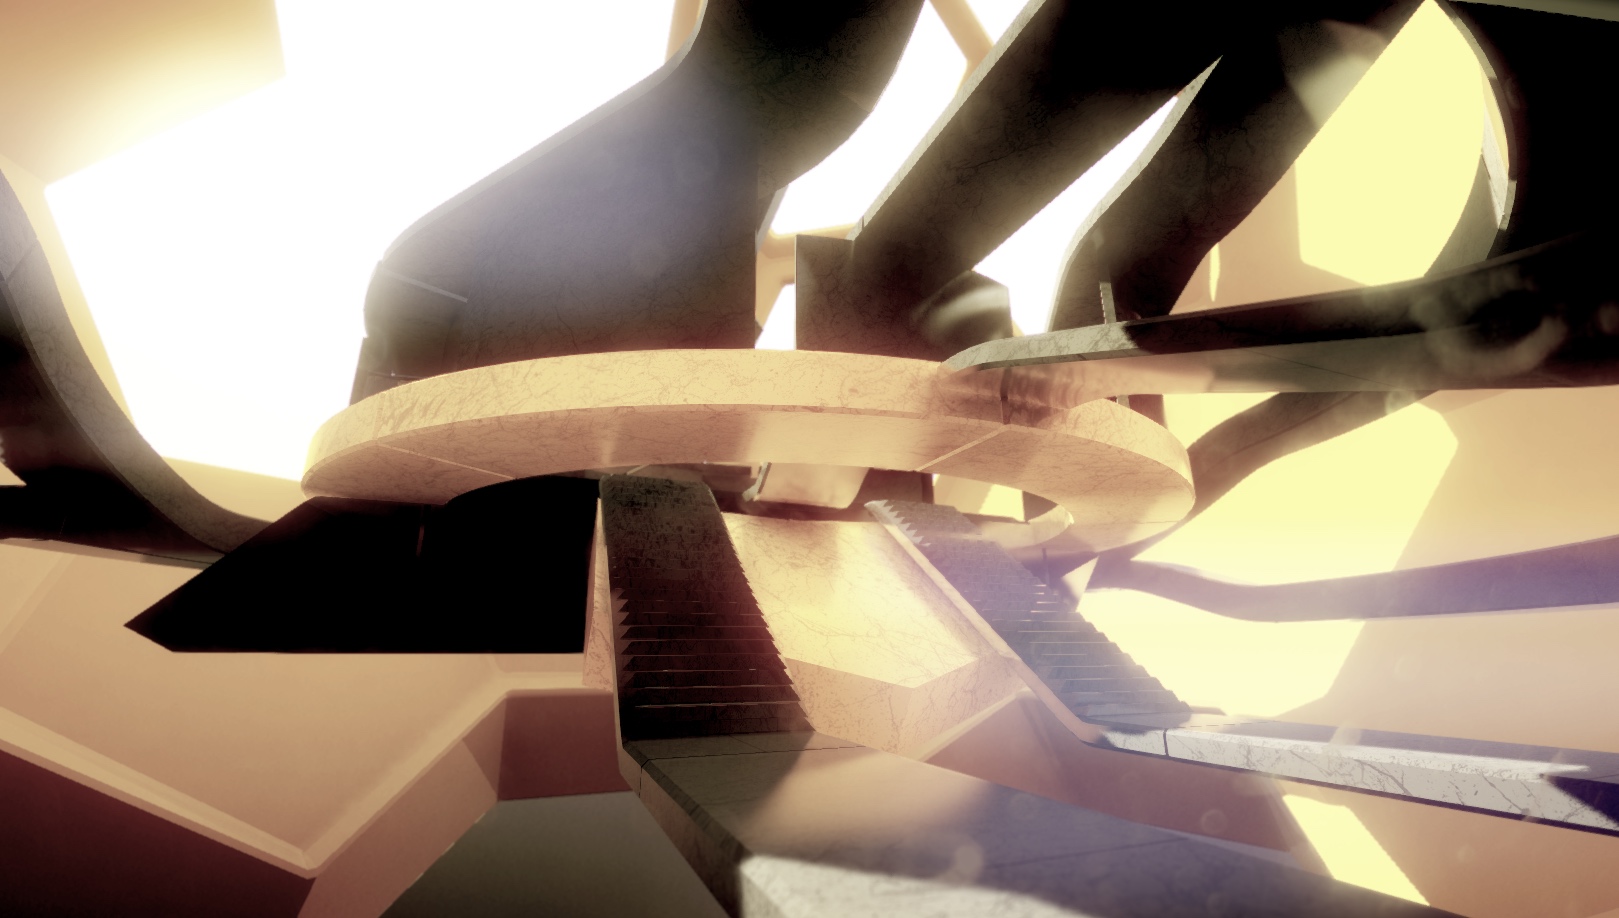
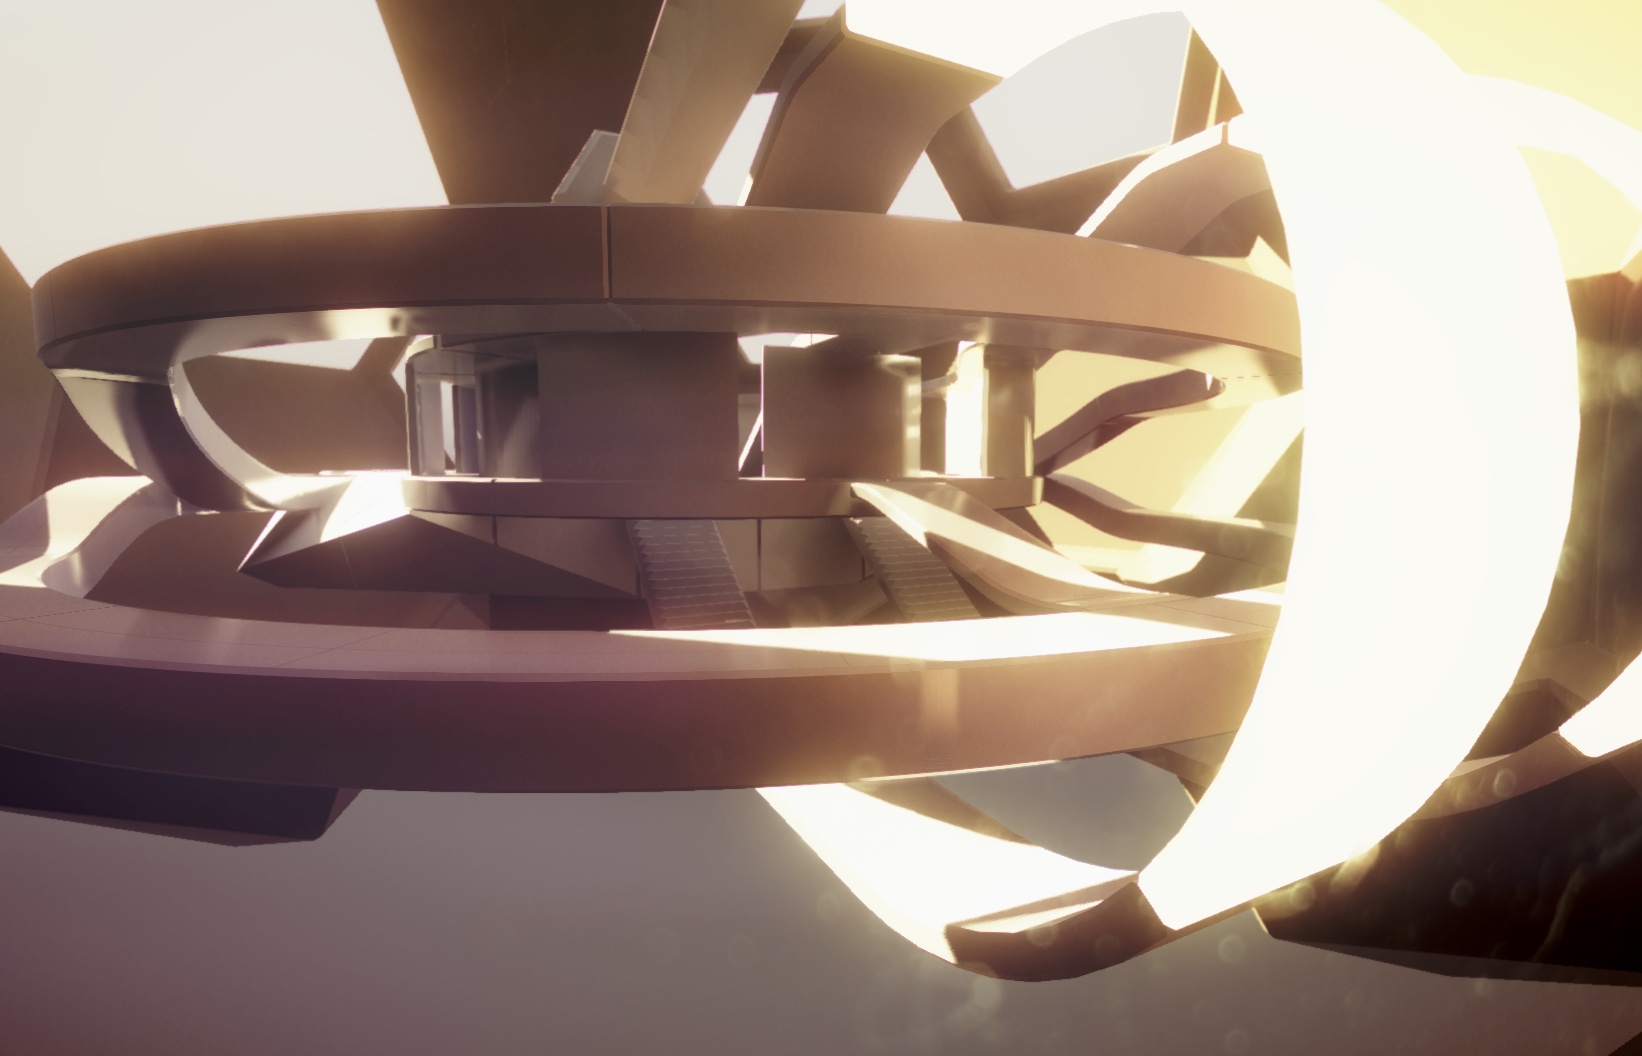

Getting fed up battling low resolution shadows even at max settings. So only solution is to break the largest pieces up into smaller ones even more.
I'm sure braking this up into even more models and polygons could only yield better results.. or more spectacular failures, place your bets...
Realtime GI below.. looks better, fancy that:
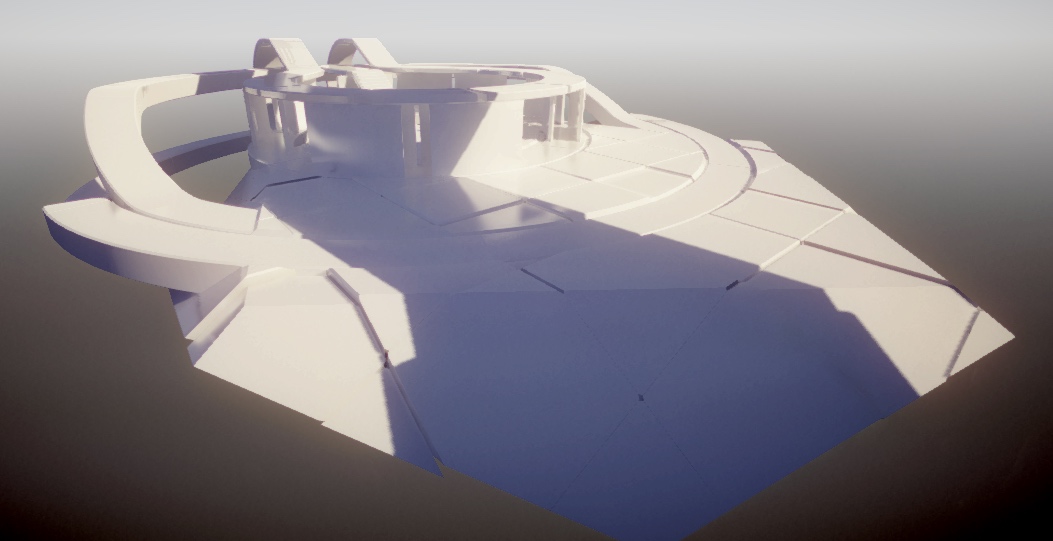
Finally, it is done, I have a company name, and domain name. *dances* managed to get .co.uk and the new .uk
The domains and hosting are provided thru an excellent company named TSOHost, I have been really pleasantly surprised at how helpful they have been, there are a lot of cowboys selling or reselling hosting so it is nice to have the peace of mind of a solid company behind my hosting. And it is 'cloud' hosted so not the typical solitary server shared by 200 customers, but on numerous servers so it should handle sudden large spikes in traffic, always be prepared for success
;-)
and SSH / SFTP / RSYNC support for the nerd in me is a huge boon. Anyway enough gushing, I don't even have an affiliate link.. ok now I have one:-P
here:Link: my.tsohost.com --- aff
Or use the Voucher code: TENOFFTSO
Either way you can get 10% off
The Full Article about the logo design and naming "process" here:
Link: shadowood.uk --- Y2011-Mo11-RoundTree
This has taken a disproportionate amount of time for how important it really is. But it mattered to me personally to get right.
No real website yet just a placeholder, will keep it simple ( for me ) and start on that when I have more of my actual game finished!
The original round logo on fire used on my personal Portfolio / Gallery was started in Jan 2006
And the reworking was done November 2011 which produced 'Roundtree'
Though it bugged my how it sounded like a famous brand Rowntree so I restyled it to the Lonetree name around July 2013 which served me internally for a year and shows up in the work in progress for my game.
To then start redoing the name again in June 2014 as I was finally buying the domain and hosting and just didn't 'feel it'
Some of the work leading up to the final design, It's not that I'm so smart, It's just that I stay with problems longer -- Einstein
Took a 'break' from working on my game to make a hover car.
Took me forever to add a basic self righting / stabilisation mechanism due to the confusing nature of rotations, gimbal lock and quaternions
Uses a configurable grid of hover forces under the car also so it isn't disturbed by small objects
Can set stabilisation force for when on ground separate from when in air
If you set the stabilisation force high for on ground it will stay level even when climbing a slope
And just played with it using the wireless xbox controller, tis fun!
Used Tattiebogle on Mac to use the controller
Link: tattiebogle.net --- Xbox360Controller